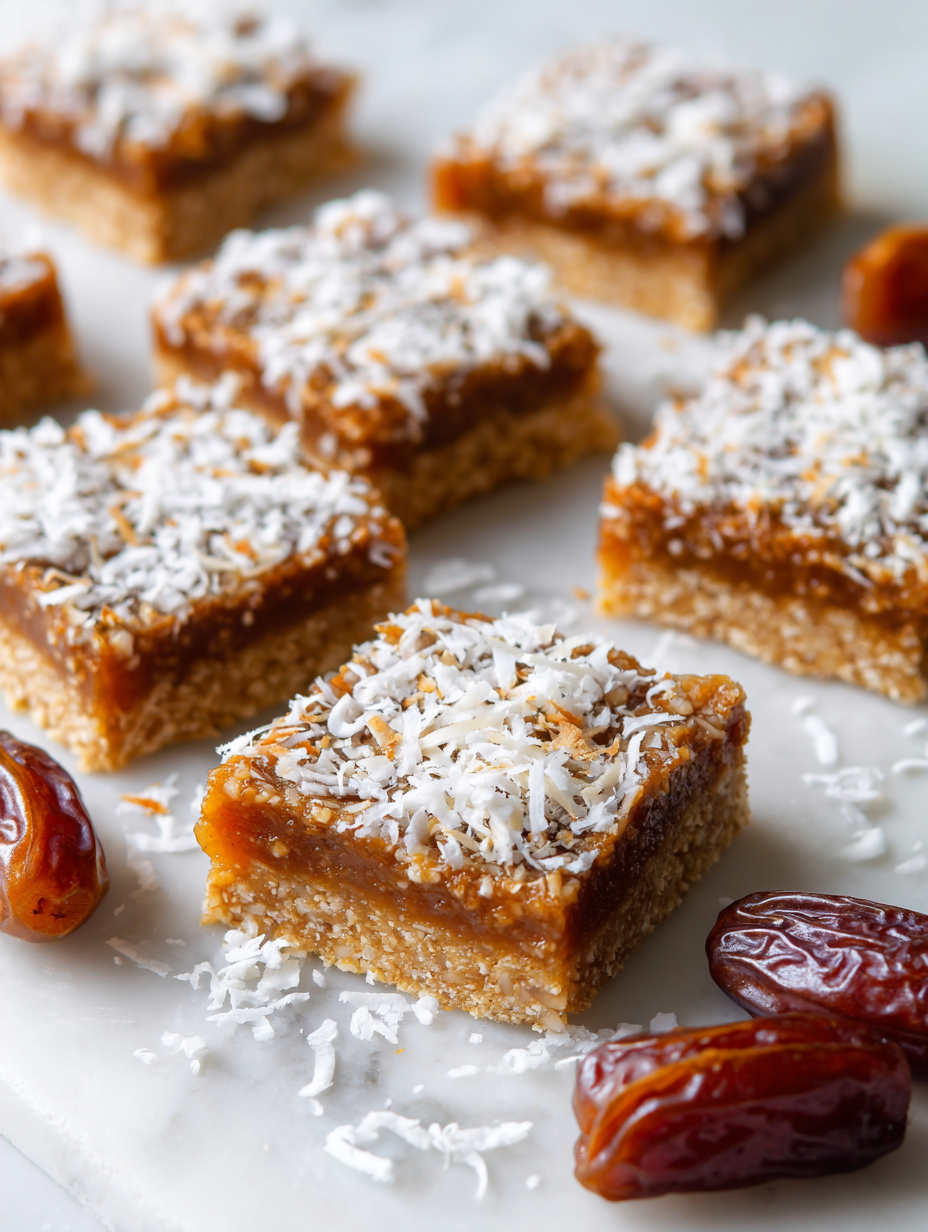
These no bake coconut date bars are my go-to when I need something sweet but don’t want to fuss in the kitchen. They come together in minutes, which is a blessing on busy mornings or when unexpected guests show up bearing empty hands. Honestly, I love how they pack a punch of flavor with just a handful of everyday ingredients.
What really keeps me coming back to this recipe is its nostalgic feel — simple, honest, and deeply satisfying. The chewy dates, toasted coconut, and a hint of vanilla create a flavor combo that’s both familiar and fresh, without any of the fuss or mess. Plus, they’re so versatile, I often tweak the ingredients based on what’s in my pantry or mood.
If you’re craving something sweet but also want to keep it straightforward and nourishing, these bars are your answer. They’re perfect for grabbing on the go or slicing into tiny squares for a quick treat. And let’s be honest — I’ve never met anyone who didn’t reach for at least one more piece.
Focusing on how these bars serve as a nostalgic, no-fuss treat that’s perfect for busy mornings or unexpected guests, highlighting their simplicity and flavor depth despite minimal effort.
The story behind this recipe
- I first stumbled upon this recipe during a chaotic weekend when I needed something quick that felt special. The idea of no-bake, simple ingredients came as a relief, and I was surprised how well the flavors melded without heat. It became a go-to for those mornings when I was running out the door but still wanted a little treat.
- This recipe grew out of my obsession with pantry staples — dates, coconut, and a splash of vanilla. I wanted something that reminded me of childhood snacks but with a modern, healthy twist. Over time, I tweaked the ratios, aiming for that perfect chewy, slightly caramelized edge that I now crave almost weekly.
- heading: The story behind this recipe
Key Ingredients and Tips
- Dates: I love how their natural sweetness and chewy texture anchor these bars. If you want a milder flavor, try medjool dates—they’re plump and caramel-like.
- Coconut: Toasted shredded coconut adds a smoky crunch that makes these bars addictive. Skip to plain if you’re avoiding added fats, but it won’t have the same nutty aroma.
- Nut Butter: I prefer almond or cashew for a more nuanced flavor, but peanut butter works just fine. Warm it slightly so it’s easy to blend into the mixture.
- Vanilla Extract: A splash brightens everything—think of it as the secret whisper of flavor. You can swap with almond extract for a different aroma, but use less.
- Salt: Just a pinch enhances sweetness and balances the richness. Don’t skip it, even if you’re used to sweet treats, or it will feel flat.
- Optional Add-ins: Chopped nuts or dark chocolate chips can be stirred in for extra texture. Keep it small so they don’t overwhelm the sticky base.
- Binding Agents: I rely on the natural oils in the dates and nut butter, but if it feels too dry, a tiny drizzle of honey or maple syrup can help everything stick together.
Spotlight on key ingredients
Dates:
- Their natural caramel sweetness and chewy texture make these bars addictive. When blended, they turn into a sticky, fragrant paste that holds everything together. Look for Medjool dates—they’re plump and rich in flavor.
- Coconut: Toasted shredded coconut adds a smoky, nutty aroma and a satisfying crunch. It becomes golden and fragrant in the skillet, and its texture contrasts beautifully with the chewy dates. Skip to plain if avoiding added fats, but it won’t have the same depth.
Coconut:
- Toasted coconut releases a warm, smoky aroma and develops a crisp texture that makes each bite lively. Watch it carefully as it can burn quickly—just a few minutes over low heat until lightly golden. The scent of toasted coconut is a giveaway it’s ready.
- Dates: They soften and become sticky when blended, transforming into a luscious paste. During processing, they smell sweet and caramel-like, and their texture should be smooth enough to coat everything evenly. If they’re too dry, a splash of hot water helps.
Notes for ingredient swaps
- Dates: I prefer Medjool dates for their plump, caramel-like sweetness. For a less sticky alternative, dried figs work well but have a different flavor profile.
- Coconut: Toasted shredded coconut adds aroma and crunch. Skip if you need a nut-free version, but expect less smoky flavor.
- Nut Butter: Almond or cashew butter gives a subtle nutty flavor, while peanut butter offers a stronger, more traditional taste. Use natural, unsweetened varieties for best texture.
- Vanilla Extract: A splash of vanilla brightens the mixture. For a different aroma, try almond extract—use half the amount to avoid overpowering.
- Salt: Just a pinch enhances sweetness and depth. Sea salt flakes give a nice burst, but regular table salt works in a pinch.
- Optional Add-ins: Chopped nuts, chocolate chips, or dried fruits can be stirred in. Use smaller pieces so they don’t disrupt the chewy texture.
- Binding Agents: If the mixture feels too dry, a drizzle of honey or maple syrup can help everything stick together better.
Equipment & Tools
- Food processor: To blend dates into a sticky paste
- Mixing bowl: To combine ingredients before pressing
- Small square pan: To shape and chill the bars
- Spatula: To press mixture evenly and transfer bars
- Parchment paper: For easy removal and slicing
- Dry skillet: To toast coconut and nuts for added flavor
Step-by-step guide to no bake coconut date bars
- Gather your equipment: a food processor for blending, a mixing bowl for pressing, and a small square pan (about 20x20cm or 8×8 inches).
- Pulse the pitted dates in the food processor until they form a sticky, caramel-like paste, about 1-2 minutes. Scrape down sides as needed.
- In a mixing bowl, combine the shredded coconut, chopped nuts (if using), and a pinch of salt. Toast coconut briefly in a dry skillet over low heat (about 3 minutes) until fragrant and lightly golden, then let cool.
- Add the coconut and optional ingredients to the date paste. Mix well until everything is evenly coated and sticky.
- Transfer the mixture to your prepared pan. Using a spatula or your fingers, press firmly and evenly into the pan, ensuring no air pockets. Chill in the fridge for at least 30 minutes; this helps everything set.
- Once firm, lift the mixture out of the pan using the edges of parchment paper. Slice into bars or squares, about 2.5cm (1 inch) thick.
- For a glossy finish, you can lightly brush the tops with melted coconut oil and sprinkle with extra toasted coconut before serving.
Chill the pressed mixture in the fridge for at least 30 minutes until firm. Slice into bars with a sharp knife. For best texture, store in an airtight container in the fridge for up to a week, or freeze for longer storage.
How to Know It’s Done
- Dates are well blended and sticky, forming a cohesive paste.
- Coconut mixture is evenly pressed and compacted in the pan, no loose edges.
- Bars are firm enough to hold their shape without crumbling when sliced.
No Bake Coconut Date Bars
Ingredients
Equipment
Method
- Place the pitted dates in a food processor and blend until they break down into a sticky, caramel-colored paste, about 1-2 minutes. Scrape down the sides as needed.
- In a dry skillet over low heat, toast the shredded coconut until it turns golden and fragrant, about 3 minutes. Stir frequently to prevent burning. Let it cool slightly.
- Transfer the toasted coconut to a mixing bowl and add the nut butter, vanilla extract, and salt. Mix thoroughly until the mixture is smooth and well combined.
- Add the date paste to the coconut mixture and stir until everything is evenly coated and sticky. If using optional add-ins, gently fold them in now.
- Line your small square pan with parchment paper, leaving some overhang for easy removal. Transfer the mixture into the pan and press down firmly with a spatula or your hands to create an even, compact layer.
- Place the pan in the fridge and chill for at least 30 minutes, allowing the mixture to set and become firm enough to slice.
- Once chilled, lift the mixture out of the pan using the parchment overhang and transfer to a cutting board. Slice into 12 even squares or bars.
- If desired, melt a little extra coconut oil and brush it lightly over the tops of the bars, then sprinkle with additional toasted coconut for a glossy finish.
- Serve immediately or store in an airtight container in the fridge for up to a week. These bars are chewy, with a caramel-like flavor and a satisfying crunch from the toasted coconut.
Pro tips for perfect no bake bars
- Bolded mini-head: Use a sticky date paste → Ensure dates are well blended for a cohesive, chewy texture.
- Bolded mini-head: Toast coconut until fragrant → Watch closely to prevent burning and develop a smoky aroma.
- Bolded mini-head: Press mixture firmly into pan → Use the back of a spatula or your hands for an even, compact layer.
- Bolded mini-head: Chill before slicing → Rest in the fridge for at least 30 minutes to help bars hold shape.
- Bolded mini-head: Adjust sweetness with salt → A pinch of salt enhances the caramel notes and balances flavors.
- Bolded mini-head: Add optional mix-ins last → Fold in nuts or chocolate chips gently for even distribution without disrupting stickiness.
Common mistakes and how to fix them
- FORGOT to pack mixture tightly → Press firmly to prevent crumbling.
- DUMPED mixture into pan too loosely → Use a spatula to evenly press down.
- OVER-TORCHED coconut → Toast until fragrant and lightly golden, not dark and smoky.
- FAILED to chill before slicing → Rest in fridge for at least 30 minutes for clean cuts.
Quick fixes and pantry swaps
- When mixture feels too dry → Splash in a tiny bit of hot water and blend again.
- If bars crumble when sliced → Chill longer, at least 30 minutes, before cutting.
- When coconut burns → Reduce heat to low and toast coconut more carefully, stirring constantly.
- If mixture sticks too much to hands → lightly dampen fingers to press evenly and prevent sticking.
- Splash a few drops of coconut oil if bars feel too dry or crumbly during pressing.
Prep, store, and reheat tips
- You can prepare the sticky date mixture a day in advance; keep it covered in the fridge to maintain its chewiness.
- Store the sliced bars in an airtight container in the fridge for up to a week, their flavor intensifies over time.
- For longer storage, freeze the bars wrapped tightly in plastic, maintaining their chewy texture for up to a month.
- Reheat chilled bars briefly in the microwave (10-15 seconds) until slightly softened and fragrant, perfect for a quick snack.
- Allow refrigerated or frozen bars to come to room temperature for a softer, more luscious bite before serving.
Top questions about no bake coconut date bars
1. Can I soften the dates beforehand?
Yes, soaking the dates makes blending easier and results in a smoother, more cohesive texture.
2. Can I skip the toasted coconut?
Absolutely. Toasted coconut enhances flavor and crunch, but you can skip to keep it simple and less smoky.
3. Can I use different nut butters?
Using natural peanut butter gives a richer flavor, but almond or cashew butters add a more subtle, nuanced taste.
4. How long should I chill the mixture?
Chilling for at least 30 minutes helps the bars firm up, making slicing much cleaner and easier.
5. Can I freeze the bars?
Yes, these bars can be frozen for up to a month. Wrap tightly to prevent freezer burn.
6. The mixture is too sticky, what to do?
If the mixture feels too sticky, dust your hands with a little coconut or water to press it evenly.
7. Should I add salt?
Adding a pinch of salt enhances the caramel flavor and balances the sweetness without overpowering.
8. Can I customize the flavor with extracts?
For a richer flavor, add a splash of vanilla or almond extract, but keep it minimal to avoid overpowering.
9. How do I get clean cuts?
Use a sharp knife to cut into clean slices; warming the knife slightly can prevent sticking.
10. How long do these bars last?
Store the bars in an airtight container in the fridge for up to a week for optimal freshness.
These bars are a simple reminder that sometimes, the best treats come from the most unpolished moments in the kitchen. They’re honest, straightforward, and a little nostalgic, perfect for whenever you need a quick sweet fix. I keep a batch in my fridge just in case, knowing they’ll be there to satisfy that craving without fuss or delay. Sometimes, that’s all the comfort I need.
In a world racing by, these no bake coconut date bars slow things down just enough to enjoy a moment of honest flavor and texture. They’re about the little wins — a chewy bite, a smoky coconut crunch, a hint of vanilla. And honestly, I think that’s what makes them worth sharing, even if only with yourself.