Sometimes, the simplest treats are the most satisfying, especially when they come together with just a handful of ingredients and a little patience. These no-bake almond butter bites are my go-to for those chaotic mornings when I need something quick, wholesome, and honestly, kind of meditative to make. There’s something oddly calming about rolling tiny bites and watching them firm up in the fridge.
I love how these bites turn a basic pantry staple into a little moment of joy. No oven, no fuss, just a sticky, nutty mixture that you shape into perfect little morsels. It’s a chance to slow down for a sec, focus on each handful, and enjoy the simple act of creating something nourishing with your own hands.
Plus, they’re endlessly adaptable—swap in different nut butters, sprinkle in a few chocolate chips, or toss in some dried fruit for variety. It’s a recipe that’s as spontaneous as your snack cravings, and honestly, I find that kind of relaxed, no-pressure approach makes the best treats.
Focusing on the unexpected joy of creating a satisfying, energy-boosting treat with minimal effort, perfect for busy mornings or last-minute cravings, while highlighting the meditative process of shaping each bite.
The Unexpected Calm of Shaping
- These bites remind me of childhood afternoons spent sneaking spoonfuls of peanut butter, only now with a sophisticated almond twist.
- There’s a quiet pride in shaping each bite; it’s a small act that makes me pause and feel grounded during busy days.
- I love how these treats come together in just minutes, yet somehow feel like a little reward I’ve earned for myself.
- Sometimes, I get a bit lost in the process—rolling and pressing—finding a moment of peaceful focus amid chaos.
- Even when I’m rushed, making these bites is a gentle reminder to slow down and enjoy simple, honest nourishment.
The story behind this recipe
Making these almond butter bites started as a way to channel my love for quick, no-fuss snacks that still feel special. I was tired of relying on store-bought energy bars that often tasted bland or overly processed. One afternoon, I accidentally left my almond butter out a bit too long, and the sticky, oozy texture sparked an idea—why not turn that into something bite-sized and easy? Since then, these little morsels have become my go-to for a moment of calm in a hectic day, a simple pleasure I can whip up in minutes.
Trivia and Origins
- These bites have roots in resourcefulness—using simple pantry ingredients to create something satisfying without heat.
- Inspired by traditional energy balls, but with a focus on minimal ingredients and no baking required.
- The concept likely evolved from the mid-20th century snack trends, emphasizing quick, wholesome bites for busy lifestyles.
- Almond butter as a base became popular in recent decades with the rise of plant-based, gluten-free treats.
Ingredient breakdown: key components
- Almond Butter: I prefer a creamy, slightly salty almond butter—it blends well and adds a rich, nutty aroma. Feel free to swap in peanut or cashew butter for different flavor notes.
- Honey or Maple Syrup: The gooey sweetness helps everything stick together and balances the nuttiness. Use a bit less if you want a less sweet bite, or more for extra gloss and chewiness.
- Rolled Oats: I like old-fashioned oats—they give a nice chew and texture. You can substitute with quick oats, but they’ll be a tad softer and less chewy.
- Chia Seeds: Adds a subtle crunch, plus a boost of omega-3s. Skip if you prefer a smoother texture or replace with hemp seeds for a milder flavor.
- Dark Chocolate Chips: I love the melty burst they give—use mini chips for even distribution. For a dairy-free version, check the label or swap in cacao nibs.
- Sea Salt: Just a pinch enhances the nutty sweetness and deepens the flavor. If you’re a salt lover, sprinkle a tiny bit more on top before chilling.
- Optional Add-ins: Dried cranberries, shredded coconut, or chopped nuts can make each batch unique. Toss in your favorites for a personalized touch.
Spotlight on key ingredients
Almond Butter:
- I prefer a creamy, slightly salty almond butter—it blends well and adds a rich, nutty aroma. Feel free to swap in peanut or cashew butter for different flavor notes.
- Honey or Maple Syrup: The gooey sweetness helps everything stick together and balances the nuttiness. Use a bit less if you want a less sweet bite, or more for extra gloss and chewiness.
- Dark Chocolate Chips: I love the melty burst they give—use mini chips for even distribution. For a dairy-free version, check the label or swap in cacao nibs.
Chia Seeds:
- Rolled Oats: I like old-fashioned oats—they give a nice chew and texture. You can substitute with quick oats, but they’ll be a tad softer and less chewy.
- Adds a subtle crunch, plus a boost of omega-3s. Skip if you prefer a smoother texture or replace with hemp seeds for a milder flavor.
Notes for ingredient swaps
- Dairy-Free: Swap honey for maple syrup. It keeps the bites vegan but might add a slightly different sweetness profile.
- Nut Butters: Use peanut or cashew butter instead of almond. Each brings a distinct flavor—peanut is richer, cashew milder.
- Sweeteners: Replace honey with agave syrup for a more neutral sweetness or coconut nectar for a caramel-like note.
- Add-ins: Dried fruits like cranberries or chopped dried apricots can replace chocolate chips for a chewy, fruity burst.
- Seeds: Chia seeds can be swapped with hemp seeds or omitted altogether—though you’ll lose some crunch and omega-3s.
- Oats: Use gluten-free oats if needed, or swap half with shredded coconut for a tropical twist and extra chewiness.
- Salt: Skip or reduce sea salt if you prefer a less salty bite, or sprinkle flaky sea salt on top before chilling for extra flavor contrast.
Equipment & Tools
- Mixing bowl: To combine all ingredients smoothly.
- Spoon or small cookie scoop: For portioning and shaping the bites evenly.
- Parchment-lined tray or plate: To hold the bites while they set in the fridge.
Step-by-step guide to no bake bites
- Gather all ingredients and equipment. You’ll need a mixing bowl, a spoon, and a baking sheet or plate lined with parchment.
- In the bowl, combine 1 cup of almond butter, 1/4 cup of honey or maple syrup, and 1 teaspoon of vanilla extract. Mix until smooth and slightly glossy, about 30 seconds.
- Add 1 1/2 cups of rolled oats, 2 tablespoons of chia seeds, and 1/4 teaspoon of sea salt. Stir well until all ingredients are evenly coated and sticky.
- Fold in 1/4 cup of dark chocolate chips or cacao nibs for melty bursts of flavor. Adjust amount based on your sweetness preference.
- Using a small cookie scoop or your hands, portion out about 1 tablespoon of the mixture and roll into compact balls. Place them on the prepared parchment-lined tray.
- If the mixture feels too sticky to roll, refrigerate the bowl for 10-15 minutes or lightly dampen your hands to prevent sticking.
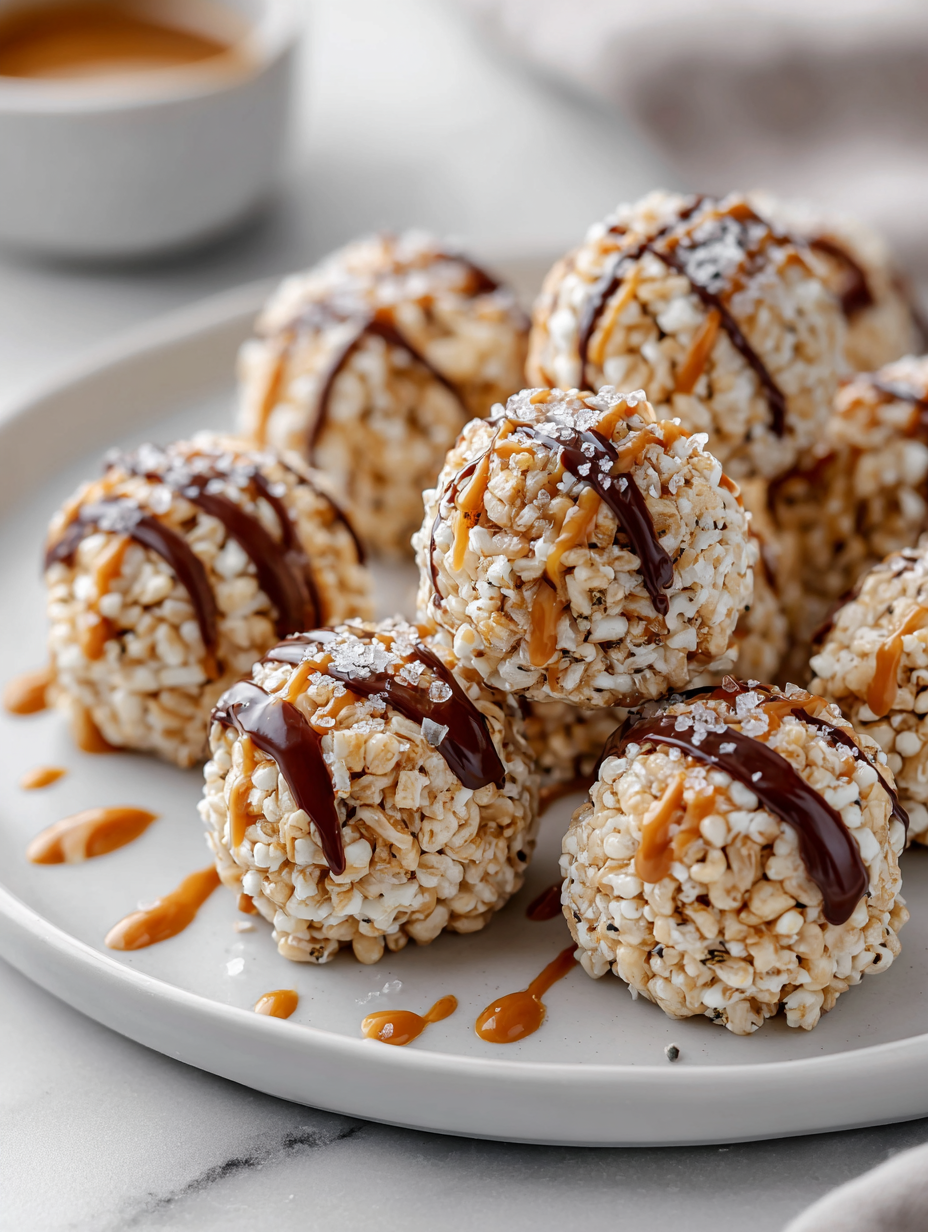
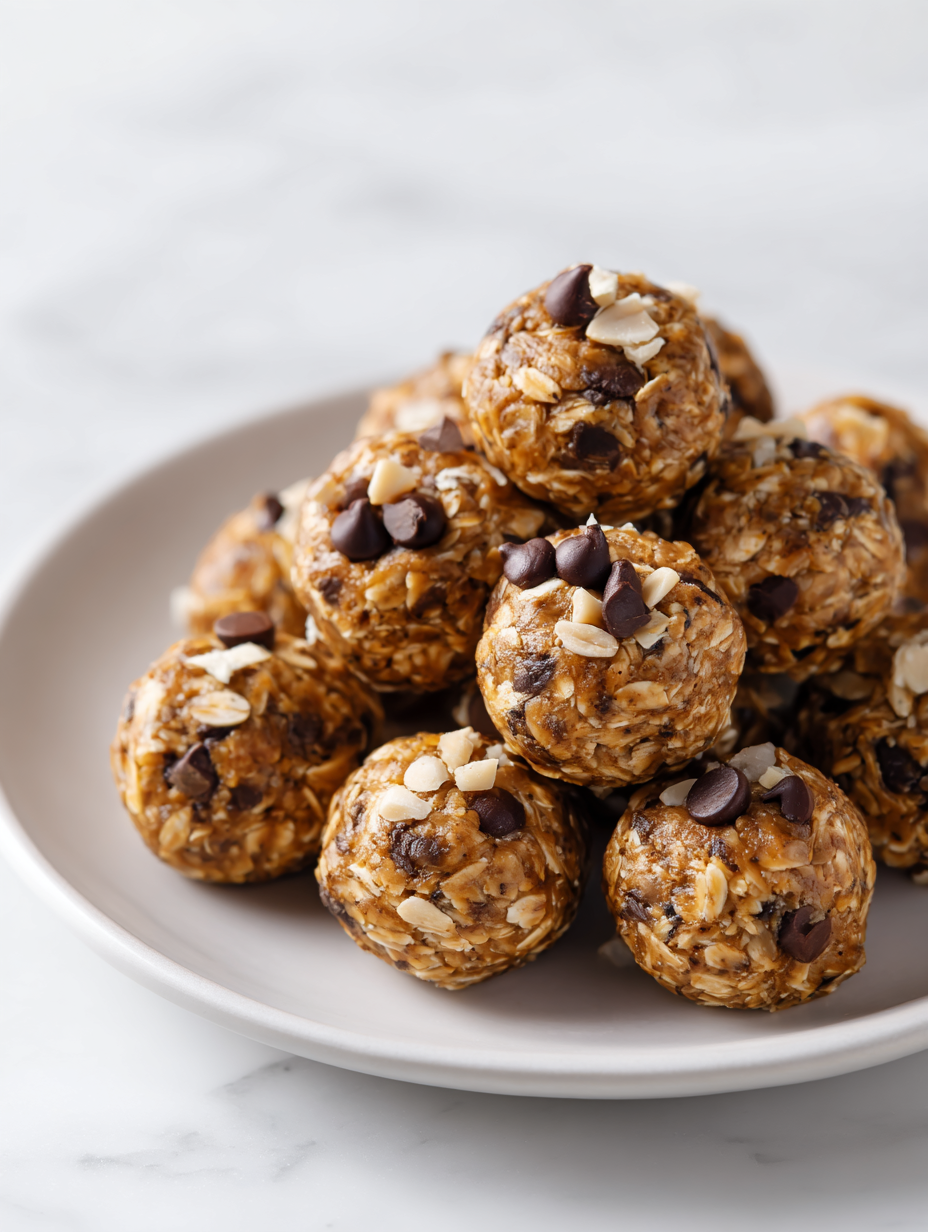
- Once all bites are shaped, press a few extra chocolate chips or a tiny pinch of sea salt on top for visual appeal and flavor enhancement.
- Refrigerate the bites for at least 30 minutes to help them firm up and set. They can be stored in an airtight container in the fridge for up to a week, or frozen for longer storage.
- Enjoy the bites straight from the fridge—chewy, nutty, with just a hint of sweet and salty. Perfect for a quick snack or a moment of calm.
Chill the bites in the fridge for at least 30 minutes before serving. Store in an airtight container, layered with parchment if stacking. Serve straight from the fridge for optimal chewy texture and melty chocolate bursts.
How to Know It’s Done
- Bites are firm but pliable; they hold shape when pressed.
- Chocolate chips should be slightly melty or set, not greasy.
- The mixture should be sticky enough to roll without crumbling.

No-Bake Almond Butter Bites
Ingredients
Equipment
Method
- Combine almond butter and honey in a mixing bowl, stirring until smooth and glossy, releasing a nutty aroma.
- Add rolled oats, chia seeds, and sea salt to the bowl, stirring well to evenly coat all ingredients with the sticky mixture.
- Fold in the dark chocolate chips, distributing them evenly throughout the mixture, and watch it become even more enticing with melty chocolate spots.
- Use a small cookie scoop or your hands to portion out about 1 tablespoon of the mixture, then gently roll into compact balls, pressing firmly to hold their shape.
- Place the shaped bites on a parchment-lined tray or plate, spacing them apart to prevent sticking.
- Refrigerate the tray for at least 30 minutes, allowing the bites to firm up and the flavors to meld beautifully.
- Once firm, enjoy these chewy, nutty bites straight from the fridge, perfect for a quick energy boost or a calming treat.
Tips for Perfect No Bake Bites
- Bolded Mini-Head: Use slightly chilled almond butter to prevent sticking, making rolling easier and smoother.
- Bolded Mini-Head: Lightly toast oats beforehand for a nuttier flavor and a subtle crunch in each bite.
- Bolded Mini-Head: Mix ingredients thoroughly until sticky and uniform—this ensures even texture and flavor distribution.
- Bolded Mini-Head: Chill the mixture for at least 15 minutes if too sticky to handle comfortably, but avoid over-chilling which can make it hard to shape.
- Bolded Mini-Head: When rolling, dampen your hands slightly to prevent sticking and achieve more uniform bites.
- Bolded Mini-Head: Add a pinch of sea salt on top before refrigerating to enhance the sweetness and create a flavor contrast.
- Bolded Mini-Head: For extra glossy bites, brush lightly with melted chocolate or coconut oil after shaping before chilling.
Common mistakes and how to fix them
- FORGOT to measure ingredients accurately → Use a scale or proper measuring tools.
- DUMPED in too much honey → Balance sweetness by adding more oats or nut butter.
- OVER-TORCHED the chocolate → Melt slowly over low heat or in short bursts in the microwave.
- MISSED chilling time → Ensure bites are fully set in fridge before handling to prevent crumbling.
Quick fixes and pantry swaps
- When mixture is too sticky → Splash with a tiny bit of water or oil to loosen.
- If bites are crumbly → Patch with a quick chill, then re-roll with damp hands.
- Splash melted chocolate on bites for a shiny, professional look.
- DUMPED in too much salt → Shield with a drizzle of honey or extra chocolate.
- When ingredients aren’t blending well → Rescue by warming almond butter slightly, then stir thoroughly.
Prep, store, and reheat tips
- You can prep the mixture up to 24 hours in advance; keep it covered in the fridge for a chilled, firm texture.
- Store the shaped bites in an airtight container in the fridge for up to one week—chilled, they stay chewy and fresh.
- For longer storage, freeze the bites for up to 3 months—wrap individually for easy grab-and-go treats.
- Refrigerate or thaw frozen bites in the fridge for 30 minutes; they’ll be chewier and more intensely flavored, with a rich nut aroma.
Top questions about almond bites
1. Can I use different nut butters?
Yes, you can substitute peanut butter for almond butter, but the flavor will be richer and more classic peanut. Cashew butter offers a milder, buttery taste. Just choose a creamy variety for best results.
2. Are these bites vegan-friendly?
Absolutely. If you want vegan options, swap honey for maple syrup or agave nectar. The texture stays sticky and sweet, but the flavor shifts slightly to more caramel-like notes.
3. Can I add dried fruit?
Yes, adding dried fruit like cranberries or chopped apricots gives a chewy, tangy burst. Just mix them in with the chocolate chips or sprinkle on top before chilling.
4. How long do these keep?
Store in an airtight container in the fridge for up to a week, or freeze for three months. Let frozen bites thaw for 10-15 minutes before eating to regain chewiness.
5. What if the mixture is too sticky or crumbly?
If the mixture feels too sticky, refrigerate for 10-15 minutes or dampen your hands slightly. If bites crumble, chill them longer or press firmly when shaping.
6. How do I shape the bites?
Use a small cookie scoop or your hands to roll the mixture into bites. Dampen hands slightly to prevent sticking and shape quickly for neat, uniform bites.
7. How long should I chill the bites?
Chill the shaped bites for at least 30 minutes. This helps them set and become chewy. Serve straight from the fridge for best texture.
8. Can I customize the ingredients?
You can swap rolled oats with shredded coconut for a tropical flavor. For gluten-free, ensure oats are certified gluten-free. Adjust sweetness with less honey if preferred.
9. What if I burn the chocolate?
Over-torched chocolate will taste burnt and bitter. Melt slowly over low heat or in short bursts in the microwave, stirring often.
10. How can I enhance the flavor?
Forgot to add sea salt? Sprinkle a tiny pinch on top before chilling to enhance the nutty flavor and add contrast.
These bites are a little act of kindness you can whip up anytime chaos needs a sweet pause. They remind me that sometimes, the simplest ingredients can turn into something unexpectedly comforting and satisfying.
Whenever I make these, it feels like a small victory—something easy, nourishing, and just a bit indulgent. They’re perfect for those moments when you need a quick, honest snack that hits the spot without fuss.