This recipe is born from those chaotic moments when I need a sweet fix but don’t want to turn on the oven. It’s about making something satisfying with pantry staples that’s quick and fuss-free, especially when time feels tight or I’m craving something chewy and nutty. Those little bars become a comforting pocket of sweetness, ready in minutes without any heat.
I love how simple ingredients come together in a way that feels almost like a small victory. No bake, no fuss—just a handful of nuts, honey, and oats pressed into shape. It’s the kind of treat that’s perfect for sneaking into lunchboxes or having on hand for unexpected guests. Honestly, they taste like a bit of chaos turned into something sweet and manageable.
This recipe is inspired by those chaotic moments when I need a quick, satisfying treat that doesn’t require turning on the oven. It’s about harnessing the simplicity of pantry staples and the joy of no-fuss cooking, especially during busy days or sudden sweet cravings. I love how these bars become a little pocket of comfort, chewy and nutty, ready in minutes.
The story behind this recipe
This recipe came about during a particularly hectic week when I realized I was craving something sweet but didn’t want to mess with baking. It’s a memory of late nights in the kitchen, experimenting with ingredients I had on hand—thinking, why not press them into shape and see? The first batch was a happy accident, sticky and nutty, and I kept tweaking until I got that perfect balance of crunch and chew. Now, it’s my go-to when I need a quick fix that feels a little indulgent but is honestly just pantry magic.
Key Ingredients and Tips
- Honey: I love the way honey adds a sticky, golden sheen and a natural sweetness that’s not overpowering. If you want less stickiness, try maple syrup instead, but watch out — it’s more fluid and lighter in flavor.
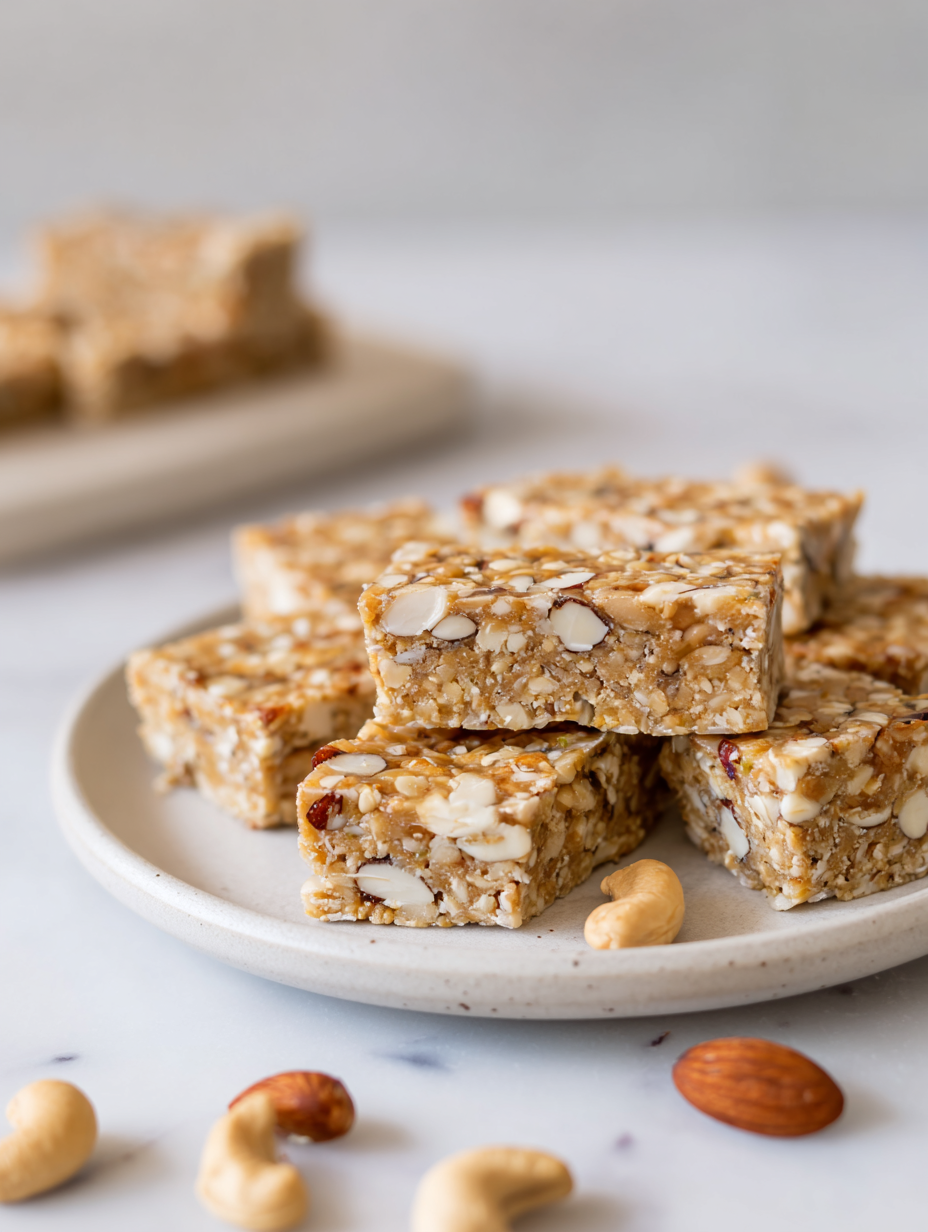
- Mixed nuts: I prefer a chunky mix of almonds and walnuts for a deep, toasted flavor and crunch. Feel free to swap in cashews or pecans, but keep the size consistent so they hold together well.
- Oats: Old-fashioned rolled oats give these bars a hearty chew. If you only have quick oats, chop them slightly to match the texture; they’ll blend smoothly without losing bite.
- Dried fruit: I add chopped dried apricots or cranberries for a chewy burst of tang. Dried cherries work beautifully, but skip overly sweetened ones if you want a fresher, less cloying taste.
- Coconut flakes: Toasted coconut adds a smoky, nutty aroma and a subtle chew. Unsweetened flakes are best — if you use sweetened, cut back on honey slightly to balance the sweetness.
- Salt: Just a pinch enhances all the flavors. If you’re salt-sensitive, reduce it a bit, but don’t skip it — it’s the secret to making everything pop.
- Vanilla extract: A splash brightens the overall flavor and ties everything together. If you’re out, a tiny bit of almond extract can be a nice substitute, but keep it subtle.
Spotlight on key ingredients
Nuts:
- Honey: I love the way honey adds a sticky, golden sheen and a natural sweetness that’s not overpowering. If you want less stickiness, try maple syrup instead, but watch out — it’s more fluid and lighter in flavor.
- Mixed nuts: I prefer a chunky mix of almonds and walnuts for a deep, toasted flavor and crunch. Feel free to swap in cashews or pecans, but keep the size consistent so they hold together well.
- Oats: Old-fashioned rolled oats give these bars a hearty chew. If you only have quick oats, chop them slightly to match the texture; they’ll blend smoothly without losing bite.
Honey:
- It’s sticky and fragrant, kind of oozes when heated, and clings to everything. It’s the backbone of these bars’ chewy texture.
- Nuts: They toast up with a smoky aroma, become crunchy and slightly oily during mixing, and add that satisfying bite. Keep the chunks consistent for even crunch.
Notes for ingredient swaps
- Sweetener: Maple syrup or agave nectar can replace honey for a vegan option, but expect a slightly different sweetness profile.
- Nuts: Use roasted, salted peanuts or hazelnuts if you prefer a different flavor; keep the chop size consistent for texture.
- Oats: Quick oats can be substituted, but chop them slightly to match the texture and avoid a mushy outcome.
- Dried fruit: Apricots and cranberries are great, but dried cherries or pineapple pieces add a tangy or tropical twist.
- Coconut flakes: Toasted shredded coconut adds smoky aroma—unsweetened is best, but sweetened works if you want extra sweetness.
- Butter: Coconut oil or a neutral oil can be used instead, but they may slightly alter the richness and chewiness.
- Flavoring: Almond extract can replace vanilla for a nutty note, just use half as much to avoid overpowering.
Equipment & Tools
- 20x20cm (8×8 inch) baking pan: Holds the mixture for pressing and setting.
- Parchment paper: Prevents sticking and makes removal easier.
- Heatproof spatula: Stirs and presses the mixture smoothly.
- Sharp knife: Cuts the set bars into squares.
Step-by-step guide to no bake nut bars
- Gather your equipment: a 20x20cm (8×8 inch) baking pan, parchment paper, a heatproof spatula, and a sharp knife for cutting.
- Line the pan with parchment paper, leaving a slight overhang for easy removal.
- In a medium microwave-safe bowl, combine 1 cup honey and 1/2 cup unsalted butter. Microwave on high for 30 seconds, then stir. Microwave again in 15-second bursts until melted and fragrant, about 1 minute total. Watch for a golden, bubbly mixture.
- Add 2 cups rolled oats and 1 1/2 cups chopped mixed nuts to the honey-butter mixture. Mix well with a spatula until everything is evenly coated. The mixture should be sticky and fragrant with toasted nut aroma.
- Stir in 1/2 cup dried fruit (chopped apricots or cranberries), 1/4 cup toasted coconut flakes, a pinch of salt, and 1 teaspoon vanilla extract. Mix thoroughly. The mixture will become dense and chewy.
- Pour the mixture into your prepared pan. Press firmly with the back of a spatula or a piece of parchment to compact evenly. The surface should be smooth and packed tight, with no loose bits.
- Place the pan in the fridge and let it set for at least 2 hours, or overnight for best results. The bars should be firm and hold their shape when pressed.
- Once set, lift the whole block out using the parchment overhang. Transfer to a cutting board and slice into bars or squares. The texture should be chewy with a slight crunch from the nuts and coconut.
- Serve immediately or store in an airtight container in the fridge for up to a week. The bars will firm up a bit more after chilling.
Refrigerate until firm, then lift out using parchment and cut into bars. Serve directly or store in an airtight container in the fridge for up to a week.
How to Know It’s Done
- Mixture is sticky but holds together when pressed.
- Bars are firm and set after refrigeration.
- Nuts and oats are toasted and fragrant, not raw.
No-Bake Nut Bars
Ingredients
Equipment
Method
- Line your baking pan with parchment paper, leaving some overhang for easy removal.
- In a microwave-safe bowl, combine honey and butter, then microwave in 30-second bursts, stirring in between, until melted and fragrant with a golden hue, about 1 minute total.
- Add the rolled oats and chopped nuts to the warm honey mixture, stirring with a spatula until everything is evenly coated and sticky.
- Stir in the chopped dried fruit, toasted coconut flakes, a pinch of salt, and vanilla extract, mixing thoroughly until the mixture is dense and fragrant.
- Pour the mixture into the prepared pan and press firmly with the back of a spatula or parchment paper to create an even, compact layer.
- Place the pan in the fridge and chill for at least 2 hours, or until the mixture is firm and holds its shape when pressed.
- Once set, lift out the block by the parchment overhang and transfer to a cutting board.
- Use a sharp knife to cut the mixture into bars or squares, revealing the chewy, nutty interior with toasted bits and dried fruit.
- Serve immediately or store in an airtight container in the fridge for up to a week for a chewy, satisfying snack.
Pro tips for perfect nut bars
- Bolded mini-head: Use a silicone spatula → It helps scrape every bit of sticky mixture from the bowl, ensuring nothing is wasted.
- Bolded mini-head: Chill before cutting → Cooling fully in the fridge makes the bars firm and clean-cutting easier, with no crumbling.
- Bolded mini-head: Press with parchment → Using a piece of parchment paper prevents sticking and helps pack the mixture tightly into the pan.
- Bolded mini-head: Toast nuts beforehand → Toasted nuts release a smoky aroma and boost flavor, adding depth to each bite.
- Bolded mini-head: Avoid over-heating honey → Microwave in bursts and watch for bubbling and fragrant aroma, to keep the mixture manageable.
- Bolded mini-head: Mix thoroughly → Stir until ingredients are evenly coated; uneven mixing can cause crumbly or uneven bars.
- Bolded mini-head: Adjust sweetness → If the bars feel too sticky, sprinkle a few more oats or nuts to balance texture and flavor.
Common mistakes and how to fix them
- FORGOT to pack ingredients tightly → press firmly to avoid crumbly bars.
- DUMPED too much honey → add more oats to balance sweetness and stickiness.
- OVER-TORCHED mixture → stir immediately and reduce heat if mixture darkens quickly.
- MISSED refrigeration time → chill at least 2 hours for proper setting and firm texture.
Quick Fixes and Pantry Hacks
- When mixture is too sticky → splash with a bit of warm water and stir well.
- If bars crumble when sliced → refrigerate longer or chill in freezer for 10 minutes first.
- DUMPED too much honey → add more oats or nuts to regain balance and texture.
- Over-torched mixture → remove from heat immediately and stir in a splash of cold water to stop cooking.
- When bars feel soft or greasy → refrigerate for an extra hour; the coolness firms them up quickly.
Prep, store, and reheat tips
- Prepare the mixture and press into the pan the night before; it firms up better after chilling overnight, making slicing easier and cleaner.
- Store the bars in an airtight container in the fridge for up to a week; the cool temp keeps them chewy and prevents spoilage.
- For longer storage, freeze the bars wrapped tightly in plastic wrap and foil; they’ll keep for up to a month, with a firmer bite once thawed.
- Refrigerated bars may become more firm; let them sit at room temperature for 10 minutes before serving to regain some chewiness.
- If bars feel too sticky straight from the fridge, a quick 10-second microwave zap can warm them slightly, softening the texture for easier bites.
Top questions about no bake nut bars
1. Can I use a different sweetener?
Yes, you can swap honey for maple syrup or agave nectar, but it might affect the chewiness slightly.
2. Can I change the nuts?
Absolutely, almonds, cashews, or pecans work well. Just chop them uniformly for even texture.
3. Can I substitute rolled oats?
Quick oats can be used, but chop them slightly to match the texture of rolled oats.
4. Can I use different dried fruits?
Dried cranberries or apricots add a tangy punch. Use dried cherries or pineapple for tropical flavor.
5. Can I skip the coconut?
Toasted coconut flakes add aroma and crunch. Use unsweetened for a more neutral flavor.
6. Can I make these vegan?
Yes, coconut oil or neutral oils can replace butter, but expect a slightly different texture and richness.
7. What if the mixture is too sticky?
If the mixture is too sticky to press, refrigerate it for 15 minutes before shaping.
8. How do I know when they’re ready to cut?
Chill the bars in the fridge for at least 2 hours. They should be firm and hold shape when pressed.
9. How should I store the bars?
Store bars in an airtight container in the fridge for up to a week or freeze for longer storage.
10. What if the bars are too soft?
If bars feel greasy, refrigerate for an extra hour to firm up or gently reheat for softer bites.
These no bake nut bars aren’t just a quick fix; they’re a little reminder that simple ingredients can turn into something satisfying. When I need a treat on the fly, grabbing a square feels like reclaiming a moment of calm amid chaos.
Plus, they’re versatile enough to adapt and always taste like a small victory—chewy, nutty, just sweet enough. No matter the season, they’re a dependable pocket of comfort I keep coming back to.

Hello, I’m Oliver James, the person behind Melting Into Flavors. Cooking is my greatest passion, and it’s been the driving force in my life for as long as I can remember.
It’s not just about food for me; it’s about creating experiences, connecting with others, and sharing the love I have for what’s on the plate. Through this blog and my café, I’m able to share my journey with all of you and hopefully inspire some of your own culinary adventures along the way.


