This recipe is a game of childhood nostalgia, but with a grown-up twist. It’s about capturing that carefree joy of sneaking bites of cookie dough, but making it safe and wholesome enough to enjoy guilt-free. No bake, no fuss, just simple ingredients that come together in a way that feels like a little guilty pleasure you can indulge in any time.
What I love most is how these bites remind me of weekend afternoons spent in the kitchen, sneaking tastes of raw dough and feeling that rush of sweetness. It’s a small act of rebellion, in a way—reclaiming that childhood thrill with ingredients you trust. Plus, they’re perfect for when you need a quick, satisfying treat that doesn’t require turning on the oven.
This recipe focuses on creating a nostalgic treat that captures the carefree joy of childhood, but with a conscious twist—using wholesome ingredients and no bake magic to satisfy sweet cravings without the guilt.
Childhood Joy in Every Bite
- Making these bites feels like a small act of rebellion, sneaking raw dough on purpose this time.
- I love how these bites bring back chaos-filled kitchen afternoons with sticky fingers and laughter.
- There’s a quiet pride in knowing I can whip up something sweet without turning on the oven.
- These bites remind me of lazy weekends, where indulgence is just a quick mix away.
- They’re a little reminder that simple ingredients can create the most comforting moments.
The story behind this recipe
- This recipe was born out of a late-night craving for something sweet but quick and honest. I remember the first time I made these bites—messy fingers, a kitchen filled with the warm smell of vanilla and chocolate, and that undeniable rush of nostalgia. It’s funny how a handful of simple ingredients can transport you right back to childhood, even in your thirties.
- One afternoon, I was digging through my pantry for a treat and found myself craving that raw, doughy bite I loved as a kid—only this time, I wanted it safer and a little more refined. So I threw together what I had, tweaked a few things, and suddenly, I had these little pockets of comfort that I couldn’t stop eating. Now, they’re my go-to when I need a quick fix, and I love that they’re as easy to make as they are to devour.
- heading
- story_type
Trivia and Historical Snippets
- These bites mimic childhood raw cookie dough but use heat-treated flour to make them safely edible.
- The trend of edible cookie dough gained popularity in the early 2010s, blending nostalgia with food safety awareness.
- Using nut butter and oats in these bites echoes traditional homemade cookie recipes, but in a no-bake, portable form.
- This recipe taps into the broader movement toward wholesome, minimally processed treats that satisfy sweet cravings without guilt.
Key Ingredients Breakdown
- All-purpose flour: I heat-treat the flour to kill any raw bacteria, making it safe to eat raw. You can skip this step if you buy pre-treated flour, but I find it reassuring to do it myself, especially for kids’ bites.
- Brown sugar: It adds a deep, caramel-like sweetness that’s more complex than white sugar. If you want a less sweet version, cut back slightly—just enough to still get that chewy, rich flavor.
- Nut butter: Creamy peanut butter is my go-to for that savory, nutty punch, but almond or sunflower butter works just as well. Just watch out for oil separation—stir it well before mixing.
- Vanilla extract: It brightens everything with a warm, aromatic glow that makes the bites feel special. If you’re out, a splash of bourbon or almond extract could add a unique twist, but keep it subtle.
- Chocolate chips: I prefer semi-sweet for balance, but milk or dark chocolate can turn these bites into a totally different experience. Use good-quality chips for that satisfying melt.
- Oats: Old-fashioned rolled oats give a hearty texture and chew. If you’re in a rush, quick oats work, but they tend to be softer and less chewy. Toast them lightly for extra flavor if you have the time.
- Coconut oil: Just a touch helps bind everything and adds a subtle richness. If you’re oil-free, a splash of milk or nut milk can work, but the texture might be a tad softer and more delicate.
Spotlight on key ingredients
Chocolate Chips:
- Heat-treated flour: I toast the flour to eliminate raw bacteria, giving it a nutty aroma and a slightly chewy texture. You can skip if using pre-treated flour, but I find it reassuring.
- I love semi-sweet for balance; they melt just enough to create gooey pockets, and their rich, cocoa scent intensifies when warm. Use good-quality for best melt and flavor.
Oats:
- Nut Butter: Creamy peanut butter is my favorite—smooth, savory, and slightly oily, it makes the bites chewy and rich. Almond or sunflower works, but stir well to avoid separation.
- Old-fashioned rolled oats provide a hearty chew and slightly nutty flavor. Toast lightly for extra aroma, or swap with quick oats if you prefer a softer bite.
Notes for ingredient swaps
- Dairy-Free: Swap butter for coconut oil or vegan butter. Expect a slightly different richness and a hint of coconut aroma.
- Sweetener: Use maple syrup or honey instead of brown sugar. This will add moisture and a more caramelized flavor, but might make the bites softer.
- Chocolate Chips: Substitute with cacao nibs or chopped dark chocolate for a more intense chocolate experience or a slightly different texture.
- Oats: Replace rolled oats with quick oats for a softer bite, or use toasted shredded coconut for a tropical twist.
- Nut Butter: Almond or cashew butter can replace peanut butter. They’ll bring a different nutty flavor and slightly different consistency.
- Heat-Treated Flour: Use pre-treated gluten-free flour if you prefer or need a gluten-free option. The flavor stays neutral, but check for texture differences.
- Oil: Instead of coconut oil, try a splash of neutral-flavored vegetable oil or even a bit of milk for softer, more delicate bites.
Equipment & Tools
- Baking sheet: To heat treat the flour evenly.
- Mixing bowls: To combine and mix ingredients thoroughly.
- Spatula: To fold ingredients together smoothly.
- Measuring cups and spoons: For accurate ingredient portions.
- Parchment paper: To prevent sticking and make cleanup easier.
Step-by-step guide to cookie dough bites
- Gather all ingredients and equipment. Have your mixing bowls, spatula, and baking sheet ready.
- Heat treat the flour: spread 1 cup of flour on a baking sheet, bake at 180°C (350°F) for 5 minutes to kill bacteria. Let cool completely.
- In a large mixing bowl, combine ½ cup of softened butter, ½ cup of brown sugar, and 1 teaspoon vanilla extract. Mix until creamy, about 2 minutes.
- Add the cooled, heat-treated flour to the mixture. Stir well until fully incorporated and no lumps remain.
- Stir in ½ cup of chocolate chips, ½ cup of rolled oats, and 2 tablespoons of coconut oil. Mix until evenly distributed.
- Scoop out small portions using a tablespoon and roll into bite-sized balls with your hands. Place on a parchment-lined tray.
- Optional: Press a few extra chocolate chips onto the tops for presentation and extra chocolate hit.
- Refrigerate the bites for at least 30 minutes to firm up. They will become more cohesive and easier to bite into.
- Once chilled, serve straight from the fridge or at room temperature for a softer bite. Enjoy the chewy, chocolatey goodness.
Refrigerate the cookie dough bites for at least 30 minutes to set. Serve directly from the fridge for a firm, chewy texture or at room temp for a softer bite. Store in an airtight container for up to a week, or freeze for longer storage.
How to Know It’s Done
- The flour should be lightly toasted and smell nutty, not raw.
- The mixture should be smooth and slightly sticky but manageable to roll.
- Bites should hold their shape without cracking or crumbling when pressed.
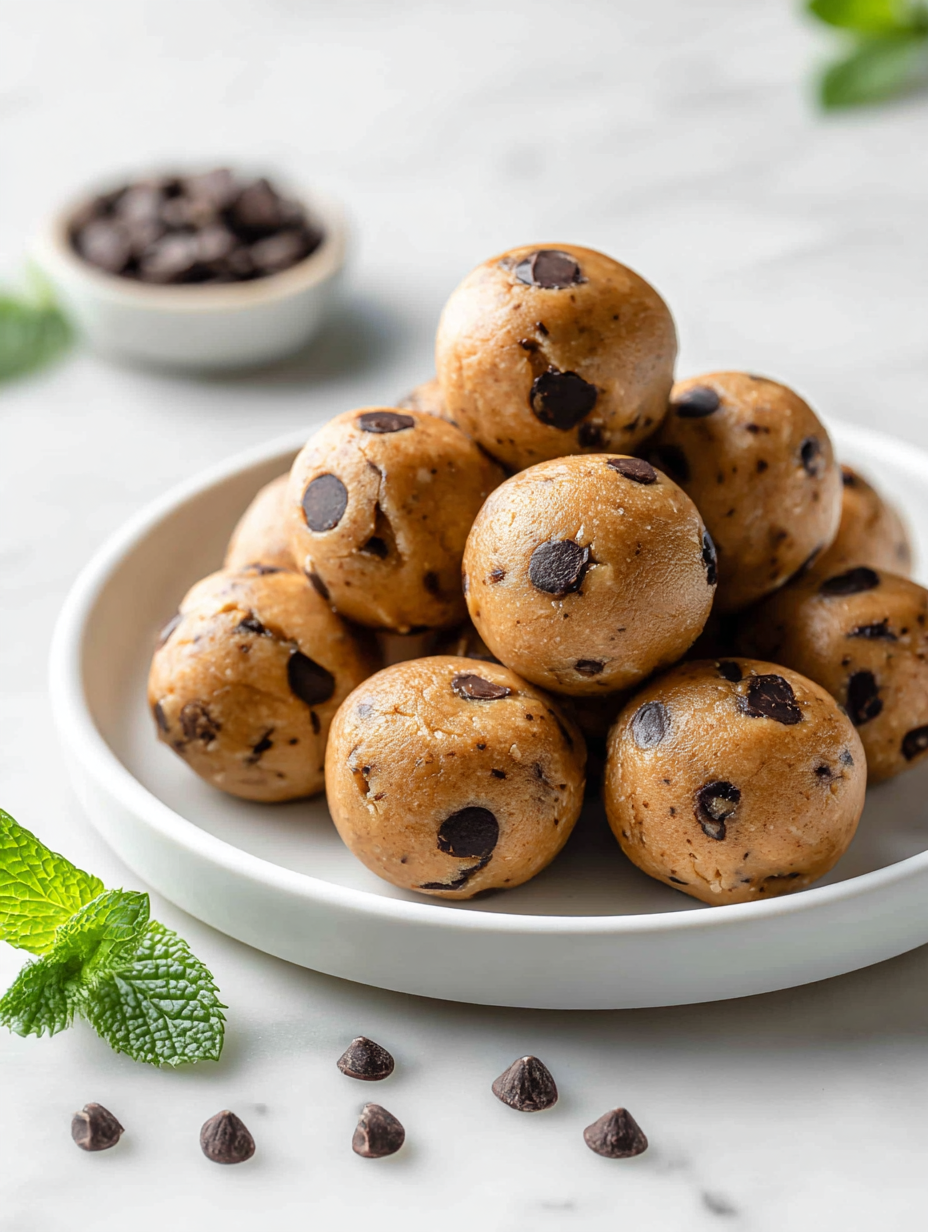
No-Bake Cookie Dough Bites
Ingredients
Equipment
Method
- Preheat your oven to 180°C (350°F) and spread the flour on a baking sheet. Bake for 5 minutes to heat-treat it, then let it cool completely.
- In a large mixing bowl, combine the softened butter and brown sugar. Use a spatula to mix until the mixture is creamy, light, and slightly fluffy, about 2 minutes.
- Stir in the cooled, heat-treated flour and vanilla extract, mixing well until the dough comes together and feels soft and slightly sticky.
- Fold in the chocolate chips, oats, and melted coconut oil, distributing them evenly throughout the dough.
- Using a tablespoon or your hands, scoop out small portions and roll them into bite-sized balls. Place each ball on a parchment-lined baking sheet.
- Press a few extra chocolate chips onto the tops of the bites for added visual appeal and chocolatey goodness.
- Refrigerate the bites for at least 30 minutes to help them firm up and set properly.
- Once chilled, serve the cookie dough bites straight from the fridge for a chewy, cool treat, or let them sit at room temperature for a softer, warmer bite.
Notes
Pro tips for perfect bites
- Bolded tip: Chill your mixture briefly before rolling to prevent sticking and ensure firm bites.
- Bolded tip: Use a spatula to fold in chocolate chips gently; this keeps them from breaking apart and distributes them evenly.
- Bolded tip: Toast oats lightly in a dry pan for extra nutty aroma and a more pronounced texture contrast.
- Bolded tip: When heating the flour, stir and check often; it should smell warm and slightly toasted, not burnt.
- Bolded tip: If the mixture feels too soft to handle, refrigerate for 10-15 minutes; it will firm up enough for easier shaping.
- Bolded tip: For an extra glossy finish, press a few chocolate chips onto the tops just before chilling, then refrigerate again briefly.
- Bolded tip: When melting chocolate chips, do so slowly over a double boiler or in short bursts in the microwave to avoid scorching.
Common mistakes and how to fix them
- FORGOT to heat-treat flour → Bacteria remains if skipped, so toast thoroughly.
- DUMPED too much sugar → Too sweet and sticky; measure carefully for balanced texture.
- OVER-TORCHED chocolate → Bitter flavor; melt gently over low heat or microwave in short bursts.
- MISSED the resting step → Bites won’t set properly; refrigerate for at least 30 minutes.
Fast fixes for common issues
- When mixture is too sticky → Splash in a bit more coconut oil and chill to firm up.
- If bites are crumbly → Patch with a tiny drizzle of milk and knead gently until cohesive.
- When chocolate melts unevenly → Shield with a lower microwave power and stir frequently.
- Dumped too much flour → Rescue with a teaspoon of oil or honey to loosen the texture.
- When the bites lack shine → Splash with a little coconut oil before refrigerating for gloss.
Prep, store, and reheat tips
- You can prepare the cookie dough mixture a day ahead; keep it covered in the fridge to prevent it from drying out, and it’ll be ready to roll when you are craving a quick treat.
- Store the formed bites in an airtight container in the fridge for up to a week. They stay chewy and chocolatey, but the flavors deepen slightly overnight.
- For longer storage, freeze the bites in a single layer on a baking sheet, then transfer to a zip-top bag. They’ll keep for up to a month and can be eaten straight from the freezer, with a chewy, icy bite.
- Refrigerated bites soften slightly as they sit, so if you prefer a firmer texture, take them out about 10 minutes before serving. To reheat, warm them briefly in the microwave at 50% power for a few seconds—just enough to melt the chocolate and revive the chewy bite.
Top questions about cookie dough bites
1. Is it safe to eat raw flour in these bites?
Yes, heat-treat the flour by baking it at 180°C (350°F) for 5 minutes. It kills bacteria and makes it safe to eat raw.
2. Can I substitute the peanut butter?
Use any nut butter you like—almond, cashew, sunflower. They all add a different nutty flavor and creaminess.
3. My mixture is too soft to form balls, what should I do?
Chill the mixture for about 10 minutes if it feels too sticky. This helps it firm up for easier rolling.
4. Can I freeze these cookie dough bites?
Yes, freeze the bites for up to a month. They become extra chewy and chocolatey when frozen.
5. Are there dairy-free options for chocolate chips?
Use dairy-free chocolate chips or chopped dark chocolate for a vegan or allergy-friendly version. Expect a slightly different melt and flavor.
6. Should I toast the oats before mixing?
Toast the oats lightly in a dry pan for a nuttier flavor and better texture. It’s a quick step that adds depth.
7. How do I melt chocolate chips without burning them?
If the chocolate melts unevenly, melt it slowly over a double boiler or in short bursts in the microwave, stirring often.
8. How long do cookie dough bites last in the fridge?
Store the bites in an airtight container in the fridge for up to a week. For longer, freeze them in a single layer, then transfer to a bag.
9. Can I reheat these bites?
Reheat briefly in the microwave at 50% power for a few seconds to soften and warm the chocolate inside, but don’t overdo it.
10. How do I get uniform-sized bites?
Use a spoon or cookie scoop to ensure uniform size. It helps them set evenly and makes serving easier.
These cookie dough bites are a little reminder that comfort can be simple and quick. They’re perfect for satisfying a sweet craving without the fuss, especially when you need something fast and honest. Sometimes, the best treats are the ones that come together in just a few minutes and taste like a small childhood secret.
Sharing these bites feels like passing along a secret recipe—something that’s both nostalgic and a little rebellious. They’re a sweet anchor in busy days or quiet nights, a tiny rebellion you can indulge in without guilt. No matter how many I make, they never last long enough to get tired of.

Hello, I’m Oliver James, the person behind Melting Into Flavors. Cooking is my greatest passion, and it’s been the driving force in my life for as long as I can remember.
It’s not just about food for me; it’s about creating experiences, connecting with others, and sharing the love I have for what’s on the plate. Through this blog and my café, I’m able to share my journey with all of you and hopefully inspire some of your own culinary adventures along the way.


