There’s something inherently comforting about biting into a peanut butter ball, especially when it’s no-bake and comes together in minutes. It’s the kind of treat that whispers childhood nostalgia—simple, sticky, and just a little messy in the best way. But what if you could elevate that familiar flavor with a surprising twist—like toasted coconut or dark chocolate chunks—that makes it feel more special without losing its easy charm.
I’ve always loved how these little bites are a quick fix for sweet cravings, especially when you want something satisfying but don’t want to turn on the oven. They’re perfect for last-minute gatherings or a quick snack for busy afternoons. And honestly, there’s a certain joy in the tactile process—mashing, mixing, and rolling—feeling the dough warm in your hands as you shape it into perfect little spheres.
Focusing on the nostalgic simplicity and childhood comfort of no-bake peanut butter treats, but with a twist—using unexpected ingredients like toasted coconut or dark chocolate chunks to elevate the classic into a more sophisticated snack.
Nostalgic bites with a twist
- Making these peanut butter balls always feels like a small act of rebellion—simple, quick, and so satisfying.
- I remember sneaking bites of the dough when no one was looking, feeling that salty-sweet rush in every chew.
- There’s a weird pride in rolling perfect little spheres after a hectic day, like I’ve created a tiny, edible trophy.
- Sometimes I add a pinch of sea salt on top just to remind myself that simplicity is often best.
- These treats have become my go-to for guilt-free indulgence—no baking, just pure, creamy comfort.
The story behind this recipe
- This recipe came together on a lazy afternoon when I needed something quick and satisfying. I was digging through my pantry, looking for a way to use up leftover peanut butter and oats, and just started mixing. The first batch was a bit messy, but the flavor was so good I knew I had to write it down for others to try.
- What really makes these bites special is how they remind me of childhood afternoons—sticky fingers, sweet smells, and the thrill of sneaking one before dinner. But I also love how adaptable they are; you can toss in whatever you have—chocolate chips, coconut, or even a dash of sea salt—to make them your own.
- heading: Personal Inspiration
Historical tidbits about the snack
- These no-bake peanut butter balls likely originated as a simple, portable treat for busy folks in the mid-20th century, especially during wartime rationing when baking ingredients were scarce.
- The combination of peanut butter and oats was popularized in homemade snack recipes in the 1950s, emphasizing quick assembly and minimal ingredients.
- In some regions, these treats are also called ‘peanut butter energy bites,’ reflecting their origins as a quick, energizing snack for workers and students.
Key Ingredients Breakdown
- Creamy peanut butter: I prefer a smooth, natural variety that feels silky and coats the tongue—skip overly salty brands if you want a pure flavor punch, but don’t go too natural that it doesn’t hold together.
- Honey or maple syrup: Adds just enough sweetness and sticky texture; I like honey for its floral aroma, but maple syrup gives a deeper, smoky note—try both to see which you prefer.
- Oats: Old-fashioned rolled oats are my go-to—they give a satisfying chew and structure. Steel-cut oats make it too dense, so stick with the classic for easy binding.
- Chocolate chunks or chips: I love dark chocolate for a bittersweet contrast, but if you’re feeling playful, toss in white chocolate or butterscotch chips—watch for melting if you refrigerate later.
- Add-ins (coconut, nuts, seeds): Toasted coconut flakes bring a smoky sweetness and crunch, while chopped nuts add salty richness—use what you love or have on hand for variety.
- Salt: Just a pinch enhances everything—don’t skip it, even if you’re salty-averse, it balances the sweetness and deepens the peanut flavor.
- Vanilla extract: A splash of vanilla brightens the whole mix—skip if you’re in a pinch, but it really rounds out the flavor with a warm, aromatic note.
Spotlight on key ingredients
Peanut Butter:
- Creamy peanut butter: I prefer a smooth, natural variety that feels silky and coats the tongue—skip overly salty brands if you want a pure flavor punch, but don’t go too natural that it doesn’t hold together.
- Honey or maple syrup: Adds just enough sweetness and sticky texture; I like honey for its floral aroma, but maple syrup gives a deeper, smoky note—try both to see which you prefer.
- Oats: Old-fashioned rolled oats are my go-to—they give a satisfying chew and structure. Steel-cut oats make it too dense, so stick with the classic for easy binding.
Chocolate & Coconut:
- Chocolate chunks or chips: I love dark chocolate for a bittersweet contrast, but if you’re feeling playful, toss in white chocolate or butterscotch chips—watch for melting if you refrigerate later.
- Toasted coconut flakes: Adds a smoky sweetness and crunch, with a hint of nutty aroma that deepens as it toasts, giving each bite an unexpected layer of flavor.
Notes for ingredient swaps
- Dairy-Free: Use coconut or almond butter instead of traditional peanut butter for a nutty, rich flavor without dairy.
- Sweetener Swap: Maple syrup can replace honey for a deeper, smoky sweetness—perfect for vegans or if you want a richer taste.
- Oats: Swap rolled oats with quick oats for a softer bite; steel-cut oats will be too dense and won’t bind as well.
- Chocolate: Carob chips are a good non-cocoa alternative, but they won’t melt as smoothly and have a different flavor.
- Add-ins: Dried fruit like chopped apricots or cranberries can add a chewy, tangy punch if you want more fruitiness.
- Salt: Flaked sea salt on top enhances flavor; if you prefer less salt, just cut back slightly or skip it altogether.
- Vanilla: A splash of vanilla extract brightens the mixture—skip if you want a more straightforward peanut flavor.
Equipment & Tools
- Large mixing bowl: To combine and mix ingredients comfortably.
- Measuring cups and spoons: To accurately measure ingredients.
- Spatula or spoon: For mixing ingredients thoroughly.
- Small cookie scoop or spoon: To portion out and shape the balls evenly.
- Parchment paper: To prevent sticking on the tray and for easy cleanup.
- Refrigerator: To chill and set the peanut butter balls.
- Microwave or double boiler: To melt chocolate for dipping or drizzling (optional).
Step-by-step guide to peanut butter balls
- Gather all your ingredients: peanut butter, honey, oats, chocolate, and any add-ins. Measure out what you’ll need; having everything ready makes the process smoother.
- In a large mixing bowl, combine 1 cup of creamy peanut butter with 1/4 cup of honey. Mix well until smooth and slightly fluffy, about 1-2 minutes. This is your sticky base.
- Add 1 1/2 cups of rolled oats to the peanut butter mixture. Stir thoroughly until the oats are evenly coated and the mixture starts to come together—if it feels too loose, sprinkle in a little more oats.
- Fold in 1/2 cup of dark chocolate chunks or chips. Distribute evenly, but don’t overmix; you want chocolate pockets in each bite for that melty surprise.
- If desired, toss in 1/4 cup of toasted coconut flakes or chopped nuts. Mix just enough to incorporate for added texture and flavor.
- Using a small cookie scoop or your hands, portion out the mixture and roll into 1-inch balls. If the mixture is too sticky, dampen your hands slightly or refrigerate for 10 minutes beforehand.
- Place the formed balls on a parchment-lined tray. Chill in the refrigerator for at least 30 minutes to firm up; they’ll be easier to handle and hold their shape better.
- Optional: for a more polished look, dip the chilled balls in melted chocolate or sprinkle a tiny pinch of sea salt on top before serving. Return to fridge for another 10 minutes if dipped.
- Once set, store the peanut butter balls in an airtight container in the fridge. They’re best enjoyed within a week, but they also freeze well for longer storage.
Chill the balls in the fridge for 30 minutes to set. For a glossy finish, melt some chocolate and dip the chilled balls, then refrigerate for another 10 minutes. Serve straight from the fridge for best texture and flavor.
How to Know It’s Done
- The mixture holds its shape when rolled without being too crumbly.
- Chocolate chunks are evenly distributed but not melted or over-softened.
- The balls are firm but still slightly soft to the touch after chilling.
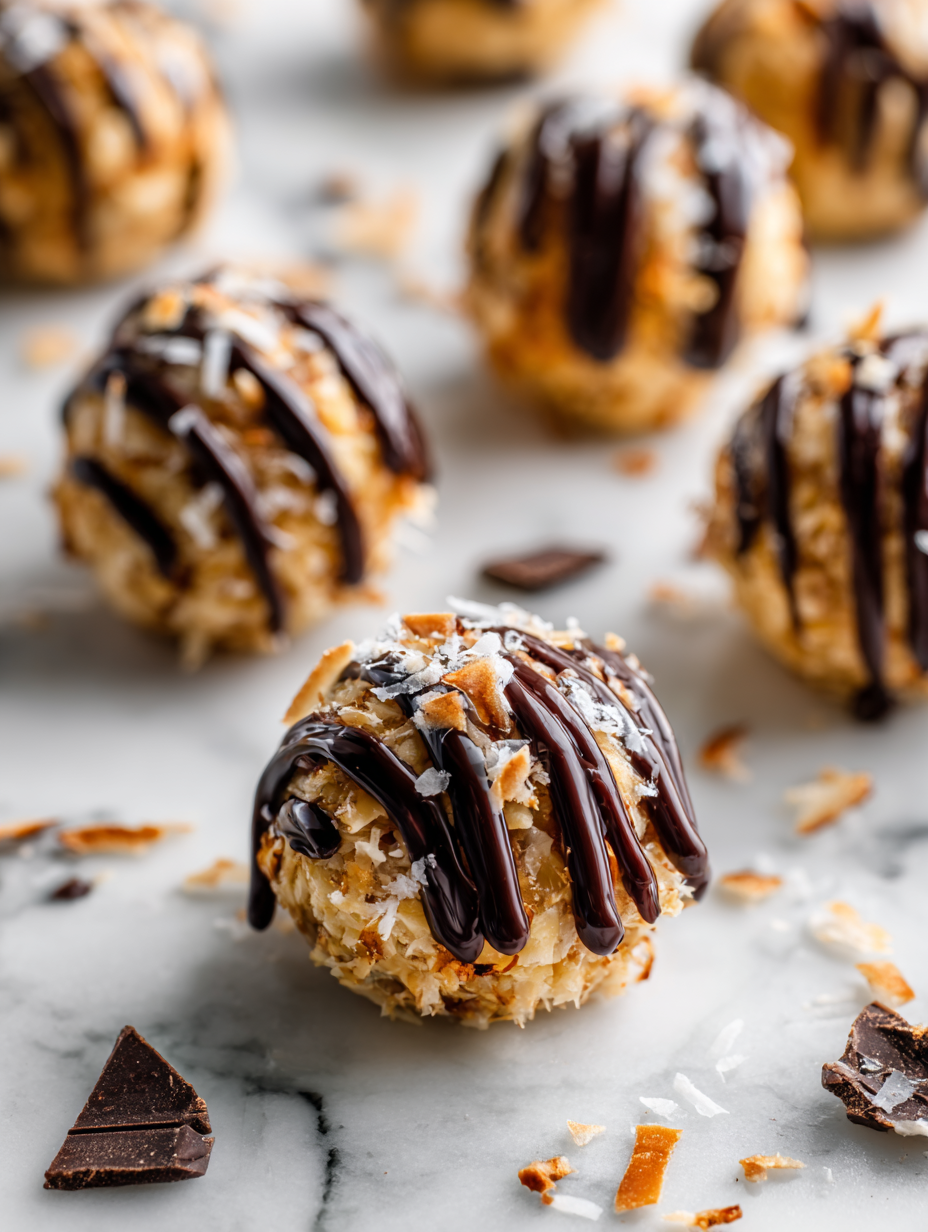
No-Bake Peanut Butter Balls with Toasted Coconut and Dark Chocolate
Ingredients
Equipment
Method
- In a large mixing bowl, stir together the creamy peanut butter and honey until smooth and fragrant, about 1-2 minutes. The mixture should be soft and slightly glossy.
- Add the rolled oats to the peanut butter mixture and fold them in thoroughly until the oats are evenly coated and the mixture starts to thicken, making it easier to handle.
- Stir in the dark chocolate chunks, distributing them evenly through the mixture; the chocolate adds delightful pockets of melty sweetness.
- Gently fold in the toasted coconut flakes, which will add a smoky sweetness and crunch to each bite.
- Using a small cookie scoop or your hands, portion out the mixture and roll into 1-inch balls, pressing firmly to ensure they hold their shape. If the mixture feels too sticky, refrigerate it for 10 minutes to firm up.
- Place the formed balls on a parchment-lined tray, spacing them evenly. Chill in the refrigerator for at least 30 minutes to set and firm up.
- Optional: Melt some dark chocolate in short bursts in the microwave or over low heat, then dip each chilled ball into the melted chocolate to coat or drizzle for a glossy finish. Return to the fridge for 10 minutes to set the coating.
- Sprinkle a tiny pinch of sea salt on top of each chocolate-dipped ball for an added savory note, if desired.
- Once set, serve the peanut butter balls straight from the fridge for the best texture and flavor. They can be stored in an airtight container in the fridge for up to a week or frozen for longer storage.
Notes
Pro tips for perfect peanut butter balls
- Chill the mixture for at least 30 minutes to make rolling easier and prevent sticking.
- Use slightly damp hands when shaping the balls to avoid sticking and ensure smooth surfaces.
- When adding chocolate, keep some chunks whole for delightful melty pockets and texture contrast.
- Melt chocolate gently over low heat or short microwave bursts to prevent burning or seizing.
- For a shiny finish, dip the chilled balls in melted chocolate and refrigerate briefly to set.
- Incorporate add-ins like toasted coconut or nuts last to distribute evenly without breaking the mixture.
- If the mixture feels too loose, refrigerate for 10-15 minutes before rolling to improve cohesion.
Common mistakes and how to fix them
- FORGOT to chill the mixture → Chill for at least 30 minutes to firm up.
- DUMPED too much chocolate → Use only the suggested amount for balance and texture.
- OVER-TORCHED the chocolate → Melt gently over low heat or in short bursts in the microwave.
- MISSED the texture test → Ensure balls are firm but slightly soft when pressed; refrigerate if needed.
Quick fixes and pantry swaps
- When mixture is too sticky → Splash in a little more oats to firm up.
- If balls crack or fall apart → Chill mixture longer or dampen hands before shaping.
- Splash melted chocolate for dipping → Patch with a tiny spoonful for a smooth finish.
- Over-melted chocolate feels grainy → Shield from direct heat and melt gently in short bursts.
- When in doubt, pantry swap → Use almond or cashew butter for a different nutty aroma and flavor.
Prep, store, and reheat tips
- Prepare the mixture and roll into balls up to 1 day ahead; keep covered in the fridge to prevent drying out.
- Store the peanut butter balls in an airtight container for up to one week in the fridge; longer if frozen.
- Chill the balls thoroughly before serving to enhance firmness and flavor melding; the colder, the better for texture.
- Reheat by letting sit at room temperature for 5 minutes or briefly microwaving in 10-second bursts until slightly softened and fragrant.
Top questions about peanut butter balls
1. Can I use crunchy peanut butter?
Use natural or crunchy peanut butter for more texture, but smooth works best for a uniform ball.
2. Why is my mixture too sticky to roll?
Chill the mixture for at least 30 minutes; this firms it up, making rolling easier and neater.
3. Can I use a different sweetener?
Yes, you can substitute maple syrup or agave for honey; expect a slightly different sweetness and stickiness.
4. How long do these peanut butter balls last?
Refrigerate the balls in an airtight container for up to a week or freeze for longer storage.
5. Can I skip the chocolate coating?
Dipping in melted chocolate adds a glossy, rich outer layer, but you can skip or drizzle instead for a lighter finish.
6. What type of chocolate should I use?
Use dark chocolate for a bittersweet taste or white chocolate for a sweeter, creamier option; avoid melting over high heat.
7. When should I add extras like coconut or nuts?
Adding toasted coconut or chopped nuts last ensures even distribution and keeps their crunch intact.
8. My balls crack when I roll them, what do I do?
If your balls crack while shaping, refrigerate the mixture for 10-15 minutes before trying again.
9. The chocolate is seized, how do I fix it?
To fix melted or seized chocolate, gently re-melt over low heat or in short bursts in the microwave.
10. My mixture is too loose, how can I fix it?
When in doubt, add a little more oats or chill the mixture longer to improve cohesion and firmness.
These no-bake peanut butter balls are more than just a quick treat; they carry a comforting nostalgia that’s hard to beat. Whether you’re craving something sweet after a busy day or looking for a simple, satisfying snack, they fit right into real life. Plus, the little twists—like toasted coconut or dark chocolate—make them feel a bit more special, even when made in haste.
In a world that’s constantly racing, sometimes the best moments are the simplest ones—like rolling a handful of dough into tiny, sticky spheres. Keep them in your fridge for instant gratification or freeze a batch for those unexpected sweet cravings. Either way, these bites are a small, honest pleasure that’s worth keeping around.

Hello, I’m Oliver James, the person behind Melting Into Flavors. Cooking is my greatest passion, and it’s been the driving force in my life for as long as I can remember.
It’s not just about food for me; it’s about creating experiences, connecting with others, and sharing the love I have for what’s on the plate. Through this blog and my café, I’m able to share my journey with all of you and hopefully inspire some of your own culinary adventures along the way.


