This no bake oat squares recipe is the kind of thing I turn to when I want a quick fix of childhood nostalgia. There’s something honest and grounding about those simple oats and sweet syrup coming together without fuss or heat, just a bit of patience in the fridge. It’s like a little hug in each bite, reminding me of afternoons spent in the kitchen with my mom, making treats that didn’t need a oven.
What I love most is how adaptable it is—no fancy ingredients, no complicated steps. Just a handful of pantry staples and some time to let it set. It’s perfect for those days when I need a sweet little moment of comfort that I can whip up in minutes and still feel good about.
Sometimes, I crave something familiar but with a little twist—like adding a splash of vanilla or tossing in some chocolate chips. These squares aren’t just dessert; they’re a reminder that simple, honest food can be the most satisfying. And honestly, they taste even better when you share them with someone who appreciates a good, no-fuss treat.
Focusing on the nostalgic comfort of childhood snacks, this no bake oat squares recipe is a quick, honest way to reconnect with simple flavors that feel like a warm hug after a long day.
The story behind this recipe
- This recipe came together one rainy afternoon when I was rummaging through my pantry, looking for something quick and satisfying. I remembered those afternoons baking with my grandma, where everything was measured by eye and the kitchen smelled like toasted oats and honey. I wanted something that captured that feeling—simple, honest, and no fuss.
- One day, I threw together what I had—oats, a bit of honey, a splash of vanilla—and the result was surprisingly addictive. It’s become my go-to for when I need a sweet, wholesome snack that doesn’t require turning on the oven or fussing over complicated steps. It’s a little reminder that good things can come from just a handful of ingredients and a bit of patience in the fridge.
- heading: The story behind this recipe
Ingredient breakdown: key components
- Old-fashioned rolled oats: I like their chewy texture and nutty flavor, but you could swap in quick oats for a softer bite—just watch out if they turn too powdery. They bring that hearty, familiar crunch I crave.
- Honey or maple syrup: It’s the glue that holds everything together and adds a sticky sweetness that’s just right. If you want it less sweet, try a bit of agave or brown rice syrup—less floral, more mellow.
- Butter or coconut oil: I prefer butter for richness, but coconut oil gives it a subtle tropical aroma that’s irresistible. For a dairy-free version, use more coconut oil or a nut butter—think smoky and lush.
- Vanilla extract: A splash makes everything smell warm and inviting—don’t skip it. If you’re out, a pinch of cinnamon or a dash of almond extract can add a new layer of cozy aroma.
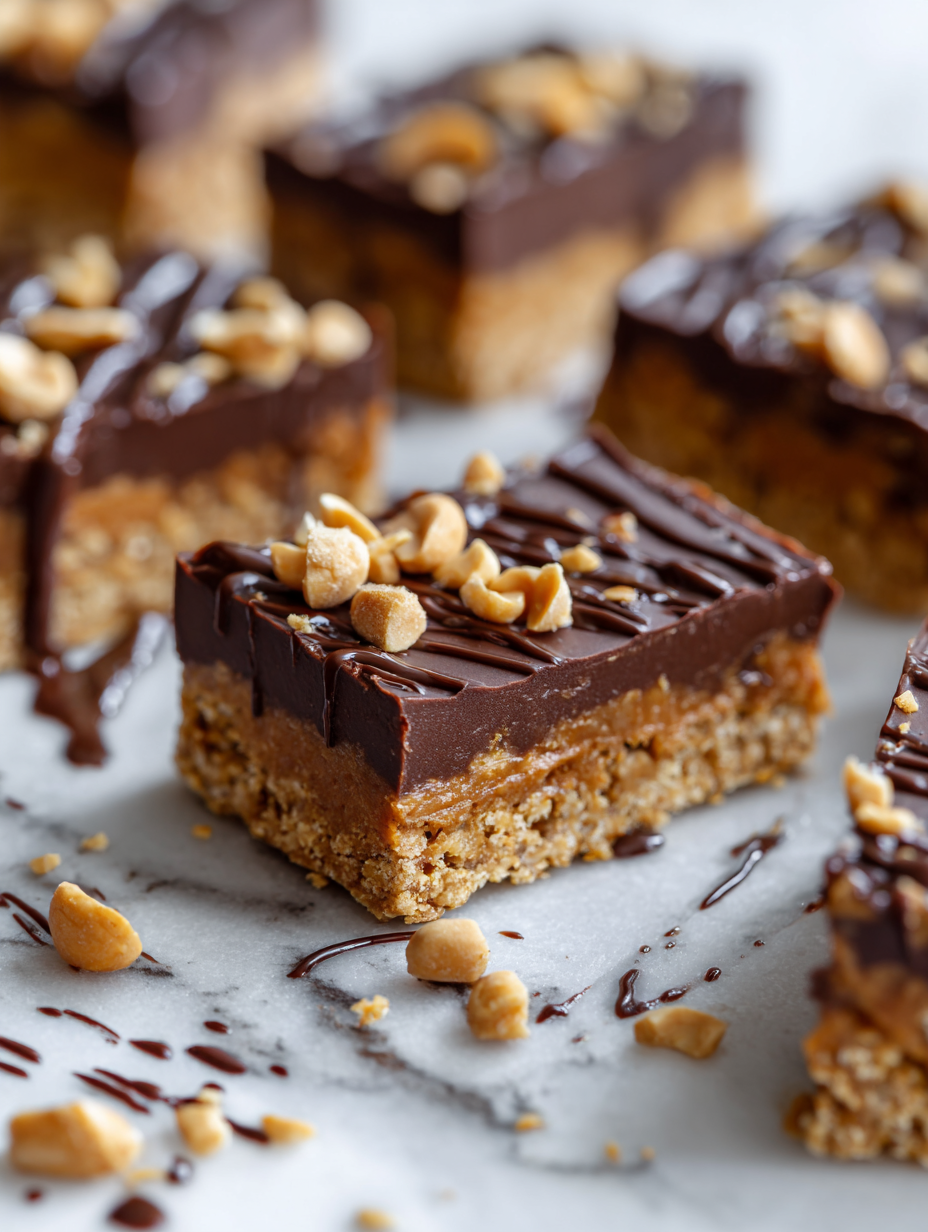
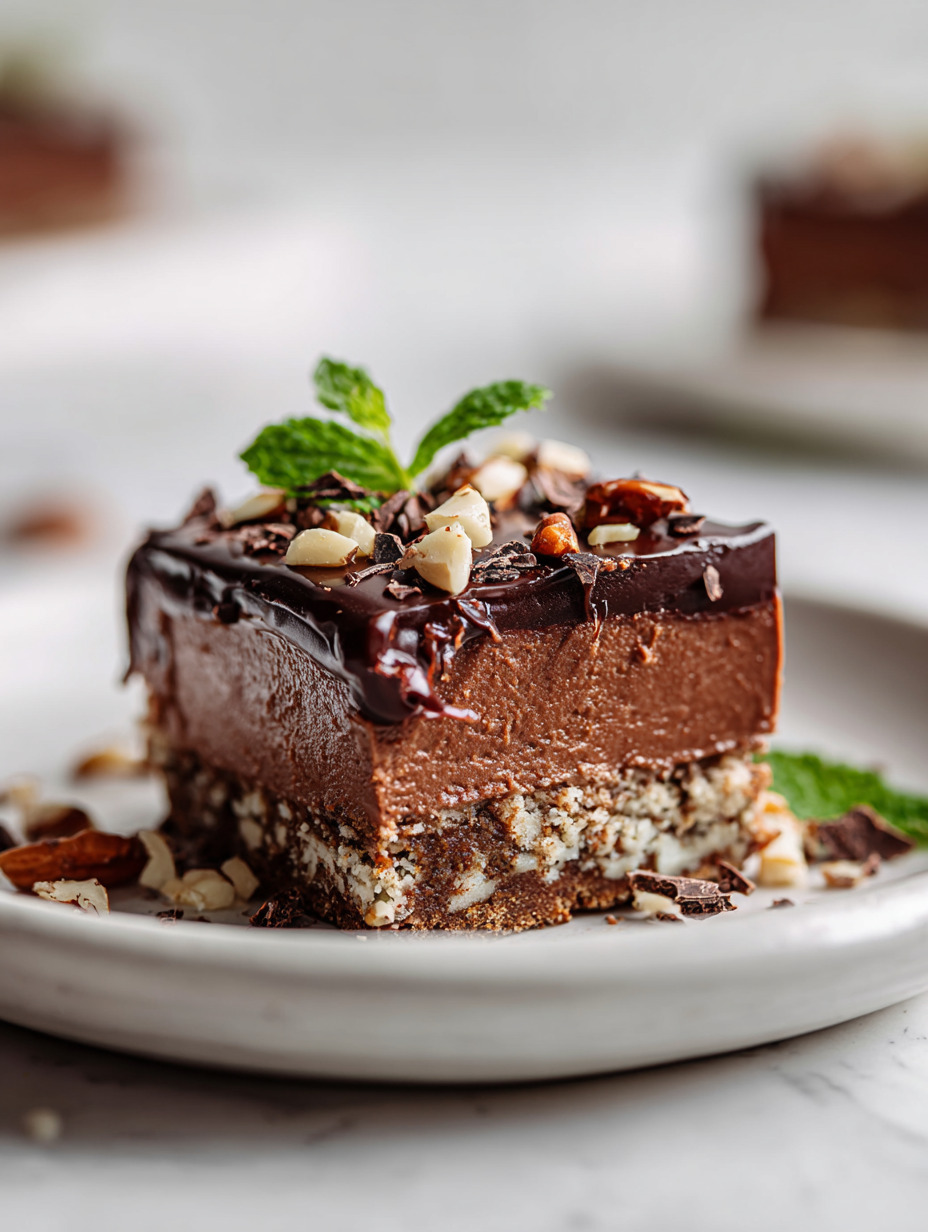
- Add-ins (chocolate chips, nuts, dried fruit): I toss in chocolate chips for melty sweetness, but chopped nuts add crunch and depth. Dried cranberries or raisins can bring a chewy tartness—feel free to mix and match based on mood.
- Salt: Just a pinch elevates all those sweet, nutty flavors and keeps it balanced. If you’re using salted butter, skip the extra salt—less fuss, less salt.
- Optional: a handful of shredded coconut or sesame seeds: Adds a toasty note and a little extra texture—think smoky, crispy bites that surprise with every chew.
Spotlight on key ingredients
Oats & sweetener:
- Old-fashioned rolled oats: I like their chewy texture and nutty flavor, but you could swap in quick oats for a softer bite—just watch out if they turn too powdery. They bring that hearty, familiar crunch I crave.
- Honey or maple syrup: It’s the glue that holds everything together and adds a sticky sweetness that’s just right. If you want it less sweet, try a bit of agave or brown rice syrup—less floral, more mellow.
Fats & flavoring:
- Butter or coconut oil: I prefer butter for richness, but coconut oil gives it a subtle tropical aroma that’s irresistible. For a dairy-free version, use more coconut oil or a nut butter—think smoky and lush.
- Vanilla extract: A splash makes everything smell warm and inviting—don’t skip it. If you’re out, a pinch of cinnamon or a dash of almond extract can add a new layer of cozy aroma.
Notes for ingredient swaps
- Dairy-Free: Swap butter for coconut oil or nut butters. Expect a slightly different richness and aroma, but equally satisfying.
- Sweetener Options: Use maple syrup, agave, or brown rice syrup instead of honey. These might alter the flavor profile slightly—more floral or caramel notes.
- Oats: Quick oats can replace rolled oats for a softer texture, but be mindful—they may make the mixture less chewy and more crumbly.
- Add-ins: Dark chocolate chips can be replaced with carob chips for a caffeine-free option, or dried fruit for extra chew and tartness.
- Flavor Boosts: A splash of almond extract or a pinch of cinnamon can add warmth or depth without changing the core texture.
- Oil: For a nutty twist, try a swirl of tahini or nut butter—these bring a richer, creamier element with a slightly different aroma.
- Texture Enhancers: Shredded coconut adds a smoky, toasted flavor and extra chew, but can be omitted for a more straightforward oat bar.
Equipment & Tools
- 20×20 cm (8×8 inch) square baking dish: To set and shape the mixture into a firm block.
- Parchment paper: Prevent sticking and make removal easy.
- Mixing bowls: Combine ingredients thoroughly.
- Spatula: Press mixture into the dish and mix ingredients.
- Knife or pizza cutter: Slice the set squares.
Step-by-step guide to no bake oat squares
- Gather all equipment: a 20×20 cm (8×8 inch) square baking dish, mixing bowls, spatula, and parchment paper. The dish is for setting the squares, and parchment prevents sticking.
- Line the baking dish with parchment paper, leaving a bit overhang for easy removal. This keeps cleanup quick and the squares intact.
- In a large mixing bowl, combine 2 cups of rolled oats, 1/2 cup of honey, and 1/4 cup of melted butter or coconut oil. Stir until everything is evenly coated and sticky.
- Add 1 teaspoon of vanilla extract and a pinch of salt. Mix well. This boosts the aroma and balances sweetness.
- If using add-ins (chocolate chips, nuts, dried fruit), fold them in now. Distribute evenly but don’t overmix, so the goodies stay in place.
- Transfer the mixture to the prepared dish. Use a spatula or the back of a spoon to press it down firmly, spreading it out into an even layer. The surface should feel compact and slightly sticky.
- Place the dish in the fridge. Chill for at least 2 hours, or until the mixture is firm and set. This step is crucial for slicing cleanly.
- Once chilled, lift the set mixture out using the parchment overhang. Place on a cutting board and slice into squares or bars as desired.
- Serve immediately or store. For best texture, keep in an airtight container in the fridge. They stay good for up to a week, and the flavors deepen as they sit.
Chill the squares in the fridge for at least 2 hours until firm. Slice with a sharp knife, serve immediately, or store in an airtight container for later enjoyment.
How to Know It’s Done
- The mixture is evenly pressed and feels firm when pressed with a spatula.
- The squares are holding together without crumbling when sliced.
- The edges are golden and slightly crispy after chilling.

No Bake Oat Squares
Ingredients
Equipment
Method
- Line your square baking dish with parchment paper, leaving a little overhang on the sides for easy removal. This makes it simple to lift out the set squares.
- In a medium mixing bowl, combine the oats, salt, and any add-ins like chocolate chips or nuts for extra flavor and texture.
- In a small saucepan over low heat, melt the butter or coconut oil along with honey, stirring until smooth and fragrant, about 2-3 minutes.
- Remove the melted mixture from the heat and stir in the vanilla extract. This gives a warm aroma to your mixture.
- Pour the wet mixture over the dry oats, then stir everything together thoroughly until the oats are evenly coated and sticky.
- Transfer the mixture into the prepared dish, using a spatula to press it down firmly and evenly across the surface. You want a compact, even layer.
- Place the dish in the fridge and chill for at least 2 hours, or until the mixture is firm and set. This helps it hold together when sliced.
- Once set, lift the mixture out of the dish using the parchment overhang. Transfer to a cutting board and slice into squares or bars with a sharp knife or pizza cutter.
- Serve immediately or store in an airtight container in the fridge for up to a week. These squares are chewy, sticky, and perfect for a quick sweet fix.
Tips and tricks for best results
- Use parchment paper to prevent sticking and ensure easy removal without breaking the squares.
- Press the mixture firmly into the dish to create a compact, even layer—this helps with clean slicing.
- Chill the squares for at least 2 hours; this is crucial for setting and clean cuts.
- Add-ins like chocolate chips or nuts should be folded gently to distribute evenly without overmixing.
- Use a sharp knife when slicing; warming it slightly with hot water helps make cleaner cuts.
- If the mixture feels too sticky, lightly dampen your hands to press it down more easily.
- For extra flavor, sprinkle a pinch of sea salt on top before chilling to enhance sweetness and aroma.
Common mistakes and how to fix them
- FORGOT to level the mixture before pressing — use the back of a spatula for evenness.
- DUMPED too much liquid — add more oats or a pinch of flour to absorb excess moisture.
- OVER-TORCHED the edges — reduce heat or move dish to a cooler part of the fridge.
- MISSED the chill time — give it at least 2 hours to set fully before slicing for clean cuts.
Quick fixes and pantry swaps
- When mixture feels too sticky → Splash a little water on hands to press down smoothly.
- If squares crumble during slicing → Patch with a warm knife for cleaner cuts.
- When edges burn slightly → Shield with foil and lower fridge temperature for quick rescue.
- DUMPED too much honey → Swap in a touch more oats or a sprinkle of shredded coconut.
- When mixture isn’t setting → Rescue with a quick blast in the freezer for 5 minutes.
Prep, store, and reheat tips
- Prepare the mixture in advance and press it into the dish; cover tightly and refrigerate overnight for easier slicing and enhanced flavor.
- Store the cut squares in an airtight container in the fridge; they stay fresh for up to a week, with flavors mellowing slightly over time.
- For longer storage, wrap squares individually in plastic wrap and freeze for up to a month. Thaw in the fridge before eating.
- Reheat slightly in the microwave for a few seconds if you prefer a softer texture; the aroma of toasted oats and honey will perk right up, but they’re best enjoyed cold or at room temp for that chewy bite.
Top questions about no bake oat squares
1. How do I know when the mixture is ready to set?
Look for a firm, slightly sticky texture when you press the mixture. It should hold together without crumbling.
2. What’s the best way to press the mixture evenly?
Use parchment paper for easy removal and clean cuts. Lightly press down with a spatula for an even layer.
3. How long should I chill the squares?
Chill the squares for at least 2 hours, preferably overnight, until firm and set. This prevents crumbling when slicing.
4. How should I store leftover squares?
Store in an airtight container in the fridge for up to a week. For longer, freeze with parchment between layers.
5. What if the mixture is too sticky to press?
If the mixture feels too sticky, dampen your hands slightly or use a spatula to press down. This makes it easier to handle.
6. Can I customize the add-ins?
Dried fruit adds a chewy tartness, chocolate chips bring melty sweetness, and nuts give crunch. Mix based on your mood.
7. Can I use quick oats instead of rolled oats?
Use quick oats for a softer bite, but they may make the squares less chewy and more crumbly. Adjust amount if needed.
8. What can I use instead of honey?
Substitute honey with maple syrup, agave, or brown rice syrup. Expect slight changes in flavor and sweetness level.
9. How can I enhance the flavor?
Add a pinch of cinnamon or a splash of vanilla for extra aroma. These boost flavor without changing the texture.
10. What if the edges start to burn?
If the edges burn slightly, shield the dish with foil and lower the fridge or freezer temperature for quick rescue.
These no bake oat squares are a quiet reminder that simple ingredients can create something genuinely satisfying. They come together fast, and their chewy, sweet, toasty notes make them a perfect little treat for any moment. Sometimes, it’s the easiest recipes that keep us grounded, especially now.
Sharing these squares might not be a grand gesture, but it’s honest and real—just like the flavors that go into them. They’re the kind of snack that feels like a small, steady comfort, no matter what kind of day you’re having.