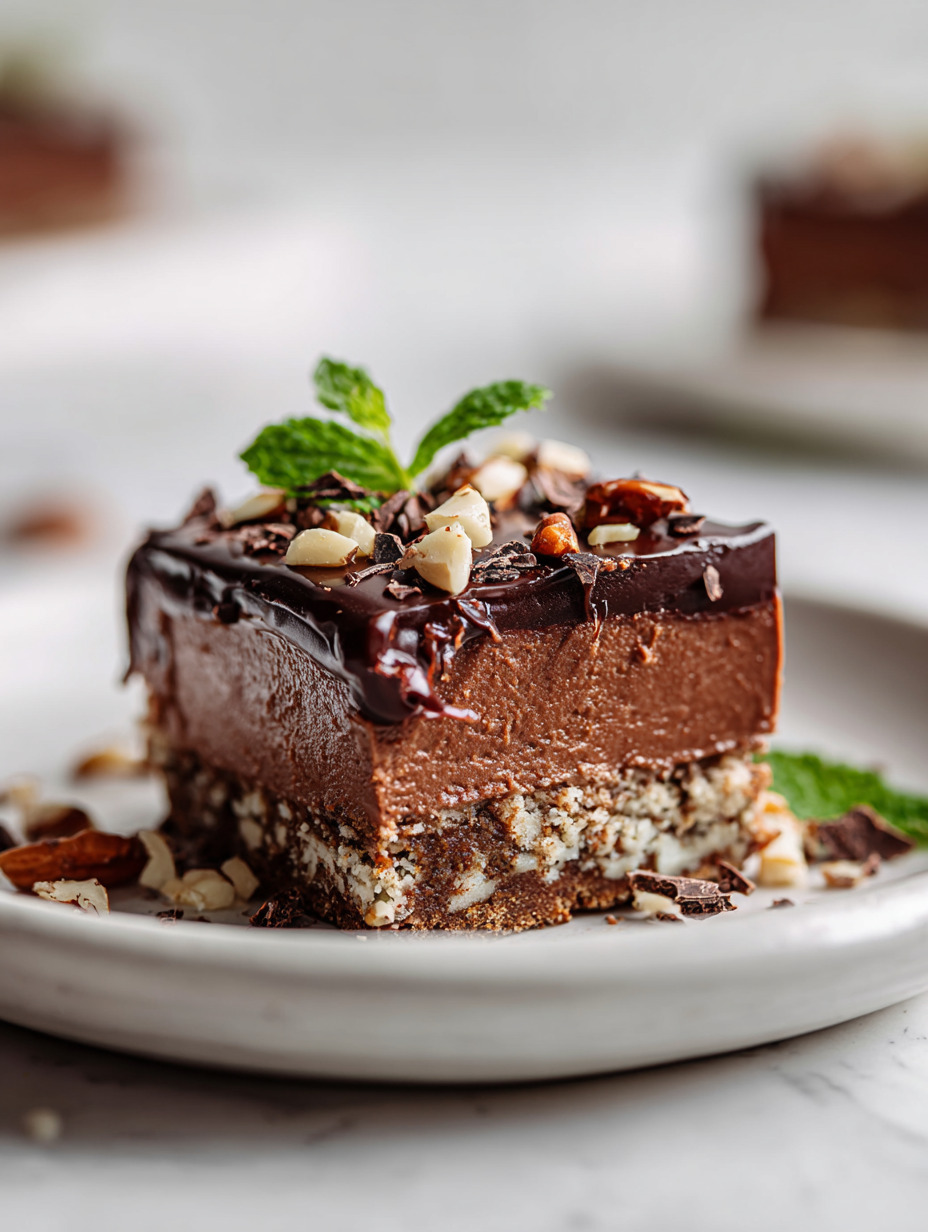
Sometimes, you just need a sweet fix that comes together without turning on the stove. These no-bake fudge bars are my go-to when I want that rich, chocolatey hit but don’t have the energy for a full bake. Plus, they’re a total throwback to childhood treats that felt like a little secret — quick, messy, and so satisfying.
The best part? You can whip these up in one bowl, press them into a pan, and forget about them while they set in the fridge. No oven, no fuss, just pure, fudgy goodness that tastes like it took hours, not minutes. They’re perfect for last-minute cravings, unexpected guests, or just a quiet moment with a spoonful of chocolate comfort.
Focusing on the nostalgic comfort of childhood treats, this recipe transforms messy, homemade fudge bars into a quick, no-bake version perfect for busy weeks or last-minute cravings, emphasizing how simple ingredients can evoke warm memories without the fuss.
The story behind this recipe
This recipe was born out of a chaotic afternoon in my kitchen, when I needed something sweet and fast but didn’t want to turn on the oven. I remembered a batch of leftover chocolate chips and a block of butter sitting on the counter, and suddenly, the idea clicked. It’s funny how some of the best treats come from improvisation—no fancy ingredients, just what I had on hand, whipped into something that feels indulgent and nostalgic. These bars remind me of lazy weekends and childhood afternoons, where the only thing that mattered was that first bite of something rich and fudgy.
Key ingredients and tips
- Sweetened condensed milk: It’s the silky glue that makes these bars come together smoothly. If you want a richer flavor, try a touch of vanilla or a splash of coffee extract to deepen the chocolate notes.
- Chocolate chips: I prefer semi-sweet for balance, but dark or milk chocolate works just as well. Use good quality chips—the better the chocolate, the more intense that fudgy, oozy bite.
- Butter: I go for unsalted, but salted butter adds a subtle savory contrast. Melt it slowly so it stays silky without turning grainy or burning the edges of your pan.
- Vanilla extract: This tiny splash lifts the chocolate flavor and adds warmth. Skip it if you’re out, but know the bars won’t have that extra depth.
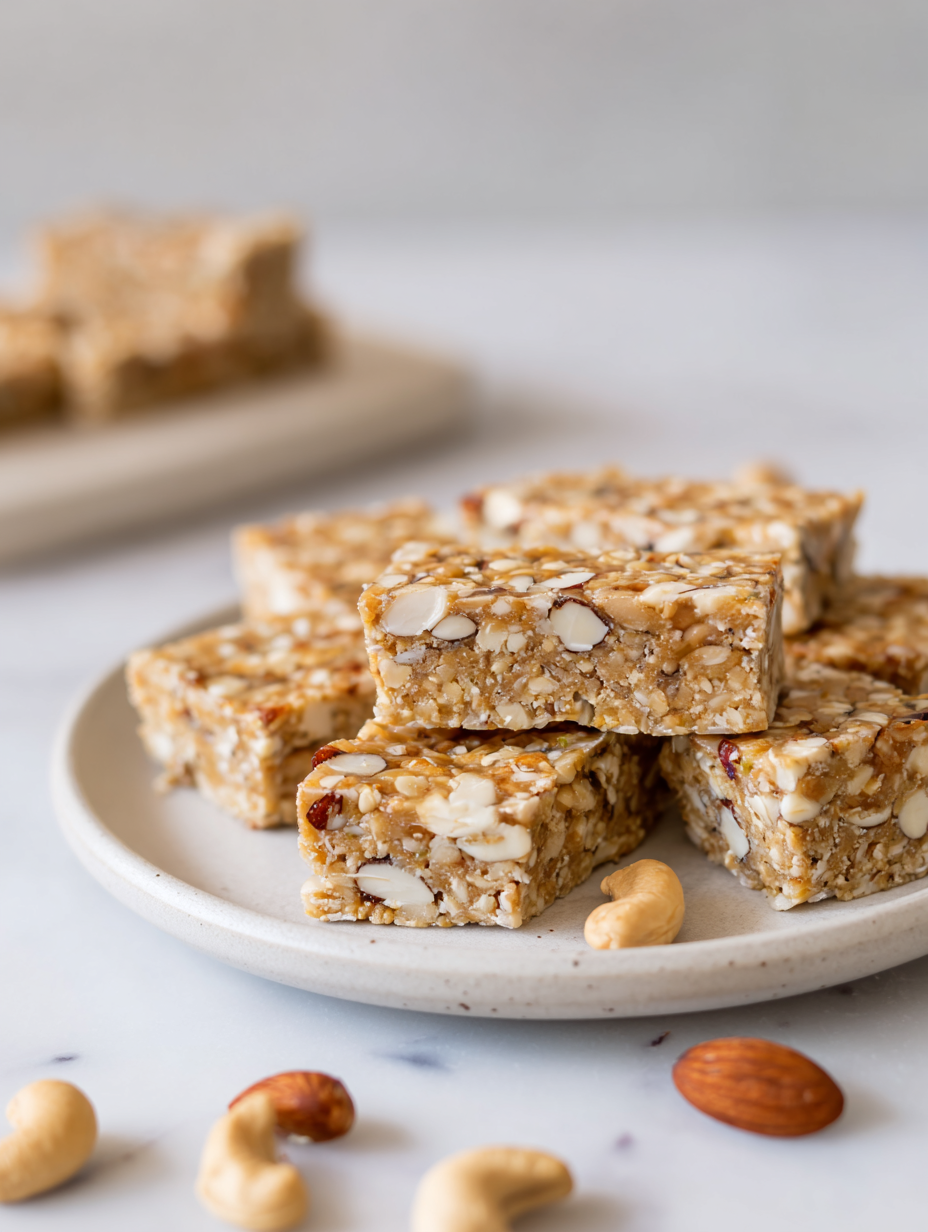
- Optional add-ins: Nuts, dried fruit, or sea salt flakes—these can really elevate the bars. Just fold them in gently to keep the texture even and avoid sinking to the bottom.
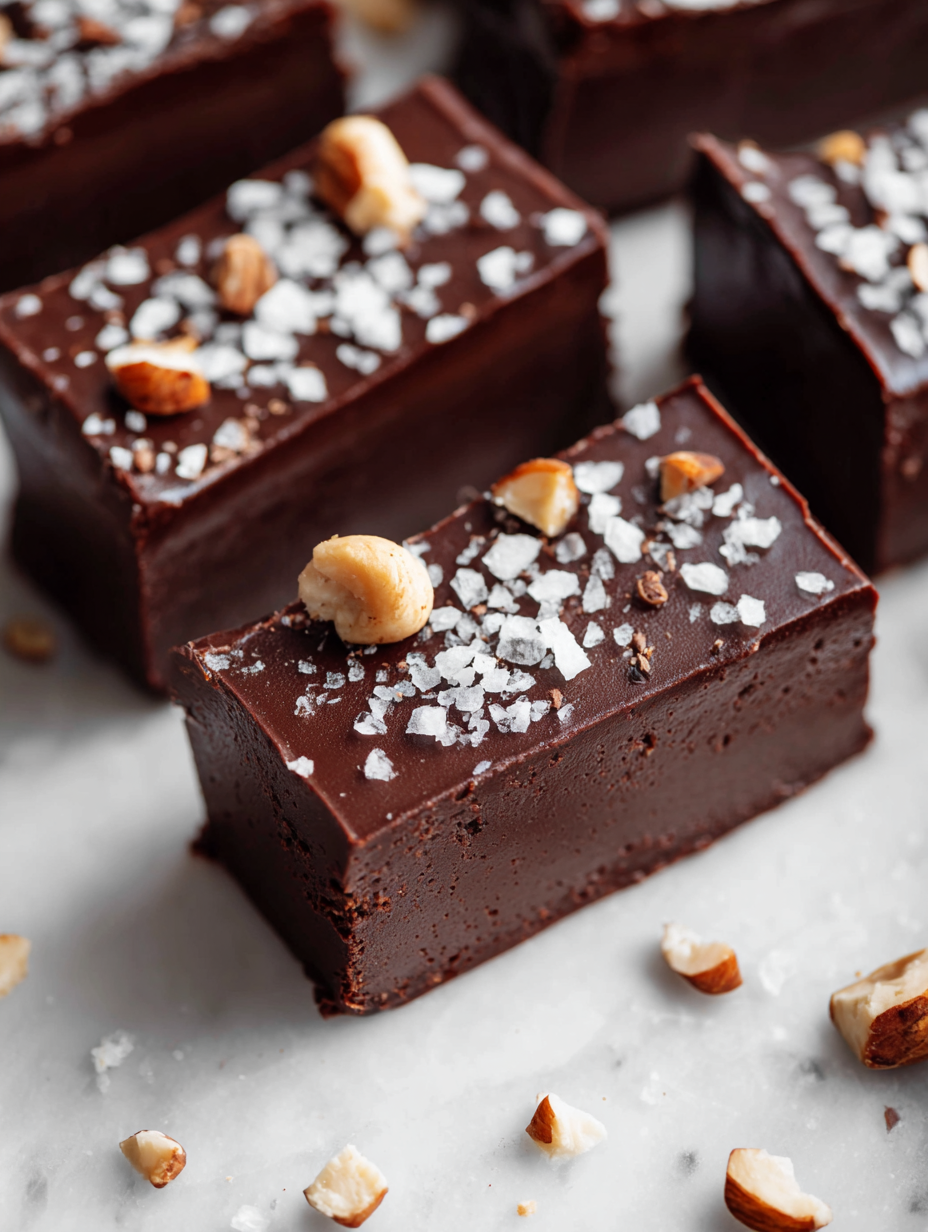
- Salt: A pinch of flaky sea salt sprinkled on top after pressing the mixture into the pan enhances the chocolate’s richness and adds a satisfying crunch with each bite.
- Pan liner: Use parchment paper or foil to make lifting the bars out easy. Greasing your pan can cause sticking, so opt for lining to keep things tidy.
Spotlight on key ingredients
Chocolate chips:
- I love semi-sweet for balance—oomphy, melty, and just the right bitterness. They soften into a rich fudge, but good quality makes a real difference in flavor.
- Sweetened condensed milk: It’s the silky glue that makes these bars come together smoothly. Its sweetness and creaminess give that irresistible fudgy texture, so don’t skimp on quality.
Butter:
- I go for unsalted, but salted butter adds a subtle savory contrast. Melt it slowly, and it stays silky without burning or graininess—key for that glossy finish.
- Vanilla extract: Just a splash lifts the chocolate into that warm, inviting aroma. Without it, the bars lose depth—so don’t skip it if you have it.
Notes for ingredient swaps
- Dairy-Free: Use coconut condensed milk or cashew cream. Expect a slightly different, creamier texture and coconut aroma.
- Vegan Chocolate: Swap with dairy-free dark chocolate or cocoa nibs mixed with coconut oil. It’ll be less sweet but rich in cocoa flavor.
- Butter: Replace with coconut oil or vegan margarine. The bars may be a bit softer and have a subtle coconut scent.
- Sweetened Condensed Milk: Try sweetened coconut milk or a thickened almond milk. The bars might be slightly less fudgy but still creamy.
- Nuts & Add-ins: Use dried fruit, seeds, or allergen-friendly crunchy toppings. They add texture and flavor but can change the balance of sweetness.
- Salt: Use flavored salts like smoked or Himalayan. They can add a smoky or mineral note that enhances chocolate depth.
- Pan Lining: Use aluminum foil if parchment isn’t available. Keep in mind it may be slightly less easy to lift out cleanly.
Equipment & Tools
- 9×9 inch pan: To hold and shape the fudge mixture.
- Parchment paper: For easy lifting and cleanup.
- Microwave-safe bowl: To melt the chocolate and butter evenly.
- Spatula or spoon: To stir and spread the mixture.
- Sharp knife: To cut clean, precise squares.
Step-by-step guide to fudge bars
- Line a 9×9 inch (23×23 cm) pan with parchment paper, leaving a bit overhang for easy lifting.
- In a microwave-safe bowl, combine 2 cups (340 g) of chocolate chips, 1/2 cup (115 g) of unsalted butter, and 1 can (14 oz) of sweetened condensed milk.
- Microwave in 30-second bursts, stirring each time, until smooth and shiny—about 1-2 minutes total. Be careful not to overheat or burn.
- Add 1 teaspoon of vanilla extract to the melted mixture, stir well to incorporate that warm, inviting aroma.
- Pour the glossy chocolate mixture into your prepared pan, spreading evenly with a spatula or the back of a spoon.
- Sprinkle a pinch of flaky sea salt or chopped nuts on top if desired, for that salty crunch contrast.
- Press gently to ensure the mixture settles and is level. A small piece of parchment can help press it down without sticking.
- Place the pan in the fridge and chill for at least 2 hours, or until firm and set. The mixture should be solid, with a crackly top when tapped.
- Once set, lift the fudge out using the parchment overhang, and cut into squares with a sharp knife. Wipe the knife clean between cuts for neat edges.
- Serve immediately or store in an airtight container in the fridge for up to a week. For softer bars, let them sit at room temperature for 10 minutes before serving.
Chill the bars in the fridge for at least 2 hours until firm. Lift out using parchment, then cut into squares. Serve immediately or store in an airtight container for later.
How to Know It’s Done
- The mixture is smooth, shiny, and fully melted before pouring.
- The pressed mixture is evenly spread and lightly firmed after chilling.
- The bars crack when tapped, indicating proper set and firmness.
No-Bake Chocolate Fudge Bars
Ingredients
Equipment
Method
- Line your 9x9 inch pan with parchment paper, leaving some overhang on the sides for easy removal.
- In a microwave-safe bowl, combine the chocolate chips, butter, and sweetened condensed milk.
- Microwave the mixture in 30-second bursts, stirring well each time, until the mixture is smooth, shiny, and completely melted—about 1-2 minutes total.
- Stir in the vanilla extract until fragrant and well combined.
- Pour the glossy chocolate mixture into your prepared pan, spreading it evenly with a spatula or the back of a spoon.
- Sprinkle a pinch of flaky sea salt or chopped nuts on top if you like a salty crunch or extra flavor contrast.
- Gently press down to ensure the mixture is evenly distributed and level at the surface.
- Place the pan in the fridge and chill for at least 2 hours until the fudge is firm and set.
- Once set, lift the fudge out of the pan using the parchment overhang and transfer to a cutting board.
- Use a sharp knife to cut the fudge into squares, wiping the blade clean between cuts for neat edges.
- Serve immediately or store in an airtight container in the fridge for up to a week. Let the fudge sit at room temperature for 10 minutes before enjoying for the best melt-in-your-mouth experience.
Pro tips for perfect fudge bars
- Bolded mini-head: Use low heat → Melt chocolate gently to avoid seizing or burning, ensuring a glossy finish.
- Bolded mini-head: Chill in stages → Let the mixture firm up slightly in the fridge before spreading for easier handling.
- Bolded mini-head: Even spreading → Use the back of a spoon or spatula to smooth the surface for a uniform fudge layer.
- Bolded mini-head: Add-ins at the right time → Fold in nuts or dried fruit just before pouring to prevent sinking or uneven distribution.
- Bolded mini-head: Rest time matters → Chill for a full 2 hours or until firm, so the bars hold their shape without cracking.
- Bolded mini-head: Knife tricks → Warm your knife slightly before cutting to get clean, smooth edges without crumbling.
- Bolded mini-head: Storage tips → Keep bars in an airtight container in the fridge for up to a week, letting them soften slightly before serving.
Common mistakes and how to fix them
- FORGOT to level the mixture → Smooth with a spatula for even setting.
- DUMPED too much salt → Reduce salt for balanced chocolate flavor.
- OVER-TORCHED chocolate → Melt on low heat; stir frequently to prevent burning.
- FAILED to chill fully → Chill at least 2 hours for proper firmness.
Quick fixes and pantry swaps
- If mixture is too thick, splash in a little warm milk to loosen it.
- When bars are sticky, patch with a thin layer of melted chocolate on top.
- Splash a few drops of hot water if your fudge cracks when cutting.
- When chocolate seizes, dump in a spoonful of coconut oil to smooth it out.
- Shield delicate edges with a piece of parchment if melting or setting goes awry.
Prep, store, and reheat tips
- Prepare the chocolate mixture and line your pan a day ahead; keep it covered in the fridge for fresh, ready-to-set fudge.
- The bars can be stored in an airtight container in the fridge for up to a week, maintaining their fudgy texture and rich aroma.
- For longer storage, freeze the bars wrapped tightly in foil or plastic wrap; they’ll keep for about a month, but a slight ice crystal may form.
- Reheat chilled bars by letting them sit at room temperature for 10 minutes or gently warming in the microwave in 5-second bursts until soft and shiny again, releasing that deep chocolate smell.
Top questions about no bake fudge bars
1. How do I melt the chocolate without burning it?
Use a microwave-safe bowl to melt chocolate and butter in short bursts, stirring often to prevent burning. It helps keep the mixture smooth and shiny.
2. Can I skip lining the pan?
Line your pan with parchment paper or foil so you can lift out the fudge easily once set. Greasing the pan often causes sticking and mess.
3. How long does it take for the fudge to set?
Chill the bars for at least 2 hours in the fridge until they’re firm. If you’re in a hurry, pop them in the freezer for about an hour.
4. Should I add salt to the fudge?
Add a pinch of flaky sea salt on top after pressing the mixture into the pan. It enhances the chocolate’s richness and adds a nice crunch.
5. How should I store the fudge bars?
Store leftovers in an airtight container in the fridge for up to a week. Let them sit at room temp for 10 minutes before serving for the best texture.
6. Can I use different types of chocolate?
You can swap the chocolate chips for dark chocolate or vegan options. Expect a slightly different flavor and texture, but still delicious.
7. Is there a dairy-free alternative?
Use coconut condensed milk for a dairy-free version. It gives a similarly creamy, sweet texture but with a subtle coconut aroma.
8. My fudge is too thick, what now?
If mixture is too thick to pour, warm it slightly or add a tiny splash of milk to loosen it up.
9. How can I get neat edges?
For cleaner cuts, dip your knife in hot water before slicing and wipe it clean between cuts. It prevents sticking and crumbling.
10. Why does my fudge crack?
If the fudge cracks when cutting, warm the knife slightly or let the bars sit at room temperature for a few minutes.
These fudge bars aren’t just a quick fix—they’re a nostalgic trip that hits all the right notes. The rich, chocolatey aroma filling your kitchen as they set reminds you of simpler times, even on busy days.
Once you get the hang of the process, they become a go-to for last-minute gatherings or just a quiet treat. No matter when you make them, they bring a little comfort and a lot of flavor, all without turning on the oven.