Making these no-bake chocolate peanut clusters has quietly become my Sunday ritual. When the house is quiet and the chaos of the week has settled, I find myself reaching for these simple ingredients, turning chaos into calm. It’s almost meditative, the slow process of melting, mixing, and shaping—each step grounding me in the moment.
There’s something soothing about the tactile act of folding melted chocolate into crunchy peanuts, feeling the textures shift and combine. It’s a small, mindful act that transforms a handful of pantry staples into a sweet, salty escape, no oven needed. These clusters remind me that sometimes, the simplest recipes hold the deepest comfort.
How making these clusters became a calming, almost meditative ritual during hectic weekends, turning a simple treat into a moment of mindful focus.
Finding Calm in Candy
- These clusters remind me of childhood afternoons spent sneaking bites from the mixing bowl.
- There’s a quiet pride in assembling these—each peanut nestled in glossy chocolate, almost like tiny treasures.
- Making this recipe became my small act of rebellion against the need for perfection in baking.
- Sharing these with friends always sparks a burst of nostalgia and a flurry of happy memories.
The story behind this recipe
- This recipe came about during a particularly chaotic week. I needed something quick, satisfying, and foolproof, and I kept coming back to this simple combo of chocolate and peanuts. It’s funny how a snack can become a small act of rebellion against the madness around us. No oven, no fuss, just mixing and shaping—instant gratification for my sweet tooth and my nerves.
- I remember the first time I made these in college, late at night, trying to keep my mind off exams. The smell of melting chocolate and roasted peanuts was unexpectedly calming, filling the tiny kitchen with warmth. Since then, these clusters have become my go-to for quick comfort—something I can whip up with my eyes closed, yet still feel like a treat I made myself.
- heading: Finding Calm in Candy
Historical & Cultural Tidbits
- These clusters originated as a practical way to use leftover chocolate and peanuts, turning pantry staples into a treat.
- During wartime rationing, similar no-bake confections gained popularity because they required minimal ingredients and no oven.
- In the 1950s, homemakers often made these for holiday parties, where quick, impressive sweets were prized.
- The combination of chocolate and peanuts has roots in Southern American candy traditions, where nuts are a staple.
- Today, these clusters have become a nostalgic comfort food, reminding many of childhood and simple, honest baking.
Ingredient breakdown: key components
- Peanut Butter: I prefer a creamy, slightly salty variety that coats the palate smoothly. Feel free to swap with almond or cashew butter for a different nutty tone, but keep the texture rich and thick.
- Chocolate Chips: I use semi-sweet because they melt into a glossy, velvety layer that isn’t too sweet. Dark chocolate can deepen the flavor, while milk chocolate makes it sweeter and softer—choose what suits your mood.
- Roasted Peanuts: The crunch here is everything—look for salted, roasted peanuts for that smoky, oozing flavor. Unsalted work fine if you add a pinch of flaky sea salt after, to boost the salty-sweet contrast.
- Honey or Maple Syrup: I add a touch for natural sweetness and to help everything bind. If you skip it, the clusters might be a little less cohesive, but they’ll still taste great—try a splash of agave for a neutral option.
- Vanilla Extract: I love that subtle, aromatic complexity it brings. If you don’t have vanilla, a pinch of cinnamon or a dash of almond extract can add a cozy or nutty twist, respectively.
- Salt: I sprinkle a little flaky sea salt on top before chilling—this heightens the chocolate and peanut flavors. Use fine salt if that’s all you have, but don’t skip this step for that perfect finish.
- Optional Add-ins: Dried cranberries, shredded coconut, or crushed pretzels can add texture and flavor. I often toss in a handful of sea salt caramel chips for an extra indulgence—think of it as a small surprise in each bite.
Spotlight on key ingredients
Peanuts:
- Peanut Butter: I prefer a creamy, slightly salty variety that coats the palate smoothly. Feel free to swap with almond or cashew butter for a different nutty tone, but keep the texture rich and thick.
- Chocolate Chips: I use semi-sweet because they melt into a glossy, velvety layer that isn’t too sweet. Dark chocolate can deepen the flavor, while milk chocolate makes it sweeter and softer—choose what suits your mood.
- Roasted Peanuts: The crunch here is everything—look for salted, roasted peanuts for that smoky, oozing flavor. Unsalted work fine if you add a pinch of flaky sea salt after, to boost the salty-sweet contrast.
Chocolate:
- Melts into a smooth, shiny coating that envelops the peanuts, offering that rich, bittersweet aroma. Watch for it to become velvety and glossy—if it seizes or gets dull, it’s overcooked or cooled too fast.
- Salt: Sprinkled on top for that burst of contrast. Flaky sea salt enhances the chocolate and peanut flavor, but fine salt works if you sprinkle sparingly, just enough to shimmer.
Notes for ingredient swaps
- Dairy-Free: Use coconut oil or coconut butter instead of butter or cream for a dairy-free version, though it might alter the richness slightly.
- Nut Variations: Swap peanuts for almonds, cashews, or hazelnuts for different textures and subtle flavor shifts.
- Chocolate Type: Substitute dark or milk chocolate with white chocolate for a sweeter, creamier taste, but expect a softer set.
- Sweetener: Replace honey with maple syrup or agave nectar to keep it vegan; expect a slightly different caramel note.
- Salt: Use flavored salts like smoked or sea salt flakes to enhance complexity or skip entirely if you prefer a more subdued sweetness.
- Add-ins: Toss in dried fruit, coconut flakes, or pretzels for texture contrast; adjust quantities for balance.
- Peanut Butter: Try almond or sunflower seed butter for a different nutty flavor or if allergies are a concern, keeping the texture similar.
Equipment & Tools
- Small saucepan: Melts chocolate evenly over low heat.
- Mixing spoon: Stirs ingredients together smoothly.
- Silicone spatula: Scrapes down sides of the bowl and helps fold ingredients.
- Parchment paper or silicone baking mat: Provides a non-stick surface for setting clusters.
- Teaspoon or small cookie scoop: Portions out even clusters quickly.
Step-by-step guide to clusters
- Gather your equipment: a small saucepan for melting, a mixing spoon, a silicone spatula for scraping, and a baking sheet lined with parchment paper or a silicone mat for cooling.
- In the saucepan over low heat (about 50°C / 122°F), melt the chocolate chips, stirring constantly to prevent burning. This should take about 3-5 minutes until smooth and glossy.
- Remove from heat. Quickly fold in the peanut butter, honey (or maple syrup), and vanilla extract. Mix until well combined and shiny.
- Add the roasted peanuts to the chocolate mixture. Stir gently to coat each nut evenly, ensuring the mixture remains thick but spreadable.
- Using a teaspoon or small cookie scoop, portion out spoonfuls of the mixture onto the prepared baking sheet. Space them about 2 inches apart.
- Press each cluster lightly with the back of the spoon to flatten slightly, if desired. Sprinkle a tiny pinch of flaky sea salt on top for contrast.
- Let the clusters set at room temperature for about 30 minutes, or refrigerate for 15-20 minutes until firm and shiny.
- Once hardened, gently lift the clusters from the parchment or silicone mat. They should be crisp on the outside, with a chewy, gooey interior.
- Store in an airtight container at room temperature for up to 3 days, or refrigerate for up to a week. For longer storage, freeze for up to a month.
- Enjoy them straight from the fridge or at room temp—your choice, but note the texture will soften slightly as they warm.
Let the clusters rest at room temperature or refrigerate until firm. Once set, gently peel off and store in an airtight container. Serve at room temp for a softer bite or chilled for crunch.
How to Know It’s Done
- Chocolate melts smoothly with no lumps, glossy surface.
- Peanut mixture is evenly coated and holds shape when scooped.
- Clusters are firm and shiny after resting, with no sticky or tacky feel.
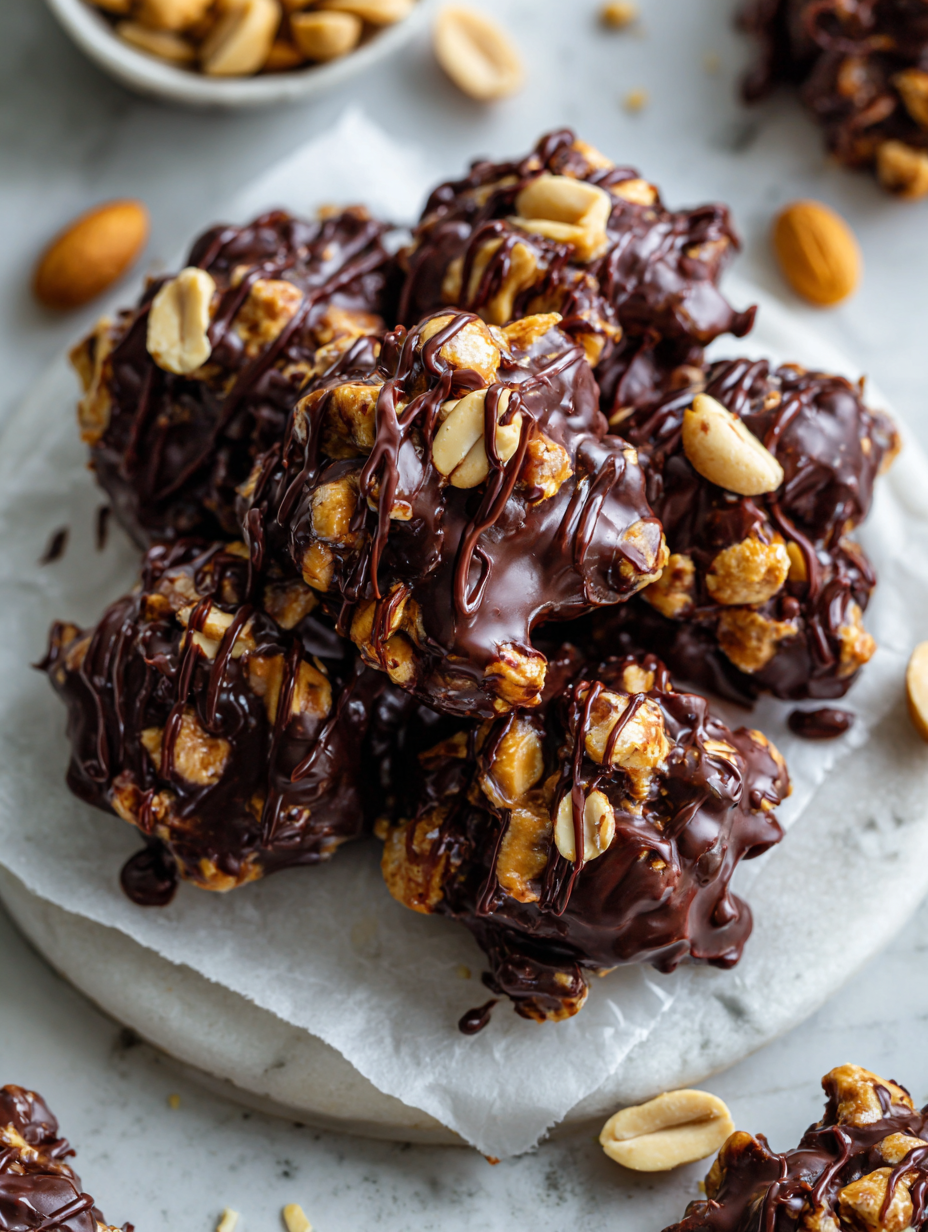
No-Bake Chocolate Peanut Clusters
Ingredients
Equipment
Method
- Place the chocolate chips in a small saucepan over low heat. Stir constantly as they melt into a smooth, glossy liquid, filling the kitchen with a rich chocolate aroma.
- Once melted, remove the saucepan from the heat and quickly fold in the peanut butter, honey, and vanilla extract using a silicone spatula. Stir until the mixture is shiny, smooth, and well combined.
- Add the roasted peanuts to the chocolate mixture. Gently fold them in, coating each nut evenly while maintaining a thick, slightly sticky texture.
- Using a teaspoon or small cookie scoop, portion out the mixture onto a parchment-lined baking sheet, spacing each cluster about 2 inches apart. Press lightly to flatten them slightly if desired.
- Sprinkle a tiny pinch of flaky sea salt on top of each cluster to enhance the flavors. Let the clusters sit at room temperature for about 30 minutes, or refrigerate for 15 minutes until set and shiny.
- Once firm, gently lift the clusters from the parchment or silicone mat. They should be crisp on the outside with a chewy, nut-studded interior. Serve immediately or store in an airtight container at room temperature for up to 3 days.
Pro tips for perfect clusters
- and shiny: Melt chocolate slowly over low heat to maintain glossy texture and prevent seizing.
- Gentle folding: When combining peanut butter, do it gently to keep the mixture smooth and avoid air bubbles.
- Chill for texture: Refrigerate clusters for at least 15 minutes until they are firm but not hard, for the perfect chew.
- Salt for contrast: Sprinkle flaky sea salt just before setting to enhance the chocolate and peanut flavor interplay.
- Avoid overmixing: Mix just until ingredients are combined to prevent the clusters from becoming too dense or greasy.
- Use room-temp ingredients: Ensure peanut butter and honey are at room temperature for easier mixing and even coating.
- Watch the melting point: Keep a close eye on the chocolate to avoid overheating, which causes dullness and graininess.
Common mistakes and how to fix them
- FORGOT to temper the chocolate → Use gentle heat to prevent seizing or blooming.
- DUMPED too much salt → Add salt gradually, tasting for balance before finishing.
- OVER-TORCHED the chocolate → Remove from heat as soon as it’s smooth; residual heat can burn.
- MISSED the chilling step → Chill until clusters are firm and shiny, about 15-20 minutes, for perfect texture.
Quick kitchen fixes for clusters
- When chocolate seizes, splash in a teaspoon of vegetable oil to smooth it out.
- If clusters are too sticky, refrigerate for 10 minutes to firm up quickly.
- Dumped too much salt? Rinse briefly under cold water, then re-dip in chocolate.
- Over-torched chocolate? Patch with a spoonful of fresh melted chocolate and stir well.
- Splash a few drops of vanilla or a pinch of sea salt to rescue dull-tasting clusters.
Prep, store, and reheat tips
- Prepare the mixture in advance: melt chocolate and fold in peanuts and flavorings; refrigerate for up to 24 hours before shaping.
- Store the clusters in an airtight container at room temperature for up to 3 days, or in the fridge for up to a week, to maintain freshness and crunch.
- For longer storage, freeze the clusters in a single layer in an airtight container for up to a month; thaw at room temp before serving.
- Reheat briefly in the fridge if needed—about 10 minutes at room temp—until slightly softened, with a faint aroma of chocolate and roasted nuts.
Top questions about clusters
1. Can I use different chocolate types?
Use semi-sweet chocolate chips for a balanced sweetness and glossy finish. Dark chocolate adds depth, while milk chocolate makes it softer and sweeter—pick what suits your mood.
2. Can I substitute the peanuts?
Yes, you can swap peanuts for almonds, cashews, or other nuts. Roasted and salted nuts give the best crunch and flavor, but unsalted work if you add a pinch of salt afterward.
3. How do I know when they’re ready?
Chill the clusters for at least 15-20 minutes until firm and shiny. They should snap when you bite into them and hold their shape well.
4. What if my chocolate seizes?
If the chocolate seizes or gets dull, add a teaspoon of vegetable oil and stir until smooth. Keep the heat low to prevent burning.
5. How should I store these?
Refrigerate the clusters in an airtight container for up to a week, or freeze for up to a month. Bring to room temp before serving for best texture.
6. How do I portion the clusters?
Use a small cookie scoop or teaspoon for even portions. Gently press down for a flatter shape if you prefer, but avoid overhandling to keep them crisp.
7. Are there vegan options?
To make them vegan, substitute honey with maple syrup or agave nectar. The texture stays similar, but flavor notes may shift slightly.
8. Can I add salt on top?
Add a pinch of flaky sea salt on top before chilling. It enhances the chocolate’s richness and balances the sweetness with a burst of saltiness.
9. Should ingredients be cold or warm?
Ensure ingredients like peanut butter and honey are at room temperature for easier mixing and better coating of the nuts.
10. How do I fix sticky or dull clusters?
If clusters are too sticky, refrigerate for 10 minutes to firm up. If chocolate looks dull, re-melt briefly and re-coat for shine.
These no-bake chocolate peanut clusters are proof that simple ingredients can create something deeply satisfying. When I need a quick treat that doesn’t require turning on the oven, I turn to this recipe—it’s a small act of comfort in busy days. Plus, the mix of salty peanuts and rich chocolate makes every bite a little moment of honesty and nostalgia.
They’re perfect for sharing or keeping around for when that sweet craving hits unexpectedly. No matter the season, these clusters bring a quiet joy that’s hard to beat. Sometimes, the best recipes are the ones that remind us to slow down and enjoy the small, sweet wins.