This recipe is a nostalgic nod to childhood snack times, but with a twist of practical simplicity that makes it perfect for busy adults craving a sweet, comforting treat without the fuss of baking. It’s about reclaiming those carefree moments, turning them into something you can whip up in minutes, yet still feel like a little indulgent victory.
There’s something satisfying about chopping through that crunchy, chocolate-coated layer, knowing you didn’t turn on the oven or wait for dough to chill. It’s honest, straightforward, and honest-to-goodness good. A quick fix that feels like a small rebellion against the busy pace of life, bringing back a little joy with every bite.
In a world that often pushes us to over-complicate everything, these no bake bars remind us that sometimes, simplicity is the sweetest escape. They’re perfect for last-minute cravings, or when you want to share a homemade treat without the hassle—just melt, mix, press, and chill.
This recipe is a nostalgic nod to childhood snack times, but with a twist of practical simplicity that makes it perfect for busy adults craving a sweet, comforting treat without the fuss of baking. It’s about reclaiming those carefree moments, turning them into something you can whip up in minutes, yet still feel like a little indulgent victory.
The story behind this recipe
- This recipe came about on a rainy afternoon when I was rummaging through childhood snack memories. I suddenly craved that perfect crunch and rich chocolate flavor, but didn’t want to turn on the oven or wait ages. It’s funny how a simple combo of cornflakes and melted chocolate can bring back so much nostalgia, yet feel totally fresh when you tweak a few ingredients.
- One day, I tossed some extra nuts and a pinch of sea salt into the mix just to see if it would elevate the usual. It did. Now, these bars are my go-to for quick sweetness that’s honest and satisfying. It’s a way to keep a little childhood magic close, even when life gets busy or stressful.
- heading: The story behind this recipe
Key ingredients and tips
- Chocolate: I prefer a good quality dark chocolate—melts smoothly and has that rich, slightly bitter edge. If you want a sweeter bar, go for milk chocolate, but avoid overly sweet options that mask the cornflake crunch.
- Cornflakes: These give the bars their crunch and nostalgic bite. Toast them lightly if you like a smoky aroma, but skip if you want maximum freshness and that bright cereal snap.
- Butter: I use unsalted, which keeps the flavor clean and lets the chocolate shine. For a dairy-free version, coconut oil works but gives a subtler, coconutty note.
- Sweetener: Usually just sugar, but honey or golden syrup can add a nice sticky sweetness. Honey makes it a little more floral—use sparingly if you want to keep the chocolate dominant.
- Add-ins: Nuts, dried fruit, or even a pinch of sea salt can elevate these bars. Don’t overload—just enough to surprise each bite with a different texture or flavor burst.
- Optional extras: A splash of vanilla or a pinch of chili powder can add depth. Keep it simple, but don’t be afraid to experiment with flavor layers.
- Binding agent: Golden syrup or honey helps everything stick together. Skip if you want a crumblier texture, but then you’ll need to press it really firmly into the pan.
Spotlight on key ingredients
Chocolate:
- I prefer a good quality dark chocolate—melts smoothly and has that rich, slightly bitter edge. If you want a sweeter bar, go for milk chocolate, but avoid overly sweet options that mask the cornflake crunch.
- Cornflakes: These give the bars their crunch and nostalgic bite. Toast them lightly if you like a smoky aroma, but skip if you want maximum freshness and that bright cereal snap.
Cornflakes:
- These give the bars their crunch and nostalgic bite. Toast them lightly if you like a smoky aroma, but skip if you want maximum freshness and that bright cereal snap.
- Butter: I use unsalted, which keeps the flavor clean and lets the chocolate shine. For a dairy-free version, coconut oil works but gives a subtler, coconutty note.
Notes for ingredient swaps
- Chocolate: I prefer a good quality dark chocolate—melts smoothly and has that rich, slightly bitter edge. If you want a sweeter bar, go for milk chocolate, but avoid overly sweet options that mask the cornflake crunch.
- Cornflakes: These give the bars their crunch and nostalgic bite. Toast them lightly if you like a smoky aroma, but skip if you want maximum freshness and that bright cereal snap.
- Butter: I use unsalted, which keeps the flavor clean and lets the chocolate shine. For a dairy-free version, coconut oil works but gives a subtler, coconutty note.
- Sweetener: Usually just sugar, but honey or golden syrup can add a nice sticky sweetness. Honey makes it a little more floral—use sparingly if you want to keep the chocolate dominant.
- Add-ins: Nuts, dried fruit, or even a pinch of sea salt can elevate these bars. Don’t overload—just enough to surprise each bite with a different texture or flavor burst.
- Optional extras: A splash of vanilla or a pinch of chili powder can add depth. Keep it simple, but don’t be afraid to experiment with flavor layers.
- Binding agent: Golden syrup or honey helps everything stick together. Skip if you want a crumblier texture, but then you’ll need to press it really firmly into the pan.
Equipment & Tools
- 20x20cm (8×8 inch) pan: Holds the mixture and shapes the bars.
- Parchment paper: Prevents sticking and makes removal easy.
- Microwave-safe bowl: For melting the chocolate evenly.
- Spatula: Folds the mixture and presses it into the pan.
- Sharp knife: Slices the set bars cleanly.
Step-by-step guide to no bake bars
- Gather your equipment: a 20x20cm (8×8 inch) square pan, a large mixing bowl, a spatula, and a microwave-safe bowl for melting chocolate.
- Line the pan with parchment paper, leaving some overhang for easy removal later. This helps with neat edges.
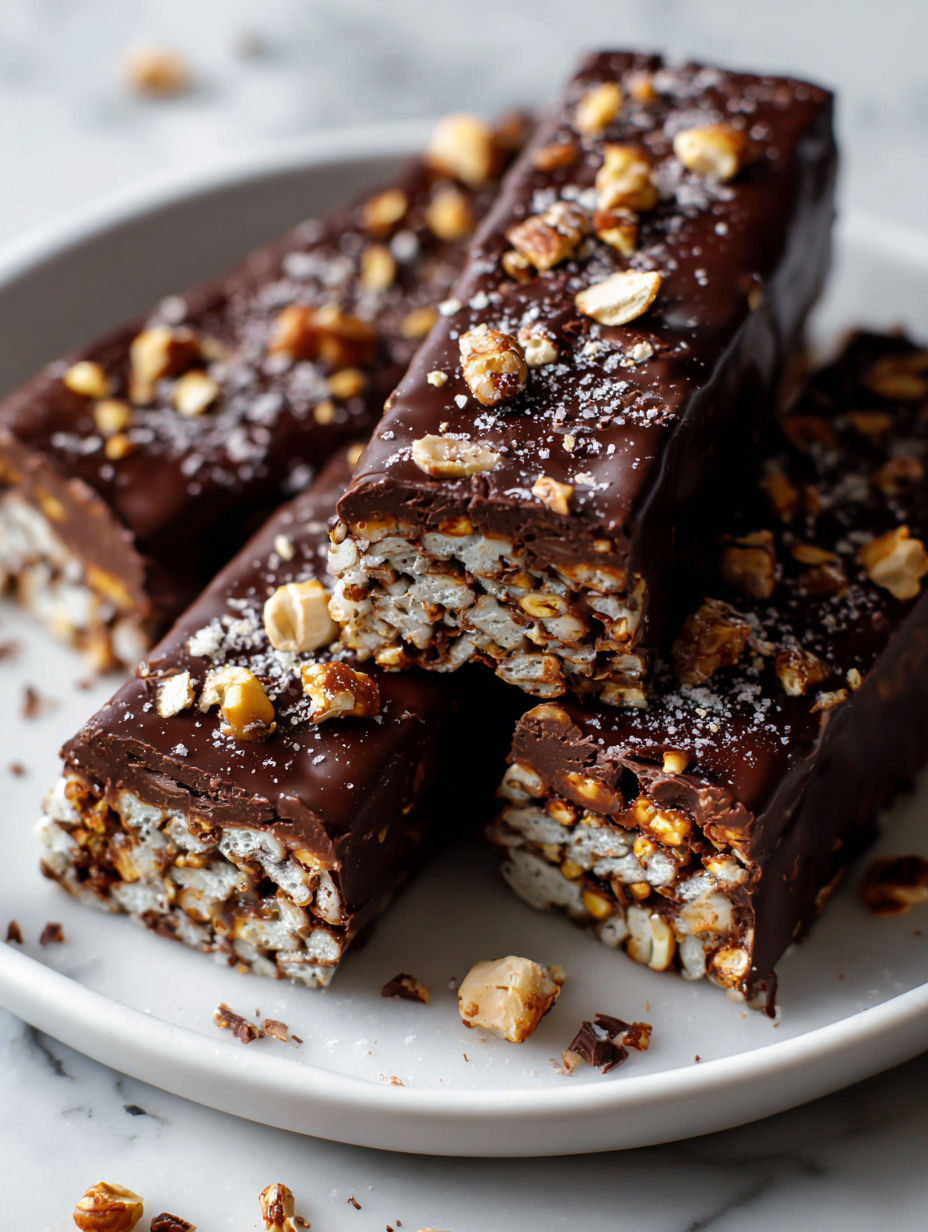
- In the microwave-safe bowl, melt 200g (7 oz) of dark chocolate in 30-second bursts, stirring in between, until smooth and shiny. Be careful not to overheat; chocolate should be glossy and fluid.
- While the chocolate melts, measure 150g (1¼ cups) of cornflakes. Toast lightly if you prefer a smoky flavor, but skip if you want that bright cereal crunch.
- Pour the melted chocolate over the cornflakes. Gently fold with the spatula until evenly coated, avoiding crushing the flakes too much.
- Transfer the mixture into the prepared pan. Use the spatula or the back of a spoon to press it down firmly and evenly. A good, tight press helps the bars hold together.
- Let the mixture cool at room temperature for about 10-15 minutes, then transfer to the fridge. Chill for at least 2 hours, or until set and firm.
- Once set, lift the bars out of the pan using the parchment overhang. Slice into squares or rectangles with a sharp knife—clean blades help keep edges crisp.
- Store in an airtight container at room temperature for up to 3 days, or in the fridge for up to a week. For the best crunch, serve slightly chilled but not cold straight from the fridge.
- Enjoy your no-bake chocolate cornflake bars, with that perfect balance of creamy chocolate and crunchy cereal!
Chill the bars in the fridge for at least 2 hours until firm. Slice with a sharp knife and serve directly from the fridge or at room temp for a slightly softer bite.
How to Know It’s Done
- Chocolate is glossy and fluid without streaks, indicating proper melting.
- Cornflakes are evenly coated but not crushed, maintaining a light crunch.
- Bars are firm and hold shape when sliced, showing they’ve set properly.
No Bake Chocolate Cornflake Bars
Ingredients
Equipment
Method
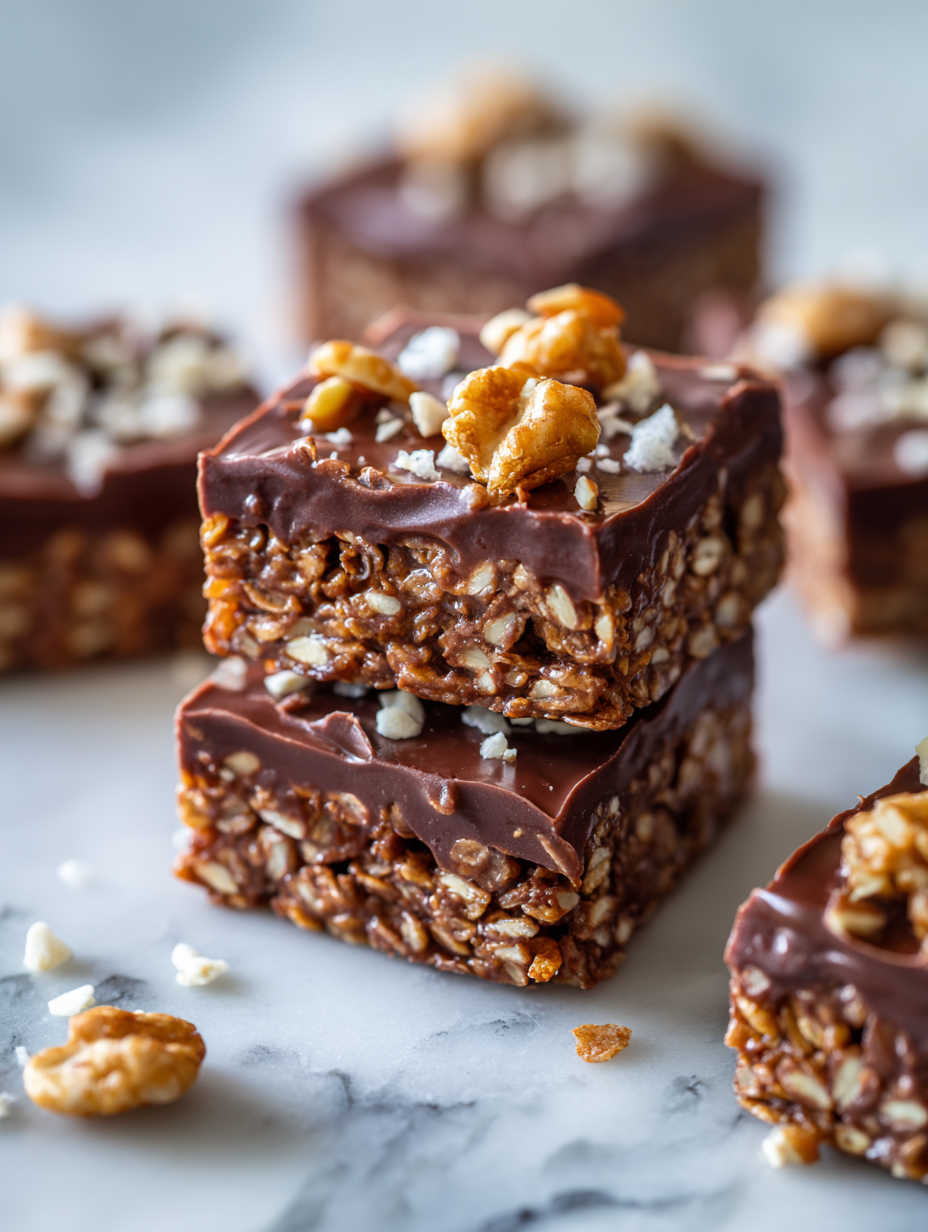
- Line your pan with parchment paper, leaving some overhang for easy removal.
- In a microwave-safe bowl, melt the dark chocolate in 30-second bursts, stirring in between until smooth and glossy.
- Pour the melted chocolate over the cornflakes in a large mixing bowl.
- Gently fold the chocolate into the cornflakes with a spatula, being careful not to crush the flakes too much, until evenly coated.
- Add in the melted butter and fold it into the mixture, ensuring everything is well combined and sticky enough to hold together.
- Transfer the mixture into the prepared pan and press it firmly with the back of a spatula or your hand, creating an even layer.
- Place the pan in the fridge and chill for at least 2 hours, or until the bars are set and firm.
- Once set, lift the bars out of the pan using the parchment overhang and cut into squares with a sharp knife.
- Arrange the bars on a serving plate and enjoy immediately, or store in an airtight container at room temperature for up to 3 days.
Notes
Quick tips for perfect bars
- Cool slightly before mixing: Let the melted chocolate cool just a bit—this prevents the cornflakes from getting soggy, keeping that satisfying crunch intact.
- Fold gently: When combining chocolate and cornflakes, fold softly to keep the flakes whole and preserve the texture instead of crushing them flat.
- Press firmly: Use the back of a spatula or a piece of parchment to press the mixture into the pan—firm pressure ensures the bars hold together when sliced.
- Chill thoroughly: Don’t rush the fridge. Chilling for at least 2 hours helps the bars set properly, making slicing easier and cleaner.
- Use room temperature ingredients: Melted chocolate and butter mix better and set more evenly if they’re not too cold when combined, avoiding streaks or uneven texture.
- Check the chocolate: Aim for a glossy, smooth melt—stir every 30 seconds in the microwave to avoid overheating and seizing.
- Handle with care: When slicing, use a sharp knife dipped in hot water for clean cuts and minimal crumbling.
Common mistakes and how to fix them
- FORGOT to level ingredients → Use a spoon to fill, then level for accuracy.
- DUMPED too much butter → Measure carefully to avoid greasy bars.
- OVER-TORCHED chocolate → Remove from heat immediately; glossy and smooth is perfect.
- FAILED to chill long enough → Chill at least 2 hours; patience ensures clean cuts.
Quick fixes and pantry swaps
- If chocolate seizes, splash in a teaspoon of vegetable oil and stir vigorously.
- When bars crumble, press them back into the pan firmly and chill longer.
- Splash a bit of warm water on the chocolate to loosen thickened or hardened spots.
- Patch over cracks with melted chocolate for a seamless look and extra flavor punch.
- Shield delicate toppings with parchment if they shimmer or crack when pressing.
Prep, store, and reheat tips
- Prepare the mixture and press into the pan up to 24 hours ahead; keep covered in the fridge for fresh crunch.
- Bars can be stored at room temperature in an airtight container for up to 3 days, maintaining their chewy texture and shiny glaze.
- For longer storage, refrigerate up to a week; the chill enhances firmness but may slightly dull the chocolate shine.
- Reheat by letting the bars sit at room temperature for 10 minutes or gently warming in a low oven (around 80°C/175°F) until just soft—look for a faint shimmer on the chocolate surface.
Top questions about no bake bars
1. What kind of chocolate is best?
Use good quality chocolate for a smooth melt and rich flavor. Cheaper chocolate might seize or be grainy.
2. Should I toast the cornflakes?
Lightly toast the cornflakes for a smoky flavor or skip for maximum cereal crunch without added aroma.
3. Can I use a different fat?
Unsalted butter keeps the flavor clean. For dairy-free, coconut oil works but adds a mild coconut scent.
4. Can I substitute the sweetener?
Honey or golden syrup makes the bars stickier and adds a subtle floral sweetness, but be cautious not to overpower the chocolate.
5. What extras can I add?
Add nuts, dried fruit, or a sprinkle of sea salt for extra flavor and texture, but don’t overload the mixture.
6. How long should I chill the bars?
Chill the mixture for at least 2 hours until set. Proper chilling makes slicing clean and the bars firm.
7. How do I get clean slices?
Use a sharp knife dipped in hot water for clean cuts. Let the knife dry before slicing to avoid sticking.
8. How should I store the bars?
Store in an airtight container at room temperature for up to 3 days or in the fridge for about a week for best texture.
9. Can I reheat the bars?
Reheat slightly at room temperature or in a very low oven (around 80°C/175°F). Watch for a faint shimmer on the chocolate.
10. What if my chocolate seizes?
If chocolate seizes, stir in a teaspoon of vegetable oil until smooth. It helps restore the gloss and fluidity.
These no-bake chocolate cornflake bars are a little piece of childhood wrapped in simplicity. They come together fast, and the smell of melting chocolate always takes me back to lazy afternoons. Sometimes, the best treats are just a few ingredients and a whole lot of nostalgic charm.
Whenever I make these, I remember that not everything worth enjoying needs to be complicated. They’re perfect for spontaneous sweet cravings or last-minute gatherings. Just a quick chill, and they’re ready to share—simple, honest, and satisfying in every crunchy, chocolaty bite.