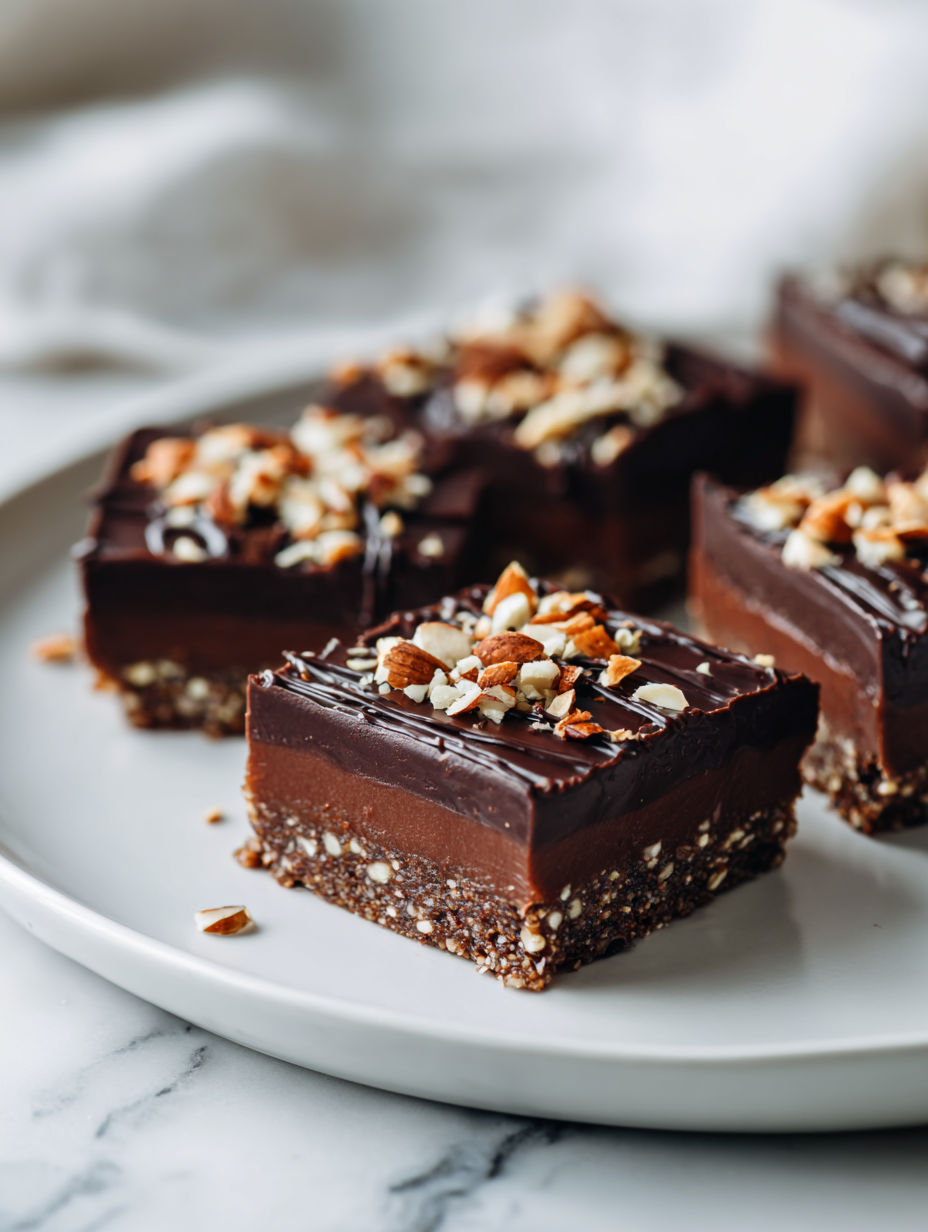
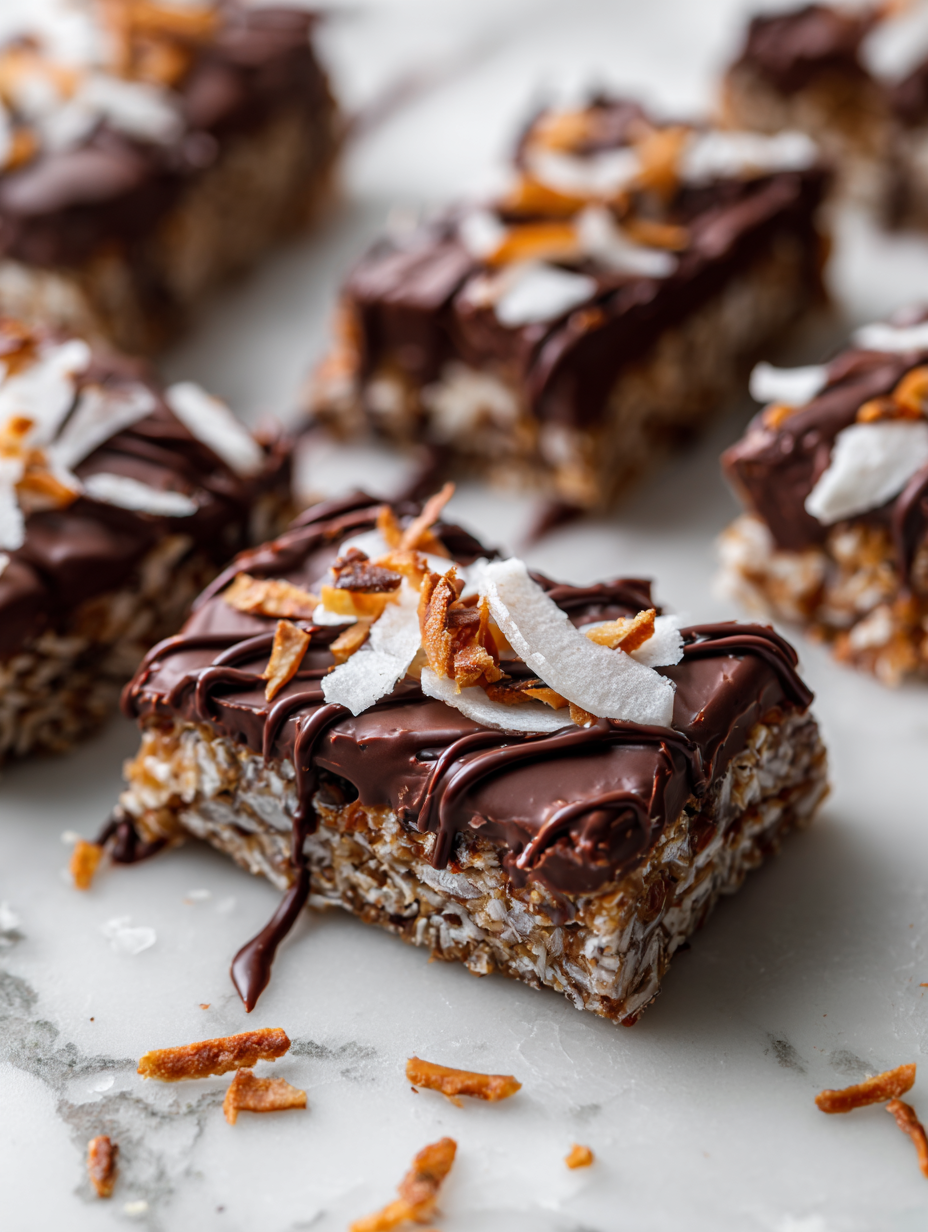
Sometimes, I crave a sweet treat that doesn’t demand turning on the oven or fussing with complicated steps. These no bake chocolate coconut bars fit right into those moments—rich, chewy, with that perfect hint of toasted coconut and smooth chocolate on top. They’re the kind of thing I toss together when I want something satisfying but don’t want to wait for a bake cycle.
What I love about this recipe is how honest and forgiving it feels. No fancy ingredients, no precise timing, just a bit of melting, mixing, and pressing into a pan. It’s a good reminder that sometimes, simplicity is the best kind of indulgence, especially when you’re short on time but still want a homemade treat.
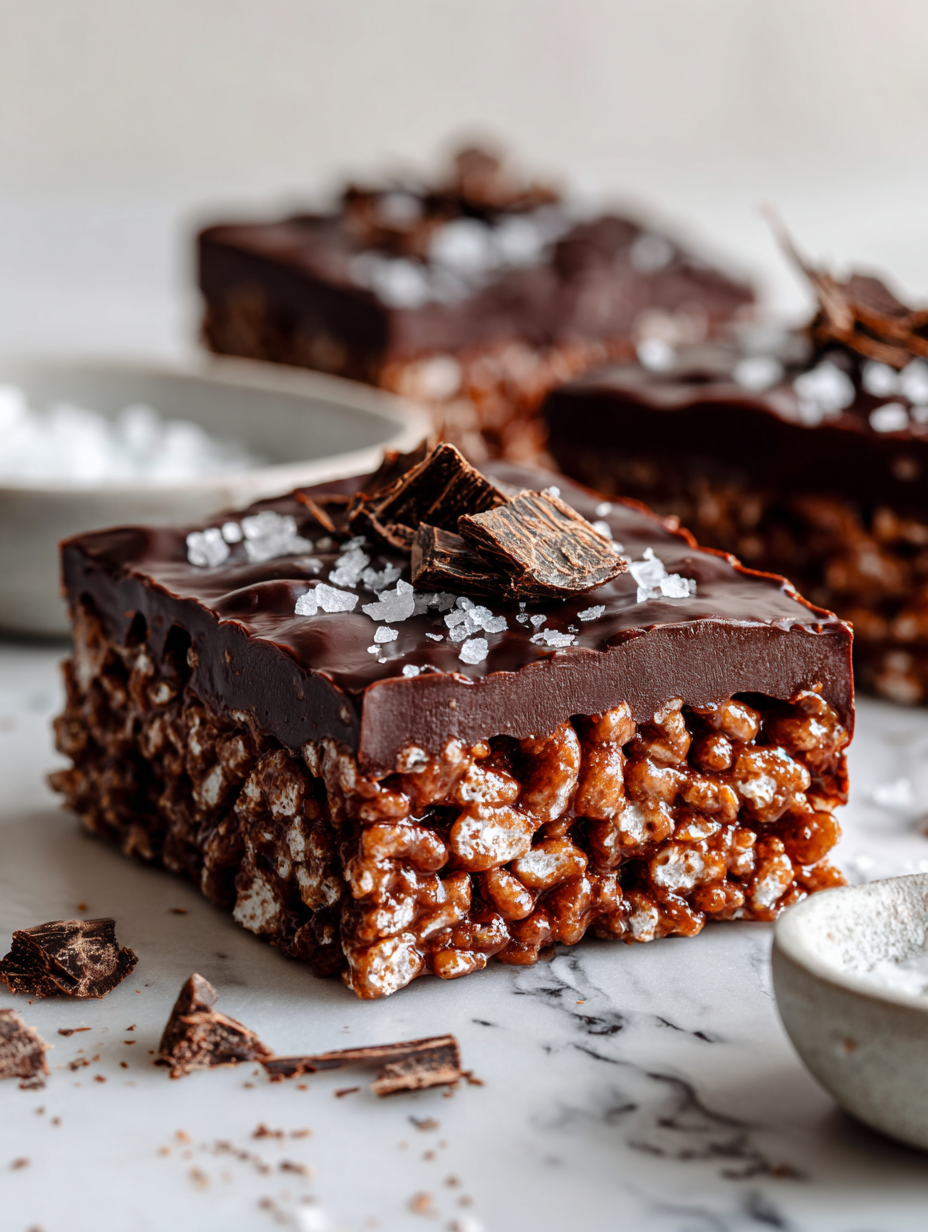
This recipe is a nostalgic throwback to childhood, but I’ve added a modern twist with extra sea salt for that perfect sweet-salty balance. It’s about reclaiming simple pleasures on busy days, when a quick, satisfying treat feels like a small victory.
The story behind this recipe
- This recipe started as a quick way to use up leftover coconut and chocolate bits from other baking adventures. I was craving something sweet and chewy but didn’t want to heat up the kitchen. It’s kind of funny how a simple handful of ingredients can turn into a little moment of joy, especially when I need a treat that’s easy to pull together.
- I remember making these late one afternoon, the smell of toasted coconut filling the room, and thinking about how I used to sneak bites of similar bars at summer picnics. That nostalgic comfort paired with the ease of no bake magic made me want to share it. It’s honestly become my go-to when I need something satisfying without fuss.
- heading
- story_type
Key Ingredients Breakdown
- Coconut flakes: I prefer toasted for that smoky, sweet crunch—adds depth. Skip to un-toasted if you want a milder flavor.
- Dark chocolate: I love a high cocoa content for richness, but semisweet works fine if you prefer less bitterness. Melt slowly for a glossy finish.
- Honey or maple syrup: I use honey for a thick, floral sweetness that binds well—swap with agave for a more neutral flavor, but watch the texture.
- Butter or coconut oil: I opt for butter for that creamy mouthfeel, but coconut oil keeps it dairy-free and adds a subtle coconut scent—melt gently.
- Sweetened condensed milk: It’s the glue that makes everything chewy—if you want less sweetness, reduce slightly or try a light coconut milk for a lighter feel.
- Salt: I sprinkle flaky sea salt on top for contrast—skip if you prefer pure sweetness, but it really enhances the chocolate’s richness.
- Optional add-ins: Nuts, dried fruit, or tiny sprinkles—play around to add texture or color, but keep the balance so it doesn’t overwhelm the bars.
Spotlight on key ingredients
Coconut flakes:
- I prefer toasted for that smoky, sweet crunch—adds depth. Skip to un-toasted if you want a milder flavor.
- Dark chocolate: I love a high cocoa content for richness, but semisweet works fine if you prefer less bitterness. Melt slowly for a glossy finish.
Dark chocolate:
- I melt it gently to avoid burning, watching for a shiny, smooth consistency. It crackles softly as it melts, releasing that rich cocoa aroma.
- Honey or maple syrup: I use it to bind everything together, its thick, floral sweetness infusing the bars with a subtle depth. It becomes oozy and fragrant when heated.
Notes for ingredient swaps
- Dairy-Free: Swap butter with coconut oil for a subtle coconut aroma and slightly softer texture.
- Sweetener: Use agave syrup instead of honey for a neutral sweetness; expect a slightly thinner mixture.
- Chocolate: Replace dark chocolate with dairy milk or white chocolate for a sweeter, creamier top layer.
- Coconut: Unsweetened shredded coconut can be used for a less sweet, more toasted flavor—adjust the sweetness accordingly.
- Add-ins: Nuts or dried fruit can be swapped or omitted—keep in mind they may change the texture and bite.
- Salt: Flaky sea salt enhances flavor, but regular table salt works if that’s what’s on hand—use a smaller amount.
- Sweetened Condensed Milk: Substitute with thick coconut milk or evaporated milk for a lighter, less sweet result.
Equipment & Tools
- Baking pan: Holds the mixture and shapes the bars.
- Parchment paper: Prevents sticking and makes removal easy.
- Medium bowl: Mixes dry ingredients.
- Small saucepan: Melts butter/oil and sweetener gently.
- Spatula: Stirs and presses mixture into the pan.
- Double boiler or microwave: Melts chocolate smoothly.
- Knife or pizza cutter: Cuts the firm bars into neat squares.
Step-by-step guide to no bake bars
- Line a 20×20 cm (8×8 inch) baking pan with parchment paper, leaving some overhang for easy lifting. This makes removal a breeze later.
- In a medium bowl, combine 1 1/2 cups toasted coconut flakes, 1/2 cup cocoa powder, and 1/4 teaspoon sea salt. Mix well until evenly distributed.
- In a small saucepan over low heat (about 50°C / 122°F), melt 1/2 cup butter or coconut oil. Stir in 1/2 cup honey or maple syrup until smooth and glossy, about 2 minutes.
- Pour the melted mixture into the dry ingredients. Stir vigorously until all the coconut is coated and the mixture feels sticky and cohesive, about 2-3 minutes.
- Transfer the mixture into the prepared pan. Use a spatula or the back of a spoon to press it evenly into the corners and flatten the surface. Work quickly before it cools.
- Place the pan in the fridge for at least 2 hours, or until firm. For faster setting, chill in the freezer for about 1 hour, checking that it’s solid but not frozen solid.
- Once firm, lift the slab out of the pan using the parchment overhang. Slice into bars or squares, about 2.5 cm (1 inch) thick.
- Melt 1 cup dark chocolate (70% cacao or higher) over a double boiler or in short bursts in the microwave (about 30 seconds, stirring in between). Pour over the bars for a glossy top.
- Sprinkle a tiny pinch of flaky sea salt or extra toasted coconut on top before the chocolate sets. Chill again for 15 minutes if needed.
- Let the bars sit at room temperature for 5 minutes before serving to avoid cracking. Enjoy the rich, chewy texture with that pop of chocolate and toasted coconut aroma.
Chill the bars until completely firm, then slice and serve. Store in an airtight container in the fridge for up to a week, or freeze for longer storage. For best texture, let them sit at room temperature for a few minutes before biting into them.
How to Know It’s Done
- Chocolate topping is glossy and firm but not hard.
- Bars feel chewy and hold shape when sliced.
- Coconut mixture is evenly coated and slightly sticky.
No Bake Chocolate Coconut Bars
Ingredients
Equipment
Method
- Line a baking pan with parchment paper, leaving overhang for easy removal.
- In a medium bowl, combine the toasted coconut flakes and a pinch of sea salt, then stir to evenly distribute.
- In a small saucepan over low heat, melt the butter gently until it’s just melted and starts to shimmer, then stir in honey until the mixture is smooth and glossy.
- Pour the warm melted mixture into the bowl with the coconut, and stir vigorously until all the coconut is coated and sticky.
- Transfer the mixture into the prepared pan, pressing firmly with a spatula or the back of a spoon to create an even, compact layer.
- Chill the pan in the fridge for at least 2 hours until the mixture is firm and set.
- Once firm, melt the dark chocolate gently in short bursts in the microwave or over a double boiler until smooth and shiny.
- Pour the melted chocolate over the chilled coconut layer, spreading it evenly with a spatula for a glossy, smooth top.
- Sprinkle a tiny pinch of sea salt or extra toasted coconut on top before the chocolate sets completely.
- Return the pan to the fridge and chill for another 15-20 minutes until the chocolate is firm.
- Lift the set bars out of the pan using the parchment overhang, then cut into squares or rectangles with a sharp knife or pizza cutter.
- Enjoy these chewy, chocolate-topped coconut bars immediately or store them in an airtight container in the fridge for up to a week.
Pro tips for perfect bars
- Bolded Mini-Head: Use gentle heat when melting chocolate to avoid scorching, aiming for a smooth, shiny finish.
- Bolded Mini-Head: Toast coconut flakes until golden and fragrant—adds smoky depth and enhances flavor complexity.
- Bolded Mini-Head: Press mixture firmly into the pan to ensure bars hold together and don’t crumble when sliced.
- Bolded Mini-Head: Chill the bars until completely firm—this helps achieve clean cuts and prevents smearing or melting.
- Bolded Mini-Head: Sprinkle flaky sea salt on top just before the chocolate sets for a perfect sweet-salty contrast.
- Bolded Mini-Head: Use the back of a spoon or a small spatula to evenly press down the mixture—avoid uneven layers.
- Bolded Mini-Head: For a glossy chocolate top, melt chocolate slowly over low heat or in short microwave bursts, stirring frequently.
Common mistakes and how to fix them
- FORGOT to level ingredients → Use a spoon to lightly level flour or coconut for accuracy.
- DUMPED too much salt → Always measure salt carefully; a pinch can overpower the sweet coconut flavor.
- OVER-TORCHED chocolate → Melt chocolate gently over low heat or in short bursts to prevent burning.
- MISSED freezing step → Chill until bars are firm; soft bars will be difficult to slice cleanly.
Quick fixes and pantry swaps
- When bars stick, splash a bit of hot water on the edges to loosen.
- If mixture is too crumbly, open pantry swap: add a splash of coconut oil for extra stickiness.
- Overcooked chocolate? Patch with a teaspoon of vegetable oil for shine and smoothness.
- Forgot to chill fully? Shield from warmth with a damp towel and refrigerate longer.
- If coconut smell is faint, rescue by toasting flakes a tad longer for smoky aroma.
Make-Ahead and Storage Tips
- Prepare the mixture and press into the pan ahead of time—keep covered in the fridge for up to 24 hours to set flavors.
- Store the finished bars in an airtight container in the fridge; they stay good for about a week, with coconut remaining chewy and chocolate glossy.
- For longer storage, freeze the bars for up to a month—wrap each piece tightly in plastic, then in foil to prevent freezer burn.
- Reheat chilled or frozen bars briefly at room temperature or at 50°C (122°F) in the oven for a softer bite—watch for melting chocolate and toasted coconut aroma re-emerging.
Top questions about no bake bars
1. Can I use unsweetened coconut flakes?
Use shredded, sweetened coconut for a chewy texture and toasted flavor. Swap with unsweetened for less sweetness and a milder taste.
2. Can I use chocolate chips instead of bars?
Yes, dark chocolate chips melt easily and create a smooth, glossy top layer. Milk or white chocolate can be substituted for a sweeter, creamier finish.
3. How long can I store these bars?
Refrigerate the bars for up to a week or freeze for a month. Let them come to room temp before serving for the best texture.
4. Can I use a different sweetener?
Yes, swap honey for maple syrup or agave. Expect a slightly thinner mixture, but it still binds well and keeps the bars chewy.
5. How do I know when the bars are ready to cut?
Chill the mixture until firm in the fridge or freezer; it should be solid but not frozen. The chocolate should be shiny and set, with a firm bite.
6. How do I get clean slices?
Use a sharp knife dipped in hot water for clean cuts. Wipe it dry after each slice to prevent sticking and ensure neat edges.
7. Can I omit the salt?
Add a pinch of sea salt on top before the chocolate sets for a sweet-salty contrast that enhances flavor.
8. Can I make these dairy-free?
Yes, for a dairy-free version, replace butter with coconut oil. It adds a subtle coconut aroma and keeps the bars chewy.
9. Why do my chocolate toppings crack?
To prevent the chocolate from cracking, let the bars sit at room temperature for a few minutes before serving.
10. The mixture is too crumbly, what can I do?
If the mixture feels too dry, add a small spoonful of coconut oil or honey to help it bind better.
These no bake chocolate coconut bars are a reminder that sometimes, the simplest ingredients can come together to create something unexpectedly satisfying. There’s a quiet pleasure in the chewy texture, the burst of rich chocolate, and the toasted coconut aroma that fills the room.
They’re perfect for when you need a quick treat or a little something to share without fuss. Honestly, I find myself reaching for these more often than I’d admit, especially when I want that nostalgic, homemade flavor with minimal effort.