This recipe is all about reclaiming simplicity and joy in a kitchen overwhelmed by complicated desserts. It’s the kind of treat I make when I need a quick hit of chocolate that feels homemade but doesn’t demand any oven time or fancy equipment. The process is almost meditative—measuring, melting, and mixing—then letting the fridge do the hard work.
What I love most is that these no bake clusters aren’t just easy; they’re honest. No pretenses, just rich chocolate, crunchy almonds, and a hint of sea salt that ties everything together. It’s the kind of sweet that satisfies a craving without overthinking it, perfect for those days when I want comfort with minimal fuss.
Plus, they’re endlessly customizable. Add a sprinkle of flaky sea salt, toss in dried fruit, or swap almonds for pistachios. It’s a humble recipe, but it’s also a little reminder that sometimes, less really is more.
This recipe is all about reclaiming simplicity and joy in a kitchen overwhelmed by complicated desserts. It’s the kind of treat I make when I need a quick hit of chocolate that feels homemade but doesn’t demand any oven time or fancy equipment. The process is almost meditative—measuring, melting, and mixing—then letting the fridge do the hard work.
Rediscovering Simplicity in Sweets
- Making these clusters is my go-to when I need a quick chocolate fix that feels homemade and honest.
- There’s something oddly satisfying about crushing almonds and melting chocolate—like a small act of therapy.
- I love how these treats bring back childhood memories of simple, messy kitchen afternoons with no fuss.
- Every time I make them, I feel a little proud of turning minimal ingredients into something so rich and crunchy.
- These clusters are my secret weapon for last-minute gifts—everyone always asks for the recipe!
The story behind this recipe
- This recipe came about one rainy afternoon when I was scavenging for something sweet but quick. I wanted chocolate, crunch, and a little salt—no fuss, no oven. It’s a kind of kitchen improvisation that stuck around because it’s honest and forgiving.
- I remember crushing almonds in a little wooden bowl, feeling the rough crunch under my fingers, then melting chocolate just until it was glossy and smooth. That smell—rich cocoa and toasted almonds—fills the room and makes the waiting part a little sweeter. It’s simple, but somehow, it feels like a small victory every time.
- The best part? It’s a reminder that sometimes the simplest treats are the most satisfying, especially when you’re craving something homemade and no-fuss. These clusters have become my go-to for quick gifts, last-minute cravings, or just a quiet moment with a good book and a handful of almonds.
History and Trivia of Clusters
- These clusters have roots in resourceful home kitchens of the early 20th century, where no-bake desserts became a clever way to satisfy sweet cravings without heating the oven.
- Originally, they were a popular treat among busy homemakers during wartime shortages, using simple ingredients like chocolate, nuts, and a bit of sugar or honey.
- The combination of chocolate and almonds in this form is inspired by traditional confections from Mediterranean regions, where nuts and cocoa were treasured ingredients.
- Modern versions often swap in different nuts or add dried fruits, but the basic concept of quick, no-fuss chocolate clusters remains a beloved classic.
Key Ingredients Explained
- Dark chocolate: I favor a rich, 70% cocoa bar—melts smoothly and gives that deep, slightly bitter punch. Swap for milk chocolate if you want more sweetness, but you’ll lose some of that intense cocoa aroma.
- Almonds: Toasted almonds bring a smoky crunch—buy pre-sliced or chop your own for uneven bites. For a softer texture, try pistachios or cashews, which offer a milder nutty flavor.
- Sea salt: Just a pinch heightens the chocolate’s richness—use flaky sea salt for a delicate shimmer. If you prefer, substitute with smoked salt for an unexpected smoky note.
- Sweetener (optional): Honey or maple syrup can add a touch of extra gloss and flavor—use sparingly, as too much can make the clusters sticky. Skip if you want pure, intense chocolate flavor.
- Vanilla extract: A splash of pure vanilla enhances the overall aroma—use high-quality vanilla for best results. For a different twist, try a pinch of cinnamon or nutmeg.
- Binder (optional): A teaspoon of coconut oil helps the chocolate set with a glossy finish—use sparingly for a softer bite. Skip if you prefer a more brittle texture.
- Additional mix-ins (optional): Dried cranberries or shredded coconut can add a chewy or tropical element—add just before setting to prevent sticking.
Spotlight on key ingredients
Dark chocolate:
- I favor a rich, 70% cocoa bar—melts smoothly and gives that deep, slightly bitter punch. Swap for milk chocolate if you want more sweetness, but you’ll lose some of that intense cocoa aroma.
- Almonds: Toasted almonds bring a smoky crunch—buy pre-sliced or chop your own for uneven bites. For a softer texture, try pistachios or cashews, which offer a milder nutty flavor.
Sea salt:
- Just a pinch heightens the chocolate’s richness—use flaky sea salt for a delicate shimmer. If you prefer, substitute with smoked salt for an unexpected smoky note.
- Additional mix-ins (optional): Dried cranberries or shredded coconut can add a chewy or tropical element—add just before setting to prevent sticking.
Notes for ingredient swaps
- Dairy-Free: Swap milk or dark chocolate with dairy-free varieties—expect a slightly different melt and a less creamy finish.
- Nuts: Use cashews or pistachios instead of almonds for a softer bite and different flavor profile.
- Sweetener: Maple syrup or agave can replace honey—adding a different flavor note and a slightly thinner texture.
- Salt: Use smoked sea salt for a smoky twist or skip altogether for a purer chocolate experience.
- Add-ins: Dried fruits like cranberries or apricots add chewiness—add just before setting to prevent sticking.
- Oil: Coconut oil helps shine and firmness—omit if you prefer a more brittle cluster, or try a neutral oil like grapeseed.
- Chocolate: For a less bitter taste, mix in some white chocolate—use sparingly to balance the deep cocoa.
Equipment & Tools
- Microwave-safe bowl: Melts the chocolate evenly and quickly.
- Spoon: Stirs the chocolate and helps form clusters.
- Parchment paper: Prevents clusters from sticking and makes cleanup easy.
- Baking tray or plate: Holds the clusters as they set in the fridge.
- Knife or chopping board: Chops the almonds for better crunch and distribution.
Step-by-step guide to no bake clusters
- Gather your equipment: a microwave-safe bowl for melting chocolate, a spoon for mixing, and a parchment-lined tray for setting the clusters.
- Chop your chocolate: break into small pieces, about 1-2 cm chunks. This helps it melt evenly and quickly. Set aside.
- Melt the chocolate: microwave in 30-second bursts, stirring after each, until smooth and glossy. About 1-2 minutes total. Be careful not to overheat—chocolate burns fast and becomes grainy.
- Prepare almonds: if using whole almonds, chop them roughly; if pre-sliced, just measure out about 1 cup. Toast briefly in a dry pan over medium heat for 2-3 minutes, until fragrant and slightly darker. Let cool.
- Combine ingredients: in a mixing bowl, stir the toasted almonds into the melted chocolate until evenly coated. If you’re adding a pinch of sea salt or vanilla, do it now.
- Form clusters: use a spoon to dollop small mounds onto your prepared tray. Aim for about 2-inch clusters. If the mixture is sticky, dampen your hands slightly to shape better.
- Set the clusters: refrigerate for at least 30 minutes. If in a hurry, pop them in the freezer for 15 minutes. They should feel firm and slightly shiny when ready.
- Final check: the clusters should be solid, with a glossy sheen. They’ll crack slightly when pressed, and the almonds should be crunchy. If they feel soft or sticky, give them a bit more time in the fridge.
- Enjoy or store: serve immediately for a crisp bite, or keep in an airtight container in the fridge for up to a week. For longer storage, freeze for up to a month—just thaw briefly before serving.
Refrigerate clusters for at least 30 minutes until firm. Serve directly from the fridge for crunch. For best presentation, arrange on a nice plate, sprinkle with a tiny bit of sea salt if desired.
How to Know It’s Done
- Chocolate is glossy and smooth when melted.
- Almonds are toasted and fragrant.
- Clusters are firm and crack when pressed.
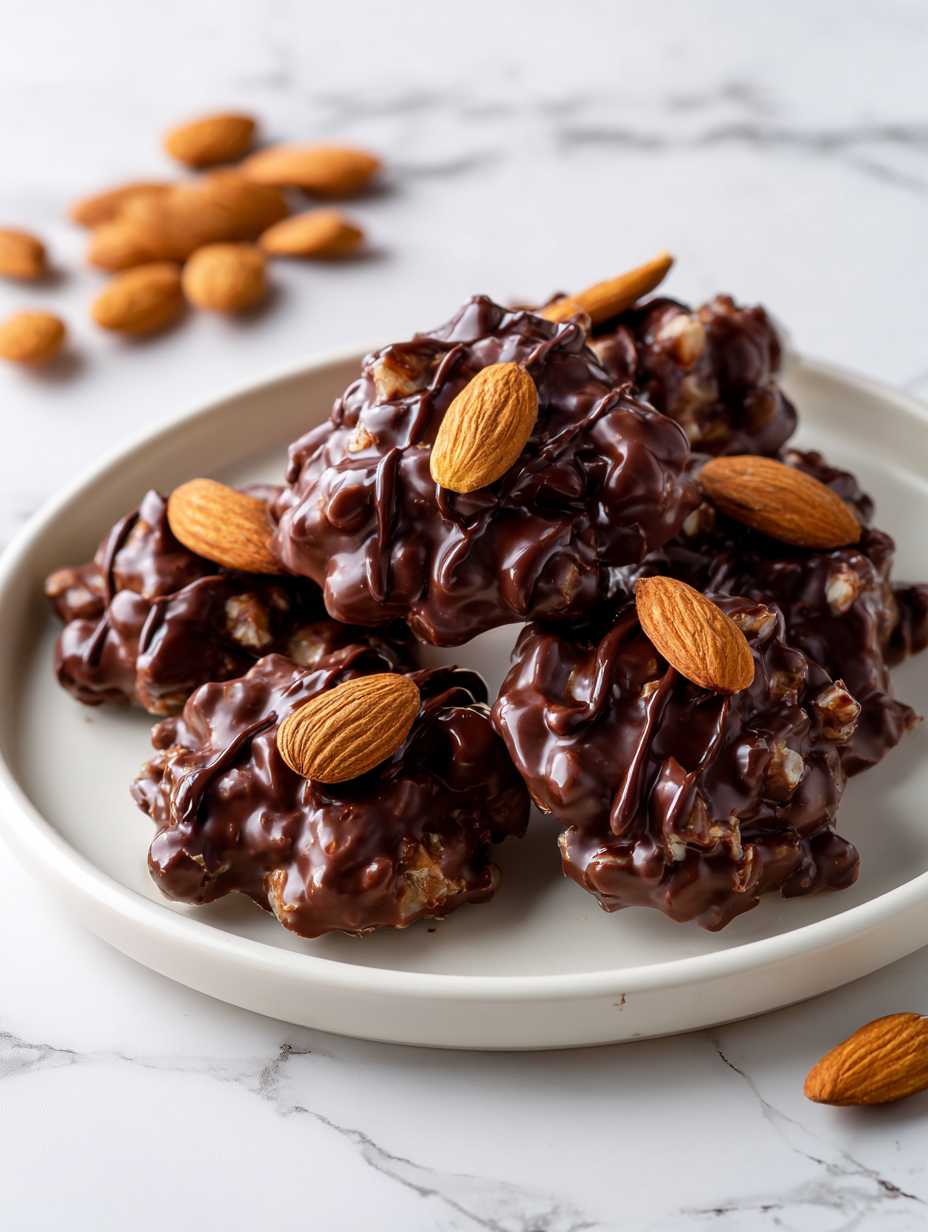
No-Bake Chocolate Almond Clusters
Ingredients
Equipment
Method
- Place the chopped dark chocolate into a microwave-safe bowl and microwave in 30-second bursts, stirring well after each, until smooth and glossy. This should take about 1-2 minutes total.
- While the chocolate melts, chop your toasted almonds into uneven pieces for crunch and flavor. Toast them briefly in a dry pan for 2-3 minutes until fragrant, then let them cool.
- Once the chocolate is melted, stir in the vanilla extract and sea salt, mixing until well combined. Add the coconut oil now if using, for a shiny finish and softer texture.
- Fold the toasted almonds into the melted chocolate, ensuring each piece is coated evenly with the glossy mixture. The aroma of toasted nuts and rich cocoa will fill your space.
- Using a spoon, scoop small mounds of the mixture onto a parchment-lined tray, aiming for about 2-inch clusters. Dampening your hands slightly can help shape sticky clusters.
- Place the tray in the refrigerator and chill for at least 30 minutes until the clusters are firm, shiny, and set. You’ll hear a faint crack when pressing them, indicating they are ready.
- Once set, remove the clusters from the fridge and gently peel them from the parchment. They should be crisp on the outside with a crunchy almond interior.
- Serve immediately for the best crunch, or store in an airtight container in the fridge for up to a week. For longer storage, freeze and enjoy straight from the freezer with a satisfying snap.
Notes
Top tips for perfect clusters
- Bolded mini-head: Use chopped almonds—smaller pieces toast faster and distribute more evenly in the chocolate.
- Bolded mini-head: Melt chocolate slowly—microwave in short bursts, stirring often to prevent burning and achieve a glossy finish.
- Bolded mini-head: Chill clusters on parchment—refrigerate for at least 30 minutes until firm and shiny, avoiding sticky patches.
- Bolded mini-head: Add a pinch of sea salt—just enough to enhance richness, but don’t overdo it or it can overpower the chocolate.
- Bolded mini-head: Use fresh, high-quality chocolate—melts better and gives a better flavor, especially if you’re skipping preservatives.
- Bolded mini-head: Work quickly once melted—mix in almonds and shape before the chocolate starts to set for clean, neat clusters.
- Bolded mini-head: Store in airtight containers—keep refrigerated for up to a week, or freeze for longer storage, to maintain crunch and flavor.
Common mistakes and how to fix them
- FORGOT to temper chocolate? Melt slowly over low heat, then cool before mixing.
- DUMPED in too much salt? Use a pinch, then taste and adjust accordingly.
- OVER-TORCHED chocolate? Remove from heat immediately, add a bit of oil, and stir gently.
- MISSED the cooling step? Refrigerate clusters at least 30 minutes for firm setting.
Quick fixes and pantry swaps
- When chocolate seizes, splash in a teaspoon of coconut oil to smooth it out.
- If clusters stick together, chill longer or gently separate with a knife.
- Dumped in too much salt? Use a damp cloth to wipe excess before storing.
- Over-torched chocolate? Patch with a small piece of fresh, melted chocolate on top.
- Splash a pinch of vanilla on sticky clusters for added aroma and flavor.
Prep, store, and reheat tips
- Prepare the clusters: Melt and mix the ingredients, then form into clusters. Store in an airtight container for up to a week. The chocolate develops a richer flavor over time and the almonds stay crunchy if kept sealed.
- Refrigeration is best: Keep the clusters in the fridge to maintain their crispness and prevent melting, especially in warm climates. They stay fresh for about 7 days.
- Freezing option: For longer storage, freeze the clusters in a single layer on a baking sheet, then transfer to a bag. They will keep for up to a month and can be enjoyed straight from the freezer with a firm snap.
- Reheating: If you want to soften slightly for easier eating, microwave for 10-15 seconds, just until the chocolate feels warm and slightly glossy. Avoid overheating to prevent melting or separation.
- Flavor deepening: The chocolate and almonds meld together after a day or two in storage, making the clusters even more satisfying. Just check for any moisture or soft spots before serving.
Top questions about clusters
1. Can I use milk chocolate instead?
Use high-quality dark chocolate for the best flavor and smooth melting. It makes a noticeable difference in taste and texture.
2. Can I substitute white chocolate?
Yes, but expect a sweeter, milder chocolate flavor. Milk chocolate also melts differently, so keep an eye on the melting process.
3. What other nuts work well?
Almonds give a crunchy, slightly smoky flavor. You can swap with cashews or pistachios for a different nuttiness and softer bite.
4. How long should I chill the clusters?
Refrigerate for at least 30 minutes until firm. If you want a crisper texture, freeze for 15 minutes, but don’t skip the chilling step.
5. Can I skip the salt?
Use flaky sea salt for a delicate shimmer and flavor boost. If you don’t have it, regular sea salt works fine, just sprinkle lightly.
6. Can I add dried fruit?
Yes, you can add dried cranberries, shredded coconut, or other dried fruits just before setting. They add chewy or tropical notes.
7. What if my chocolate seizes?
If chocolate seizes or becomes grainy, add a teaspoon of coconut or vegetable oil and stir gently until smooth.
8. How should I store leftovers?
Store in an airtight container in the fridge for up to a week. For longer storage, freeze and thaw briefly before serving.
9. How do I reheat the clusters?
To soften clusters for easier eating, microwave for 10-15 seconds. Avoid overheating to keep the chocolate glossy and intact.
10. How do I melt chocolate properly?
When melting, do so slowly in short bursts and stir often. Overheating can burn the chocolate and ruin the texture.
These no bake chocolate almond clusters are my go-to when I need something sweet and quick. They’re simple, honest, and satisfy that chocolate craving without any fuss.
Making them feels almost like a small act of mindfulness—crushing almonds, melting chocolate, and waiting for them to set. It’s a humble treat that’s perfect for any season or mood, offering a moment of simple pleasure in a busy day.