Making a strawberry shortcake layer cake feels like capturing a bit of summer’s messy, sweet joy in every slice. I love how the fresh strawberries burst with juice against the soft, tender sponge, even when it’s not perfectly pristine. It’s about embracing imperfect beauty—the slightly uneven layers, the drips of juice—and turning them into something that feels both rustic and refined.
This recipe is a nod to those nostalgic moments when strawberries were the centerpiece of our summer afternoons, and we’d dig into a slice with sticky fingers and a wide grin. I’ve tweaked the traditional shortcake by layering it into a cake, adding a little extra richness with homemade sponge, but keeping that honest, fruity punch at the core. It’s a celebration of simple ingredients that come together to remind us of slow weekends and backyard gatherings.
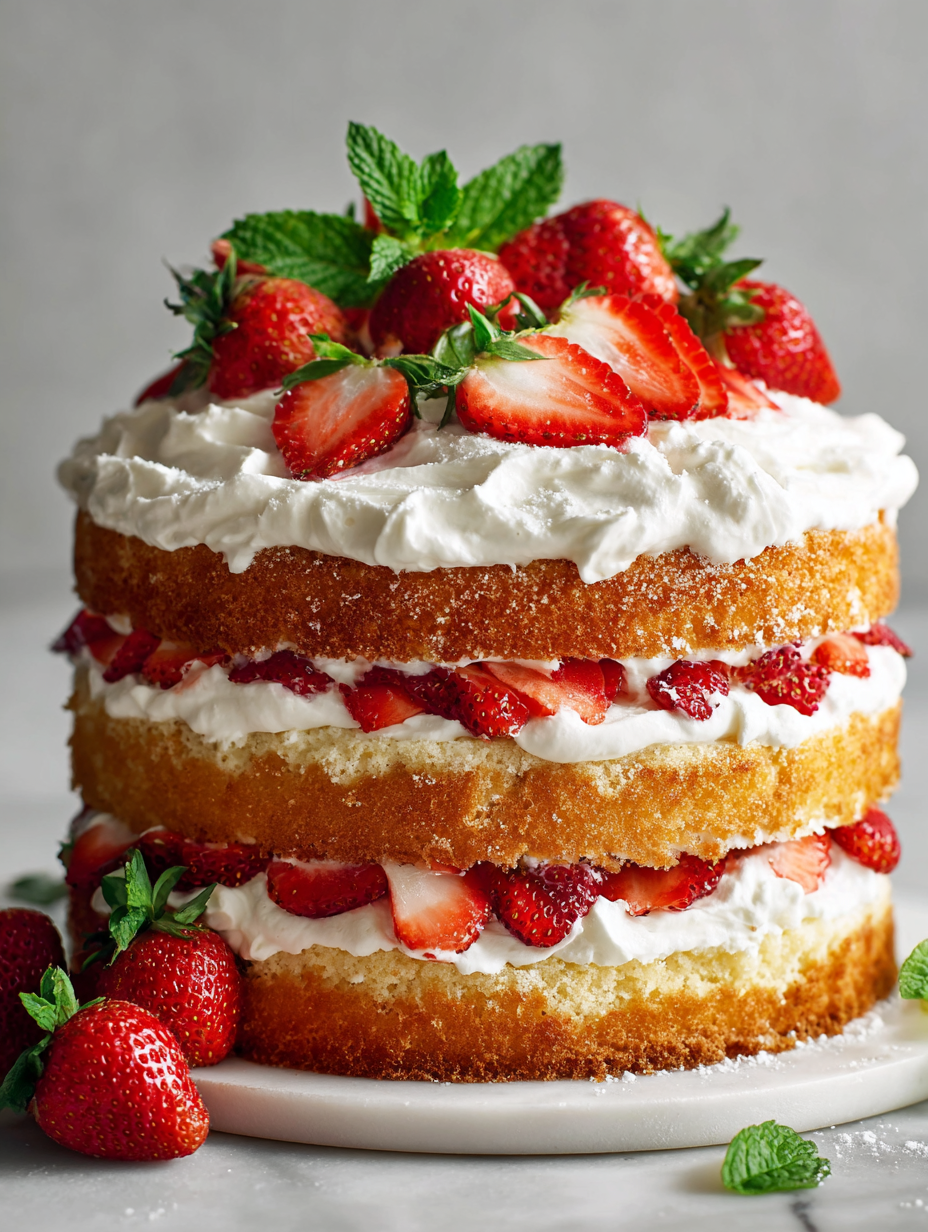
Focusing on how to make a strawberry shortcake layer cake that balances rustic charm with refined presentation, highlighting the imperfect beauty of fresh strawberries and homemade sponge for a truly heartfelt dessert.
The inspiration behind this cake
- This cake was born out of a lazy summer afternoon when I realized I had a mountain of strawberries that needed using. Instead of just making jam or eating them straight, I wanted to do something that captured their bright, juicy essence in a layered form. The idea of turning a simple shortcake into a cake felt like a way to elevate something humble into a celebration.
- I remember the first time I layered fresh strawberries between fluffy sponge and whipped cream—how the juice seeped into the cake, making it moist and fragrant with that unmistakable strawberry aroma. It’s a recipe that feels like a love letter to summer’s fleeting beauty, with each slice offering a burst of sunshine and nostalgia.
- heading: Short personal story behind the recipe
Key ingredients and tips
- Fresh strawberries: I love the intense aroma of ripe berries and how they ooze juice; use the sweetest, reddest ones you can find, and consider macerating them with a touch of sugar to enhance their natural brightness.
- Heavy cream: Whipped till soft peaks, it adds richness and a silky texture. Keep it cold and don’t overwhip or it’ll turn buttery—stop just before it’s perfectly fluffy and spreadable.
- Sponge cake layers: I prefer homemade for that tender crumb, but store-bought can work in a pinch. Bake until golden and springy—if it sinks or feels dense, it needs a few more minutes.
- Sugar: I use regular granulated, but superfine dissolves quicker—great if you’re in a hurry. Adjust sweetness based on your berries’ ripeness, tasting as you go.
- Vanilla extract: It brightens everything—use real vanilla for a warm, fragrant undertone. If you want a twist, try a splash of almond extract, but keep it subtle.
- Lemon juice: Brightens the strawberries and cuts through the richness. Fresh lemon is best—just a teaspoon to keep the flavor fresh and lively, not sour.
- Shortbread or biscuit crumbs: For that crumbly, buttery texture in the layers, or sprinkle on top for crunch. Toast lightly if using plain crumbs to deepen the flavor.
Key Ingredients and Their Quirks
Strawberries:
- I love their juicy burst and fragrant aroma, especially when perfectly ripe and red. Use them macerated with a little sugar for extra juice and brightness.
- Heavy cream: Whipped to soft peaks, it adds silky richness; keep it super cold and stop whipping just before it’s fluffy enough to spread without weeping.
Sponge Cake:
- I prefer homemade for that tender crumb, but store-bought works if you choose a light, airy variety. Bake until golden and springy—if it sinks or feels dense, it needs more time.
- Sugar: Regular granulated is fine, but superfine dissolves quicker—use it if you’re in a rush. Taste and adjust based on the ripeness of your berries.
Notes for ingredient swaps
- Dairy-Free: Use coconut cream instead of heavy cream for a rich, dairy-free whipped topping that’s subtly coconutty.
- Gluten-Free: Swap regular flour for almond or gluten-free baking blend; expect a slightly denser sponge but still tender.
- Sugar Alternatives: Replace granulated sugar with honey or maple syrup—adjust liquid quantities slightly to keep the batter balanced.
- Vinegar or Lemon Juice: Use apple cider vinegar or lime juice to add acidity if lemon isn’t available; keeps strawberries bright.
- Strawberries: Freeze-dried strawberries can be ground into a powder for flavor bursts or use frozen berries if fresh aren’t in season.
- Cake Layers: Swap sponge for a buttery biscuit or even a pound cake slice—more substantial, less airy, but just as tasty.
- Flavor Boosters: Add a splash of balsamic vinegar or a few fresh mint leaves to strawberries for a more complex, aromatic fruit layer.
Equipment & Tools
- Cake pans: Bake the sponge layers evenly.
- Stand mixer or whisk: Whip eggs, sugar, and cream efficiently.
- Serrated knife: Level sponge layers smoothly.
- Cooling rack: Cool cakes thoroughly without sogginess.
- Spatula: Spread whipped cream and assemble layers neatly.
Step-by-step guide to strawberry shortcake layer cake
- Equipment & Tools: Gather three 20cm (8-inch) round cake pans, a stand mixer or whisk, a spatula, a serrated knife, and a cooling rack.
- Preheat your oven to 180°C (350°F). Grease the cake pans and line the bottoms with parchment paper for easy release.
- Make the sponge: In a bowl, whisk eggs and sugar until thick and pale, about 5 minutes. Add vanilla. Gently fold in sifted flour and baking powder until just combined.
- Divide batter evenly among pans. Bake for 20-25 minutes, or until the edges turn golden and a toothpick inserted comes out clean. Cool in pans for 10 minutes, then turn out onto a wire rack to cool completely.
- Prepare strawberries: Hull and slice 400g (about 3 cups) of ripe strawberries. Toss with a tablespoon of sugar and lemon juice. Let sit for 15-20 minutes for juices to develop.
- Whip the cream: In a chilled bowl, beat 250ml (1 cup) of heavy cream with a tablespoon of sugar until soft peaks form. Keep refrigerated until assembly.
- Assemble the cake: If the sponge layers are domed, level them with a serrated knife. Place one layer on a serving plate, spread a layer of whipped cream, then evenly distribute a third of the strawberries and their juice.
- Top with the second sponge layer, repeat with cream and strawberries, then crown with the final layer. Gently press down to settle.
- Finish with a layer of whipped cream on top and decorate with remaining strawberries. Optionally, sprinkle with crushed shortbread or biscuit crumbs for crunch.
- Rest the assembled cake in the fridge for at least 1 hour to let flavors meld and stabilize the layers. Serve chilled.
Let the assembled cake rest in the fridge for at least an hour so the layers set and flavors meld. Serve chilled, with fresh strawberries for garnish, and enjoy that perfect burst of fruity cream with every slice.
How to Know It’s Done
- Cake layers are golden and springy to touch, with no sinking centers.
- Strawberries are juicy and fragrant, bright with lemon and sugar.
- Whipped cream holds soft peaks without melting or weeping.
Strawberry Shortcake Layer Cake
Ingredients
Equipment
Method
- Preheat your oven to 180°C (350°F). Grease three 20cm (8-inch) round cake pans and line their bottoms with parchment paper.
- In a large bowl, whisk together the sifted flour, sugar, baking powder, and salt until combined.
- Add eggs one at a time to the dry mixture, whisking well after each addition. Then, pour in the melted butter and vanilla extract, mixing until the batter is smooth and slightly fluffy.
- Divide the batter evenly among the prepared pans, spreading it out smoothly with a spatula.
- Bake for 20-25 minutes, or until the edges are golden and a toothpick inserted in the center comes out clean. Let the layers cool in the pans for 10 minutes, then transfer to a wire rack to cool completely.
- While the cakes cool, prepare the strawberries by hulling and slicing them. Toss the slices with lemon juice and a tablespoon of sugar, letting them sit for 15-20 minutes to release their juices.
- In a chilled bowl, whip the heavy cream and sugar until soft peaks form. Keep it in the fridge until ready to assemble.
- If necessary, level the sponge layers with a serrated knife to create even surfaces.
- Place the first sponge layer on a serving plate, spread a generous layer of whipped cream, then evenly distribute a portion of the macerated strawberries, including some of their juice.
- Add the second sponge layer on top and repeat the process with more whipped cream and strawberries. Place the final sponge layer on top and gently press down to settle the layers.
- Spread remaining whipped cream over the top and sides of the cake. Decorate with extra sliced strawberries for a beautiful finish.
- Refrigerate the cake for at least an hour to let the flavors meld and the layers set before slicing and serving. Enjoy the rustic charm and burst of summer in every bite!
Notes
Pro tips for perfect strawberry shortcake
- Use room temperature ingredients for a lighter, fluffier sponge that rises evenly.
- Gently fold flour into the egg mixture to maintain airiness; overmixing deflates the batter.
- Soak sliced strawberries in a little lemon juice and sugar to intensify their juiciness and flavor.
- Chill your mixing bowls and beaters before whipping cream for better volume and stability.
- Level the sponge layers with a serrated knife for a clean, even stack and professional look.
- Lightly dust the top with powdered sugar or crushed shortbread for a crisp, sweet finish.
- Let the assembled cake rest in the fridge for at least an hour to set the layers and meld flavors.
Common mistakes and how to fix them
- FORGOT to check cake doneness → Test with a toothpick; it should come out clean, not sticky.
- DUMPED strawberries into the whipped cream → Gently fold to prevent crushing and preserve juice.
- OVER-TORCHED the sponge layers → Bake at 180°C (350°F); golden edges and springy touch indicate readiness.
- MISSED to chill the cream properly → Keep ingredients cold; cold bowl and beaters help achieve soft peaks.
Fast fixes for common issues
- If strawberries are too tart, splash them with a little honey or maple syrup to mellow bitterness.
- When sponge layers crack on top, reduce oven temperature by 10°C (20°F) and bake a few minutes longer.
- DUMPED too much juice on the cake? Patch with a thin layer of whipped cream to seal moisture and prevent sogginess.
- Splash a bit of vanilla or lemon zest into whipped cream if it feels flat or lacks brightness.
- Shield the cake with foil if the top starts to over-tan during final baking or resting to prevent burning.
Prep, store, and reheat tips
- Prepare the sponge layers and let them cool completely before wrapping tightly in plastic wrap. They can be made a day ahead and stored at room temperature or refrigerated for up to 24 hours.
- Macerate the strawberries with sugar and lemon juice a few hours in advance. Keep refrigerated and drain excess juice if necessary before assembling to prevent sogginess.
- Whip the cream just before serving to maintain its light, fluffy texture. Keep it refrigerated and covered for up to 6 hours; re-whip briefly if it softens.
- Assembled cake can be refrigerated for 2-3 hours, which helps set the layers and meld the flavors, but avoid overnight storage to prevent the cake from becoming soggy.
- Reheat or refresh the cake slightly by letting it sit at room temperature for 10–15 minutes before serving. The strawberries will be juicier, and the cream will be at its best flavor and texture.
Top questions about strawberry shortcake layer cake
1. How do I get the strawberries to taste brighter and juicier?
Use ripe, fragrant strawberries, and macerate them with sugar and lemon juice to enhance their juice and aroma.
2. What’s the trick to perfect whipped cream for this cake?
Whip the cream until soft peaks form, keeping everything cold, and stop just before it turns buttery.
3. How do I keep the sponge layers even and flat?
Level the sponge layers with a serrated knife to ensure the cake stacks evenly and looks tidy.
4. How long should I chill the cake before serving?
Chill the assembled cake for at least an hour to let the layers set and flavors meld before slicing.
5. How can I tell if my sponge layer is baked properly?
Use fresh, soft, and springy sponge; overbaked or dense sponge will make the cake heavy and less tender.
6. Can I make this cake dairy-free?
Replace heavy cream with coconut cream for a dairy-free version; it whips up rich and creamy but can be slightly less stable.
7. What flavor boosters can I add to the cream or strawberries?
Add a splash of vanilla extract or a hint of almond for extra flavor; keep it subtle so it doesn’t overpower the strawberries.
8. What can I prepare ahead of time for this cake?
Make the sponge a day before and store wrapped at room temperature or refrigerated; prepare strawberries and cream just before assembly.
9. How do I fix a soggy cake layer?
If the cake is too moist or soggy, lightly dust the layers with a bit of crushed biscuit or shortbread crumbs to absorb excess juice.
10. What’s the best way to handle overly juicy strawberries?
When strawberries release too much juice, strain some before layering to keep the cake from becoming wet and messy.
This cake is a reminder that the simplest ingredients—fresh strawberries, good cream, tender sponge—can come together in a way that feels both nostalgic and special. It’s not about perfection but about celebrating the imperfect, juicy burst of summer in every bite.
Sharing this layered strawberry shortcake feels like passing down a little piece of sunshine. It’s perfect for casual gatherings or just a quiet moment of indulgence when you need a sweet, fruity pause in your day.

Hello, I’m Oliver James, the person behind Melting Into Flavors. Cooking is my greatest passion, and it’s been the driving force in my life for as long as I can remember.
It’s not just about food for me; it’s about creating experiences, connecting with others, and sharing the love I have for what’s on the plate. Through this blog and my café, I’m able to share my journey with all of you and hopefully inspire some of your own culinary adventures along the way.


