This no-bake chocolate almond bars recipe is my lazy weekend fallback, but it’s also a secret weapon for when friends drop by unannounced. I love how quick it is to throw together, especially when the pantry’s running low but I still crave that rich, gooey chocolate with a satisfying crunch of almonds.
What makes this recipe stand out is how it taps into childhood nostalgia—those candy aisle moments where everything felt a little more indulgent. The combination of dark, slightly bitter chocolate and toasted almonds is just enough to make you pause, savor, and forget about the fuss of baking. It’s honest, simple, and feels like a little treat I can always rely on.
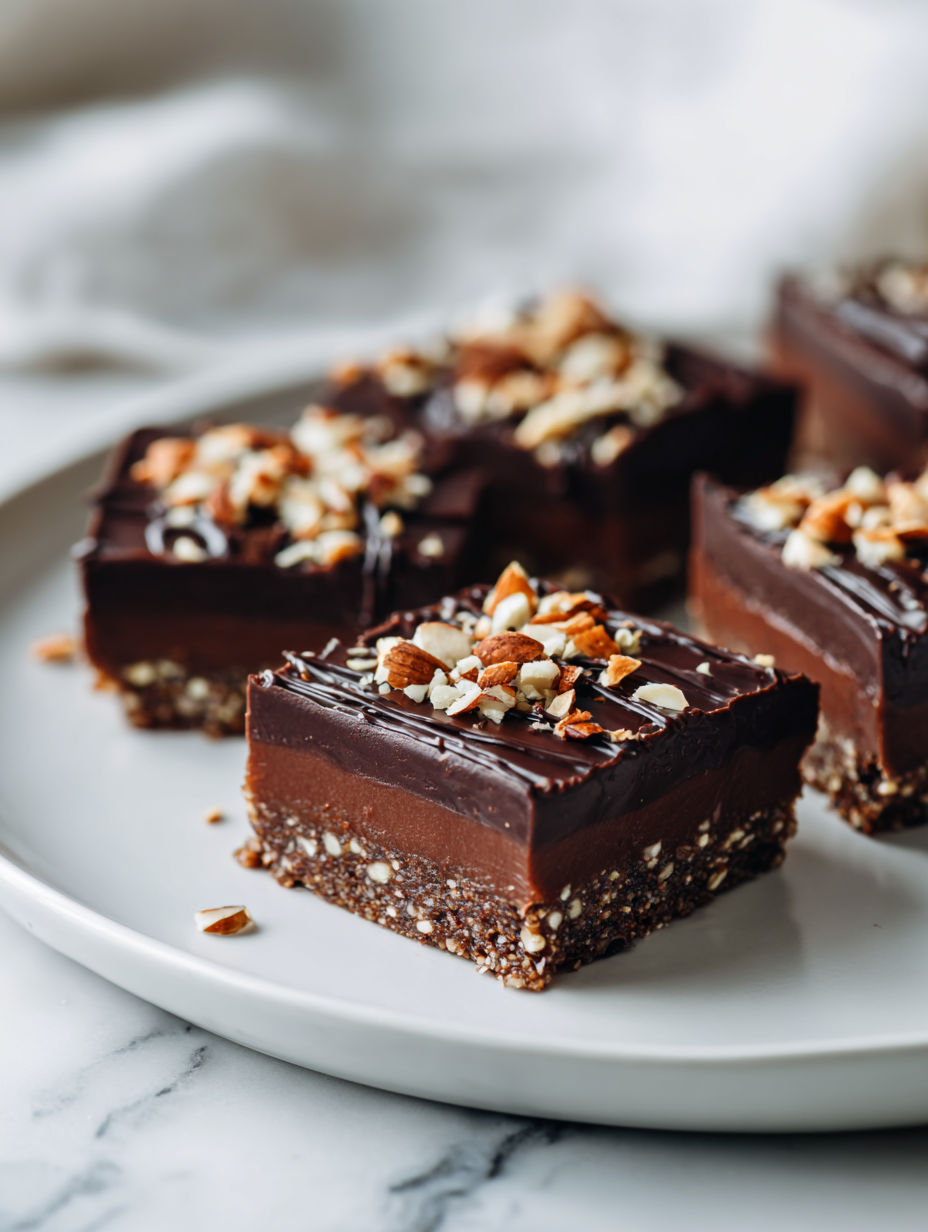
Transforming a simple no-bake treat into a nostalgic walk down my childhood candy aisle, where crunchy almonds and gooey chocolate made everything feel a little more special.
The story behind this recipe
- This recipe came together on a rainy afternoon when I was craving something sweet but didn’t want to turn on the oven. I remembered my grandma’s quick chocolate treats, and I started experimenting with almonds and dark chocolate, trying to keep it simple but satisfying. It’s funny how sometimes the best ideas come from just rummaging through the pantry in a hurry.
- Every time I make these, I think of childhood afternoons spent sneaking bites of my mom’s homemade chocolate bark. It’s that perfect combo of salty, sweet, and crunchy that seems to hit the spot no matter what mood I’m in. Plus, they’re so easy I can make them in my sleep now—literally, I’ve memorized the steps.
- heading: The story behind this recipe
Ingredient breakdown: key components
- Dark chocolate: I prefer a rich, semi-sweet bar that melts smoothly and has that deep, cocoa aroma. You can swap in milk chocolate if you want it sweeter, but the flavor won’t be as intense and the texture a bit creamier.
- Almonds: Toasted almonds add a nutty crunch I love. If you’re allergic or out, chopped hazelnuts or walnuts work well, though they bring a slightly different flavor profile. The toasting is key—brings out that smoky aroma.
- Butter: I use unsalted butter for control over saltiness, but margarine can work if you’re dairy-free. It melts faster, and the bars set more firmly, so don’t skip it. Keep it at room temp for easy mixing.
- Sweetener: I rely on honey for a touch of floral sweetness and stickiness that helps hold everything together. Maple syrup is a good substitute if you want a more caramel note, but avoid overly runny syrups that won’t set well.
- Vanilla extract: A splash of vanilla brightens the chocolate and adds warmth. Skip it if you’re out, but it’s a small step that makes a big difference in depth of flavor.
- Salt: Just a pinch, enhances everything. If you don’t have sea salt, a tiny bit of flaky salt on top after setting adds a lovely crunch and contrast to the sweetness.
Spotlight on key ingredients
Dark chocolate:
- I love a rich, semi-sweet bar that melts smoothly and smells deep and cocoa-y. Swap with milk chocolate for a sweeter, creamier result, but keep an eye on the melt—less cocoa, more sugar.
- Almonds: Toasted almonds bring a smoky crunch that’s hard to beat. If you’re out, hazelnuts or walnuts are fine, but toast them well to get that same warm aroma. The crunch is what makes these bars special.
Almonds:
- Their texture is firm and satisfying, with a slight oiliness that intensifies when toasted. During melting, they stay crunchy if added at the right moment, but over-toasting can turn them bitter and dry, so watch carefully.
- ingredient
- Almonds
Notes for ingredient swaps
- Dairy-Free: Use coconut oil or dairy-free chocolate. Expect a slightly different melt and a hint of coconut aroma.
- Sweetener: Swap honey for agave syrup or maple syrup. Both will alter the flavor slightly—maple adds a caramel note.
- Nuts: Replace almonds with pistachios or cashews. They give a different crunch and flavor, but still keep it nutty.
- Chocolate: Use milk chocolate if you prefer sweeter, creamier bars. Dark chocolate provides a richer, more intense cocoa flavor.
- Butter: Substitute with coconut oil for a dairy-free option. It might slightly change the richness and texture.
- Salt: Sprinkle sea salt on top or mix in for contrast. Flaky salt adds a satisfying crunch and enhances sweetness.
Equipment & Tools
- Baking pan: Holds and shapes the mixture for easy slicing.
- Microwave-safe bowl: Melts the chocolate evenly without extra dishes.
- Spatula: Stirs the chocolate and spreads the mixture smoothly.
- Parchment paper: Prevents sticking and makes removal easy.
- Sharp knife: Slices the firm chocolate mixture into bars.
Step-by-step guide to no bake bars
- Gather all equipment: a 20×20 cm (8×8 inch) baking pan, microwave-safe bowl, spatula, parchment paper, and a spatula for spreading. Line the pan with parchment for easy removal.
- Melt the chocolate: chop 200g dark chocolate into small pieces to melt evenly. Microwave in 30-second bursts, stirring each time, until smooth and glossy, about 1-2 minutes. (a) Smell that rich cocoa aroma. (b) If chocolate seizes, add a teaspoon of vegetable oil and stir until smooth. (c) If it’s overheated and thickens, add a splash of warm milk to loosen.
- Toast almonds: spread 1 cup sliced almonds on a baking sheet. Bake at 180°C (350°F) for 8-10 minutes until golden and fragrant. (a) Keep an eye to avoid burning. (b) Shake the pan halfway through. (c) Cool slightly before chopping coarsely.
- Combine ingredients: in a bowl, mix the toasted almonds with the melted chocolate. Add 2 tablespoons of honey, 1 teaspoon vanilla extract, and a pinch of sea salt. (a) Stir until everything is coated and sticky. (b) If mixture is too thick, add a teaspoon of coconut oil. (c) Should be glossy and thick enough to hold shape.
- Transfer to pan: pour the mixture into the prepared pan. Use a spatula to spread evenly, pressing down firmly. (a) Smooth the top, ensuring no air pockets. (b) If uneven, tap the pan to settle. (c) The surface should be shiny and slightly tacky.
- Chill: place in the fridge for at least 2 hours, or until firm. (a) If in a hurry, freeze for 30-40 minutes. (b) The chocolate should be set and no longer sticky. (c) The edges should pull away slightly from the pan.
- Cut into bars: once firm, lift the slab out using parchment. Slice into squares with a sharp knife. (a) Wipe knife clean between cuts. (b) Aim for clean, neat edges. (c) The texture should be firm but slightly crumbly at edges.
- Finish and serve: optionally, sprinkle a pinch of flaky salt on top. Store in an airtight container in the fridge for up to a week. For best texture, serve slightly chilled, not cold.
Chill the bars in the fridge for at least 2 hours until set. Slice into squares, sprinkle with flaky salt if desired, and serve straight from the fridge or at room temperature for softer texture.
How to Know It’s Done
- Chocolate is glossy and fully melted without lumps.
- Almonds are toasted and fragrant, with a golden hue.
- Bars are firm and hold shape after chilling.
No-Bake Chocolate Almond Bars
Ingredients
Equipment
Method
- Line your baking pan with parchment paper to prevent sticking and set it aside.
- Spread the sliced almonds on a baking sheet and toast in a preheated 180°C (350°F) oven for 8-10 minutes until they’re golden and fragrant. Shake the pan halfway through to ensure even toasting. Once done, let them cool slightly before roughly chopping or leaving whole, depending on your preference.
- Place the chopped dark chocolate in a microwave-safe bowl. Microwave in 30-second bursts, stirring after each, until the chocolate is smooth, glossy, and fully melted—about 1-2 minutes total. If the chocolate seizes, stir in a teaspoon of warm milk or vegetable oil to loosen it up.
- Add the toasted almonds, honey, vanilla extract, and a pinch of sea salt to the melted chocolate. Gently fold everything together with a spatula until the mixture is evenly coated and sticky, with a glossy appearance.
- Pour the mixture into the prepared parchment-lined pan. Use the spatula to spread it out evenly, pressing down firmly to compact the mixture and create a smooth surface. Tap the pan lightly on the countertop to release any air bubbles and settle the mixture.
- Place the pan in the fridge and chill for at least 2 hours, or until the bars are firm and set. If you're short on time, you can freeze them for about 30 minutes to speed up the process.
- Once set, lift the block out of the pan using the parchment paper. Place on a cutting board and use a sharp knife to slice into 12 even bars or squares. Wipe the knife clean between cuts for neat edges.
- Optional: sprinkle a tiny pinch of flaky sea salt on top of each bar for extra flavor and crunch. Serve immediately or store in an airtight container in the fridge for up to a week. For softer texture, let the bars sit at room temperature for 5 minutes before enjoying.
Pro Tips for Perfect Bars
- Bolded Mini-Head: Melt chocolate gradually → Use short bursts in the microwave to prevent overheating and seize.
- Bolded Mini-Head: Toast almonds until fragrant → Keep a close eye to avoid burning and maximize flavor.
- Bolded Mini-Head: Chill in stages → Refrigerate for at least 2 hours, or freeze for 30 minutes, for crisp edges.
- Bolded Mini-Head: Spread mixture evenly → Tap the pan lightly to settle the chocolate and create a smooth surface.
- Bolded Mini-Head: Use parchment for easy removal → Line your pan thoroughly to avoid sticky cleanup and perfect edges.
- Bolded Mini-Head: Add a pinch of salt on top → Enhances the chocolate’s richness and adds a satisfying crunch.
- Bolded Mini-Head: Handle sharp knife carefully → Wipe clean between cuts for neat, clean bars.
Common mistakes and how to fix them
- FORGOT to line pan—sticky cleanup ensues. Use parchment to fix it.
- DUMPED too much chocolate—causes greasy bars. Measure accurately.
- OVER-TORCHED chocolate—bitter flavor. Remove from heat immediately.
- FAILED to chill long enough—bars stay soft. Chill at least 2 hours.
Fast fixes for common issues
- When chocolate seizes, splash in a teaspoon of warm milk to loosen it.
- If almonds burn during toasting, reduce oven time or lower temperature slightly.
- Splash a bit of coconut oil if mixture feels too thick or dry during melting.
- Dumped too much chocolate? Add a handful more almonds or a pinch of salt to balance.
- When bars are too soft after chilling, extend the fridge time or freeze for quicker set.
Prep, store, and reheat tips
- Prepare the mixture and line the pan ahead of time. Once set, the bars can be stored for up to a week in the fridge, maintaining their firm, glossy texture.
- Wrap the bars tightly in plastic wrap or store in an airtight container. For longer storage, freeze for up to a month, but expect a slight change in crunch and aroma.
- Refrigerated bars stay fresh and develop a more intense chocolate flavor over time. Let them sit at room temperature for 5-10 minutes before serving for softer texture and richer aroma.
- To reheat, briefly warm in a low oven (around 90°C/200°F) for a few minutes until soft and fragrant, or enjoy straight from the fridge for a cooler, firmer bite.
Top questions about no bake bars
1. Can I use milk chocolate instead of dark?
Use good quality dark chocolate for a rich, glossy melt. Cheaper brands may seize or look dull.
2. Should I toast the almonds beforehand?
Toast the almonds until fragrant and golden. They’ll add smoky depth and crunch to your bars.
3. How long do I need to chill the bars?
Chill the bars for at least 2 hours until firm. They should crack when sliced and hold shape.
4. Do I need to line the pan?
Use parchment paper to line the pan. It makes removal easy and prevents sticking, especially with sticky chocolate.
5. Can I add salt on top?
Add a pinch of flaky sea salt on top after chilling to enhance flavor and add a satisfying crunch.
6. How should I store the bars?
Store in an airtight container in the fridge for up to a week. For longer, freeze for up to a month.
7. What if the chocolate seizes during melting?
If the chocolate seizes, add a teaspoon of warm milk or vegetable oil and stir until smooth.
8. How do I get clean cuts?
Use a sharp knife wiped clean between cuts for neat, clean bars without crumbling edges.
9. Can I serve them soft instead of chilled?
For a softer bite, let the bars sit at room temperature for 5 minutes before serving.
10. What if the mixture is too stiff to spread?
If the mixture is too thick, stir in a small spoon of coconut oil or honey to loosen it up.
Making these no-bake chocolate almond bars is a little ritual I turn to when I need something quick and satisfying. There’s a certain joy in how simple ingredients come together—crunchy almonds, glossy dark chocolate, and a hint of salt—something that feels like a small victory. They’re perfect for those moments when you want a sweet fix without the fuss of baking or waiting.
Honestly, they remind me that sometimes, the best treats are the ones you throw together with what’s in your pantry. No matter the season or occasion, these bars are a dependable, no-nonsense indulgence that I keep coming back to. And maybe that’s what makes them truly special.

Hello, I’m Oliver James, the person behind Melting Into Flavors. Cooking is my greatest passion, and it’s been the driving force in my life for as long as I can remember.
It’s not just about food for me; it’s about creating experiences, connecting with others, and sharing the love I have for what’s on the plate. Through this blog and my café, I’m able to share my journey with all of you and hopefully inspire some of your own culinary adventures along the way.


