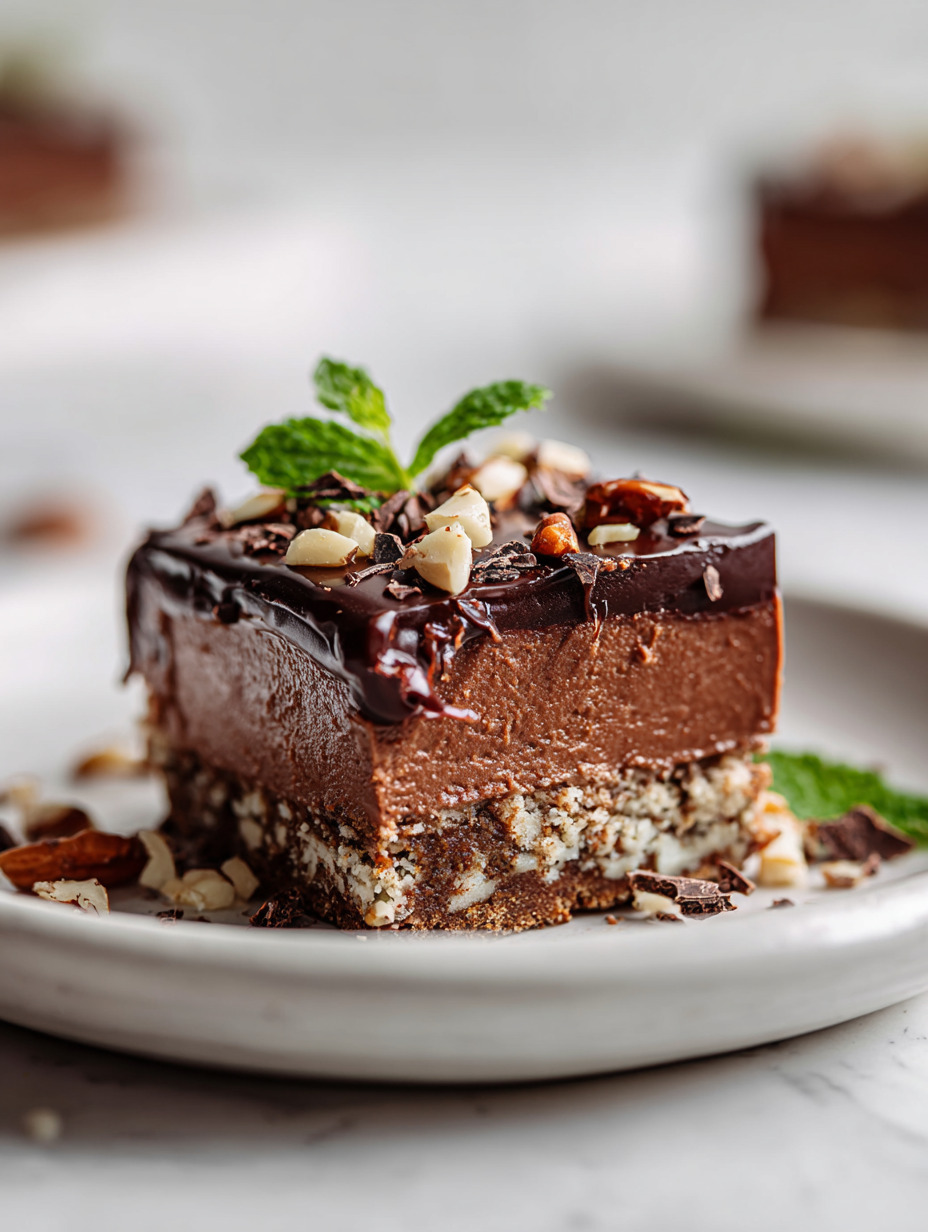
Some days, I just need a break from the chaos of the kitchen — no fancy tools, no precise steps, just something quick and comforting. This no-bake chocolate slice has become my go-to during those moments, a little treat I can whip up with whatever I’ve got lying around. It’s honest, a bit rough around the edges, but always hits that spot of sweet relief.
There’s something about the simplicity of melting chocolate, mixing in some butter and biscuits, and letting it set that feels a bit rebellious in a world obsessed with perfection. It’s not about fuss or finesse; it’s about grabbing a moment of calm, maybe with a cuppa, and enjoying something homemade without the hassle. That nostalgic, unpolished vibe is what keeps me coming back to this recipe.
This slice isn’t fancy, but it’s honest — a reminder that sometimes, the best comfort food is the simplest one. No oven, no complicated ingredients, just a few minutes of effort for a reward that’s rich, crumbly, and just sweet enough. It’s a little bit messy, a little bit imperfect, and that’s exactly why it feels like home.
Focusing on the unpolished, honest notes of a home cook who’s turned to this simple, no-bake treat during chaotic days, emphasizing the comfort and nostalgia it brings without perfection.
The story behind this recipe
I stumbled upon this no-bake chocolate slice during a particularly hectic week when oven time was a luxury I couldn’t afford. It was late, I was exhausted, and I just needed something sweet and straightforward. The idea of melting chocolate and tossing in whatever biscuits I had left in the pantry turned out to be the only thing that kept me sane that night. Turns out, it’s become my secret weapon for quick comfort, and I still keep a stash in the fridge for those chaos days.
Key ingredients and tips
- Dark chocolate: I love that deep, bittersweet richness it brings—look for a good quality bar, it makes all the difference in the melt and flavor. Swap with milk chocolate if you prefer it sweeter, but it loses some depth.
- Butter: I use unsalted because I like control over the salt; it gives the slice a rich, velvety feel. You can try coconut oil for a dairy-free version, which adds a slightly nutty aroma and a softer texture.
- Sweetened condensed milk: This is the glue that holds it together—sweet, sticky, and thick. If you’re out, a good caramel sauce can work in a pinch, but it’ll change the flavor profile quite a bit.
- Biscuits: I reach for plain digestive or graham crackers—crunchy, neutral, and classic. For a nuttier twist, crushed biscuits with added chopped nuts work well. Skip the biscuits altogether for a more fudgy texture.
- Vanilla extract: Just a splash lifts the chocolate flavor and adds warmth. Almond extract can be a lovely substitute if you want a different aromatic edge, but don’t overdo it.
- Sea salt: A pinch enhances the chocolate’s complexity—think of it as a flavor amplifier. Flaky sea salt on top right before setting adds a nice crunchy contrast and shimmer.
- Optional extras: I sometimes toss in chopped nuts, dried fruit, or a sprinkle of coconut for texture. Keep it simple or make it your own—either way, it’s forgiving and flexible.
Spotlight on key ingredients
Key ingredients and tips:
- Dark chocolate: I love that deep, bittersweet richness it brings—look for a good quality bar, it makes all the difference in the melt and flavor. Swap with milk chocolate if you prefer it sweeter, but it loses some depth.
- Butter: I use unsalted because I like control over the salt; it gives the slice a rich, velvety feel. You can try coconut oil for a dairy-free version, which adds a slightly nutty aroma and a softer texture.
- Sweetened condensed milk: This is the glue that holds it together—sweet, sticky, and thick. If you’re out, a good caramel sauce can work in a pinch, but it’ll change the flavor profile quite a bit.
Ingredient substitution options
- Dairy-Free: Swap the butter for coconut oil or vegan margarine. It won’t be as rich, but still satisfying.
- Chocolate: Use milk or white chocolate if you prefer a sweeter, creamier flavor. Adjust sweetness accordingly.
- Sweetened Condensed Milk: Try coconut condensed milk or caramel sauce for a different, tropical or caramel note.
- Biscuits: Swap digestives for graham crackers or even crushed cookies like Oreos for a richer, chocolatey crunch.
- Nuts & Add-ins: Add chopped almonds, dried fruit, or coconut flakes. Feel free to skip for a cleaner, simpler slice.
- Sweetener: Use honey or maple syrup in place of condensed milk if you want a more natural sweetness. Expect a softer set.
- Flavor Boost: A splash of espresso or a pinch of chili powder can add depth and a subtle kick. Use sparingly!
Equipment & Tools
- 20cm (8-inch) square baking dish: To set and chill the slice in an even layer.
- Saucepan: For melting chocolate and butter gently.
- Mixing spoon and spatula: To stir, fold, and smooth the mixture.
- Parchment paper: For lining the dish to prevent sticking and aid removal.
- Sharp knife: To cut clean, precise slices.
Step-by-step guide to no-bake chocolate slice
- Gather your equipment: a 20cm (8-inch) square baking dish, a saucepan, a mixing spoon, and a spatula. The dish is for setting, the saucepan for melting, and the spoon/spatula for mixing.
- Line the baking dish with parchment paper, leaving a little overhang for easy removal later. This helps with clean slicing.
- Chop 200g (7 oz) of dark chocolate into small pieces. Smaller pieces melt faster and more evenly, reducing the risk of burning.
- Melt the chocolate: place in saucepan over low heat (about 50°C/122°F). Stir constantly. Or, use a double boiler if you prefer gentle, even heat.
- Add 100g (7 tbsp) unsalted butter to the melted chocolate. Stir until smooth and shiny. This will give your slice a rich, velvety texture.
- Stir in 1 can (395g/14 oz) sweetened condensed milk until fully incorporated. It thickens the mixture and adds sweetness and stickiness.
- Crush 200g (7 oz) of digestive biscuits or graham crackers into small chunks. You want a mix of fine crumbs and some slightly larger pieces for texture.
- Fold the crushed biscuits into the chocolate mixture. Mix gently but thoroughly, ensuring every piece gets coated.
- Pour the mixture into the prepared dish. Smooth the top with the spatula, pressing gently to level out the surface and ensure no air pockets.
- Refrigerate for at least 3 hours, or until set. For best results, leave it overnight. The slice should be firm and with a crackly top when ready.
- Remove from fridge. Use the overhang to lift the slice out of the dish. Slice into squares or rectangles with a sharp knife.
- Serve immediately, or store in an airtight container in the fridge for up to a week. Keep it chilled to prevent melting or softening.
Refrigerate the slice until fully firm, at least 3 hours or overnight. Use the parchment overhang to lift it out, then cut into squares. Serve directly from the fridge for best texture, with a glass of milk or a hot cup of tea.
How to Know It’s Done
- Chocolate mixture is smooth and glossy before pouring.
- The mixture firms up with a crackly, shiny top after chilling.
- Slice holds together firmly when cut, with clean edges.
No-Bake Chocolate Slice
Ingredients
Equipment
Method
- Line your baking dish with parchment paper, leaving overhang on the sides for easy removal.
- Place the chopped dark chocolate and butter in a saucepan over very low heat. Stir gently and constantly until both are melted and the mixture is smooth and glossy, filling your kitchen with a rich chocolate aroma.
- Remove the saucepan from heat and stir in the sweetened condensed milk and vanilla extract until fully combined, making the mixture thick and shiny.
- Gently fold in the crushed digestive biscuits, ensuring they’re evenly coated with the chocolate mixture. The texture should start to feel sticky and crumbly.
- Pour the mixture into your prepared dish, spreading it out evenly with a spatula. Press down gently to settle and smooth the surface.
- Sprinkle a pinch of sea salt on top, if using, for that subtle salty contrast, and add a few flakes of flaky sea salt for a finishing touch.
- Refrigerate the slice for at least 3 hours, or preferably overnight, until it’s firm and crackly on top.
- Once set, lift the slice out of the dish using the parchment overhang. Place it on a cutting board and, with a sharp knife, cut into squares or rectangles.
- Serve immediately, or store in an airtight container in the fridge for up to a week. Enjoy the rich, crumbly texture with a cup of tea or glass of milk.
Pro tips for perfect no-bake slice
- Use high-quality chocolate for a richer flavor and smoother melt.
- Melt chocolate slowly over low heat to prevent burning and seize.
- Mix in crushed biscuits quickly to keep the texture crumbly but cohesive.
- Chill the slice until firm—at least 3 hours or overnight for best setting.
- Use parchment paper to lift the slice easily without cracking or crumbling.
- Add a sprinkle of flaky sea salt just before setting for a surprising pop of flavor.
- Incorporate chopped nuts or dried fruit for texture variation and extra indulgence.
Common mistakes and how to fix them
- FORGOT to temper chocolate → Melt slowly over low heat to prevent seizing.
- DUMPED in all ingredients at once → Add ingredients gradually, mixing well after each addition.
- OVER-TORCHED mixture → Remove from heat immediately if chocolate or butter shows signs of burning.
- FAILED to line pan → Always line with parchment for easy removal and clean slices.
Quick Fixes for Common Issues
- When chocolate seizes, splash in a teaspoon of vegetable oil to smooth it out.
- If mixture is too thick, gently warm it for 10 seconds in microwave, then stir.
- Dumped in ingredients prematurely? Chill the mixture for 10 minutes before mixing again.
- Over-torched chocolate? Patch with a tablespoon of butter and stir until glossy.
- Shield the slice from moisture by wrapping tightly; shimmer may fade but flavor stays rich.
Prep, store, and reheat tips
- Prepare the mixture in advance: melt chocolate and butter, then combine with biscuits; keep refrigerated for up to 24 hours for convenience.
- Store the finished slice in an airtight container in the fridge; it stays fresh for up to a week, maintaining its firm yet crumbly texture.
- Refrigerate the slice until fully set, at least 3 hours or overnight; the chocolate should be crackly and firm to the touch.
- For reheating, serve slices straight from the fridge; if you prefer slightly softer, warm briefly in a microwave for 5-10 seconds, observing a shiny, oozy surface.
Top questions about no bake chocolate slice
1. Can I use different chocolate types?
Use good quality dark chocolate for the best flavor and smooth melting. Milk chocolate is sweeter but less intense.
2. Can I make it dairy-free?
Yes, yes! Coconut oil can replace butter for a dairy-free version, giving it a softer, slightly nutty texture.
3. How do I know when it’s set?
Chill the mixture until firm, about 3 hours or overnight. It should crackle when you slice and hold together well.
4. How do I get clean slices?
Use a sharp knife and wipe it clean between cuts. For clean edges, refrigerate slices before cutting.
5. How long does it keep?
Store in an airtight container in the fridge for up to a week. For longer storage, freeze for up to a month.
6. My mixture is too thick, what can I do?
If the mixture is too thick, gently warm it in the microwave for 5 seconds, then stir until smooth.
7. What if the chocolate seizes?
If the chocolate seizes, add a teaspoon of vegetable oil and stir until glossy again.
8. Can I add other ingredients?
Use crushed biscuits with some larger chunks for texture. Try adding chopped nuts or dried fruit for variety.
9. How do I reheat or soften slices?
For a softer, creamier slice, serve straight from the fridge or warm it slightly for a few seconds.
10. Do I need to line the pan?
Always line your pan with parchment paper. It prevents sticking and makes lifting out the slice easier.
This no-bake chocolate slice might not win beauty contests, but it’s a testament to the beauty of simplicity. Sometimes, the best comfort comes from something that’s honest, a little rough around the edges, and packed with nostalgic flavor. It’s a reminder that in the chaos of life, a quick, homemade treat can bring a moment of calm and a lot of satisfaction.
Whenever I need a sweet escape without the fuss, this slice delivers. It’s imperfect, it’s messy, and it’s exactly what I need to keep going. No matter how busy or chaotic things get, it’s always waiting in the fridge, ready to be enjoyed with a quiet smile.

Hello, I’m Oliver James, the person behind Melting Into Flavors. Cooking is my greatest passion, and it’s been the driving force in my life for as long as I can remember.
It’s not just about food for me; it’s about creating experiences, connecting with others, and sharing the love I have for what’s on the plate. Through this blog and my café, I’m able to share my journey with all of you and hopefully inspire some of your own culinary adventures along the way.


