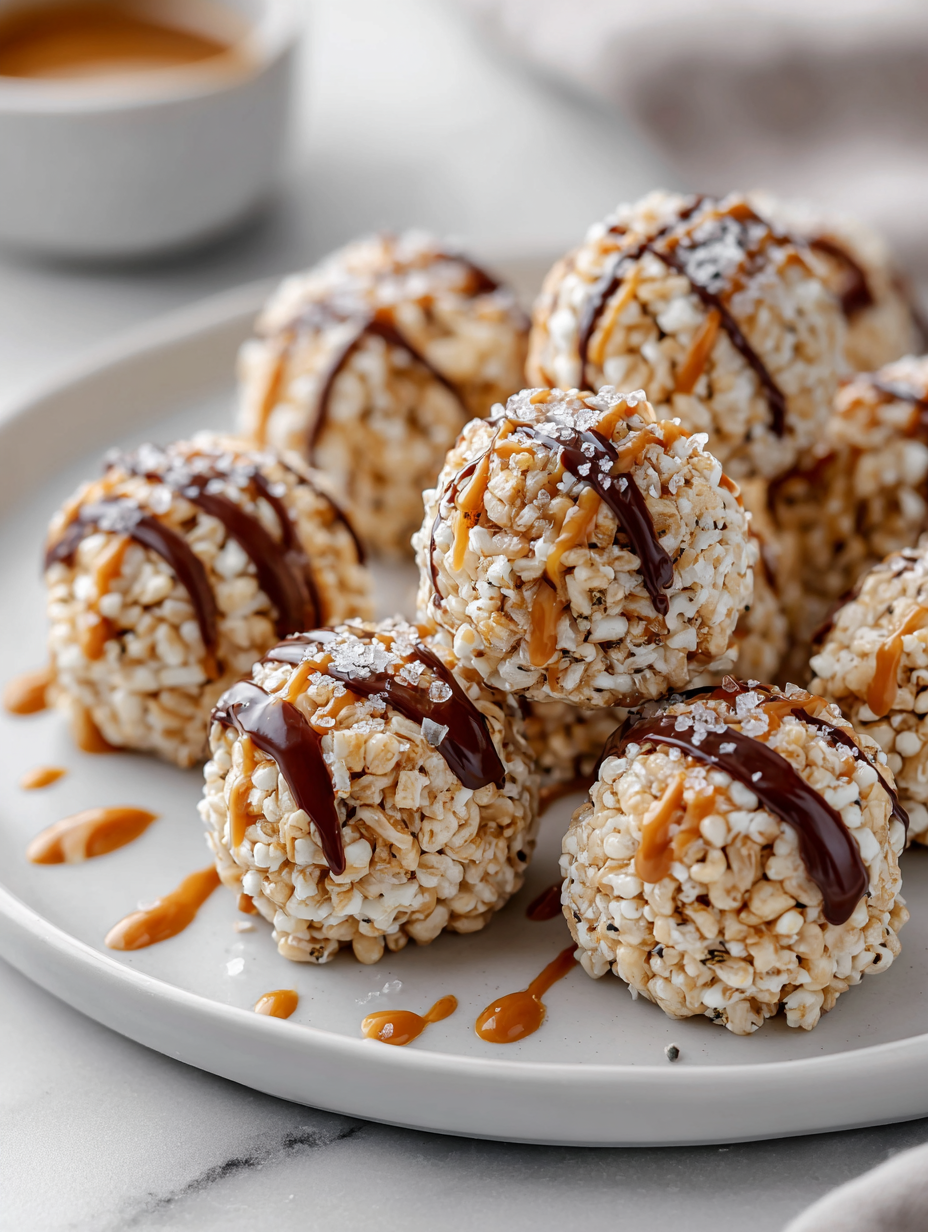
This no bake Rice Krispie bites recipe sneaks in a little sophistication by adding a crispy touch of toasted sea salt and nuts, transforming a childhood favorite into a more grown-up snack. It’s the kind of treat that feels indulgent but is quick enough to whip up when the sweet tooth hits unexpectedly. I love how simple ingredients come together with just a bit of stirring and patience.
There’s something about the crunch of toasted nuts and the gentle shimmer of sea salt that makes these bites stand out from the usual. They remind me of lazy afternoons in the kitchen, where comfort food gets a little upgrade without losing its nostalgic charm. Plus, no oven means I can make them anytime, even when the weather’s too hot for baking.
These bites are perfect for when friends drop by or when you need a sweet fix without the fuss. They’re unpolished, honest, and just a little special—something that fits into real life, not a perfect picture. Sometimes, the simplest recipes are the ones that stick around the longest.
This recipe is inspired by childhood nostalgia but with a twist: incorporating unexpected savory elements like sea salt and toasted nuts to elevate the simple, sweet treat into a more complex, satisfying bite.
A nostalgic crunch with a savory twist
- Making these bites takes me back to childhood afternoons—crunchy, sweet, and just the right amount of salty.
- I love how a handful of ingredients can come together so quickly, turning into something secretly satisfying.
- There’s a quiet relief in knowing I can whip these up in minutes, no oven needed, when cravings hit hard.
- Sometimes, I find myself sneaking an extra one just to hold onto that nostalgic crunch a little longer.
The story behind this recipe
- This recipe came from a lazy weekend afternoon when I was craving something sweet but didn’t want to turn on the oven. I remembered how my grandma used to make these simple treats with just a handful of pantry staples, and I thought, why not put my own spin on it? The crunch, the salty-sweet combo—it’s a reminder of childhood afternoons, but with a little more flavor complexity.
- One day, I was experimenting with adding toasted nuts and a pinch of sea salt to elevate the usual Rice Krispie bites. The moment I mixed everything together and pressed it into the pan, I knew I’d stumbled on something special. It’s funny how a simple twist can turn a familiar snack into a more satisfying, crave-worthy bite.
- heading: ‘The story behind this recipe’
Historical and Fun Facts
- These no-bake treats originated in mid-20th century America, as a quick dessert for busy households.
- The original Rice Krispie recipe was developed by Kellogg’s in the 1930s to promote their cereal.
- Adding savory elements like sea salt and toasted nuts is a modern twist that reflects current flavor trends.
- Historically, these bites were a popular school lunchbox snack, cherished for their simplicity and portability.
- They became a symbol of comfort food, often associated with family gatherings and childhood memories.
Component insights for perfect bites
- Rice Krispies: They’re the backbone of this treat, offering that iconic crunch that’s both airy and satisfying. Make sure to use fresh, crispy cereal for the best texture, or they can turn soggy faster.
- Marshmallows: I prefer the classic white ones—they melt smoothly and bring that gooey sweetness. If you want a richer flavor, try toasted marshmallows for a smoky undertone, but be quick with stirring.
- Butter: It’s the secret to that shiny, cohesive mixture. I use unsalted for control, but salted butter adds a subtle depth—just watch the salt level if you’re salty-savvy.
- Nuts: Toasted almonds or pecans add crunch and a touch of savory. If allergies are a concern, shredded coconut or crispy rice can stand in, but they won’t give you that nutty punch.
- Sea salt: Just a pinch lifts everything—think of that tiny burst of ocean breeze. Finer salt dissolves better, so sprinkle lightly and taste before adding more.
- Add-ins (optional): Chocolate chips or dried fruits can personalize these bites. I like semi-sweet chocolate for richness, but milk chocolate melts too quickly—add it last and work fast.
Spotlight on key ingredients
Marshmallows:
- Rice Krispies: They’re the backbone of this treat, offering that iconic crunch that’s both airy and satisfying. Make sure to use fresh, crispy cereal for the best texture, or they can turn soggy faster.
- I prefer the classic white ones—they melt smoothly and bring that gooey sweetness. If you want a richer flavor, try toasted marshmallows for a smoky undertone, but be quick with stirring.
- Butter: It’s the secret to that shiny, cohesive mixture. I use unsalted for control, but salted butter adds a subtle depth—just watch the salt level if you’re salty-savvy.
Sea salt:
- Nuts: Toasted almonds or pecans add crunch and a touch of savory. If allergies are a concern, shredded coconut or crispy rice can stand in, but they won’t give you that nutty punch.
- Just a pinch lifts everything—think of that tiny burst of ocean breeze. Finer salt dissolves better, so sprinkle lightly and taste before adding more.
Notes for ingredient swaps
- Dairy-Free: Swap butter for coconut oil or a neutral plant-based butter. Expect a slightly richer, tropical flavor.
- Vegan Marshmallows: Use vegan marshmallows or melt coconut cream with a touch of maple syrup for sweetness.
- Gluten-Free: Ensure cereal is certified gluten-free; many brands now cater to this need without sacrificing crunch.
- Sweetener Variations: Honey or agave syrup can replace marshmallows for a different sticky, floral note. Use sparingly to avoid sogginess.
- Nut Alternatives: Shredded coconut, crispy rice, or seeds can replace toasted nuts for crunch and flavor. Expect different textures and flavors.
- Salt: Sea salt flakes add a crunch and burst of oceanic brightness, but regular fine salt works fine if you prefer milder saltiness.
Equipment & Tools
- Large mixing bowl: To hold and mix the ingredients.
- Saucepan: To melt butter and marshmallows evenly.
- Spatula: To stir and fold ingredients gently.
- 8×8 inch baking dish: To press and set the mixture into bites.
- Sharp knife: To cut the set mixture into bites.
Step-by-step guide to no bake Rice Krispie Bites
- Gather your equipment: a large mixing bowl, a saucepan, a spatula, and a baking dish (8×8 inch or similar).
- In the saucepan, melt 3 tablespoons of butter over low heat. Keep the heat gentle to avoid browning.
- Once melted, add 10 oz of marshmallows. Stir constantly until fully melted and smooth. This takes about 2-3 minutes; smell the sweet, gooey aroma.
- Remove from heat. Immediately add 6 cups of Rice Krispies cereal. Gently fold to coat all the cereal evenly, ensuring no marshmallow clumps remain. The mixture should be glossy and sticky.
- If using, toast ½ cup of nuts in a dry skillet over medium until fragrant and slightly golden, about 3-4 minutes. Let cool slightly before adding to mixture to prevent sogginess.
- Mix in the toasted nuts (if using) and a pinch of sea salt (about ¼ teaspoon). Stir well to distribute evenly.
- Transfer the mixture to the prepared baking dish. Use a spatula or lightly greased hands to press down firmly and evenly, about 1 inch thick. The surface should be smooth and compact.
- Allow the bites to set at room temperature for at least 30 minutes. For quicker setting, refrigerate for 15-20 minutes. They should feel firm and hold their shape when pressed gently.
- Once set, cut into 12-16 squares or bites. Use a sharp knife, and wipe it clean between cuts for neat edges. These bites are best enjoyed fresh but keep well in an airtight container for up to 3 days.
Let the bites rest at room temperature for at least 30 minutes or refrigerate for 15-20 minutes until firm. Cut into desired shapes and serve immediately or store in an airtight container for up to 3 days.
How to Know It’s Done
- Mixture is glossy and sticky before pressing into the pan.
- Surface is smooth and compact after pressing, with no loose cereal visible.
- Bites are firm and hold shape when gently pressed after resting.
Sweet & Savory No-Bake Rice Krispie Bites
Ingredients
Equipment
Method
- Gather all your equipment and ingredients before starting to keep the process smooth and enjoyable.
- In a large saucepan, melt the butter over low heat, gently swirling until it’s completely melted and fragrant, about 2 minutes.
- Add the marshmallows to the melted butter, stirring constantly with a spatula until they are fully melted and the mixture is smooth and bubbly, filling the air with a sweet, toasted aroma.
- Remove the saucepan from the heat and immediately add the Rice Krispies cereal. Gently fold everything together until the cereal is evenly coated and the mixture has a shiny, sticky appearance.
- If using nuts, toast them in a dry skillet over medium heat until golden and fragrant, about 3-4 minutes. Let them cool slightly before roughly chopping or leaving whole, then mix into the cereal blend.
- Sprinkle the sea salt over the mixture and gently stir to distribute evenly, balancing sweet and savory flavors with a delicate shimmer of salt.
- Transfer the mixture into an 8x8 inch baking dish, pressing down firmly with a spatula or greased hands to create an even, compact layer about 1 inch thick.
- Let the bites cool at room temperature for at least 30 minutes until they feel firm and hold their shape when pressed. For quicker setting, refrigerate for 15-20 minutes.
- Once set, use a sharp knife to cut into 12-16 squares or bites, wiping the blade clean between cuts for neat edges.
- Enjoy these crunchy, sweet, and salty bites immediately, or store in an airtight container at room temperature for up to 3 days for maximum freshness.
Pro tips for perfect bites
- Bold cereal: Gently shake the box before measuring to ensure crispiness and avoid soggy clumps.
- Melt marshmallows: Use low heat and stir constantly to achieve a smooth, oozy texture without browning.
- Toast nuts: Keep a close eye and stir frequently to prevent burning and develop a smoky aroma.
- Press firmly: Use a spatula or greased hands to press mixture into the pan, ensuring even, compact bites.
- Cool completely: Let the bites rest at room temperature to set properly, avoiding sticking or crumbling.
- Cut cleanly: Wipe your knife between cuts for neat edges and prevent sticking or tearing.
- Add salt last: Sprinkle sea salt after mixing to enhance flavor without dissolving into the marshmallow goo.
Common mistakes and how to fix them
- FORGOT to level the cereal mixture? Gently press again for an even bite.
- DUMPED too many marshmallows? Add a little more cereal to balance sweetness and texture.
- OVER-TORCHED the marshmallows? Start fresh with new marshmallows to avoid bitterness.
- MISSED the salt sprinkle? Lightly dust after mixing for a flavor boost.
Quick fixes and pantry swaps
- When mixture is too sticky → Splash a little more melted marshmallows and fold quickly.
- If cereal feels soggy → Patch with a sprinkle of fresh cereal and press down firmly.
- When bites crumble → Shield with a light spray of cooking spray before cutting.
- If marshmallows are over-torched → Rescue with fresh marshmallows and re-melt gently.
- When flavor feels dull → Swap regular sea salt with flaky sea salt for a shimmer of brightness.
Prep, store, and reheat tips
- Prepare the mixture up to a day in advance; keep it covered at room temperature to maintain stickiness.
- Store the assembled bites in an airtight container at room temperature for up to 3 days; they remain chewy and flavorful.
- For longer storage, refrigerate for up to 1 week, but expect the bites to become slightly firmer and less gooey.
- Reheat briefly in the microwave—about 10 seconds—until slightly warm and fragrant, then enjoy the soft, melty texture with a crunch.
- Sensory tip: watch for a slight shine on the surface when fresh; if dull, they might be drying out, so reheat or serve sooner.
Top questions about Rice Krispie Bites
1. How do I keep the bites crunchy?
Use fresh, crispy cereal for the best crunch. Old cereal can turn soggy faster.
2. How do I melt marshmallows properly?
Gently melt marshmallows over low heat, stirring constantly until smooth and gooey without browning.
3. How do I make sure the bites hold together?
Press mixture firmly into the pan using a spatula or greased hands for even, compact bites.
4. How long should I let the bites set?
Allow the mixture to set at room temperature for at least 30 minutes for the best firmness.
5. Can I add other ingredients?
You can customize with chocolate chips, dried fruits, or different nuts for variety.
6. How should I store the bites?
Store in an airtight container at room temperature for up to 3 days or refrigerate for longer freshness.
7. How do I reheat the bites?
Reheat briefly in the microwave for about 10 seconds to soften and make them gooey again.
8. How do I get clean cuts?
To prevent sticking, wipe your knife clean between cuts and use a sharp blade.
9. What if my mixture is too sticky?
If mixture feels too sticky, add a little more cereal or marshmallows to balance the texture.
10. Can I use different salt types?
Using flaky sea salt as a finishing touch enhances flavor and adds a slight crunch.
These no-bake Rice Krispie Bites are a reminder that simple ingredients can create something unexpectedly satisfying. They’re perfect for a quick sweet fix or a casual get-together, offering crunch and salty-sweet balance in every bite. Sometimes, it’s these unpolished treats that make the best memories, no oven required.
In a world of fancy desserts, there’s comfort in the straightforward, honest crunch of these bites. They keep well in the fridge, ready when you need a little nostalgic sweetness or a last-minute snack. And honestly, once you get the hang of customizing them, they might just become your go-to treat for any occasion.

Hello, I’m Oliver James, the person behind Melting Into Flavors. Cooking is my greatest passion, and it’s been the driving force in my life for as long as I can remember.
It’s not just about food for me; it’s about creating experiences, connecting with others, and sharing the love I have for what’s on the plate. Through this blog and my café, I’m able to share my journey with all of you and hopefully inspire some of your own culinary adventures along the way.


