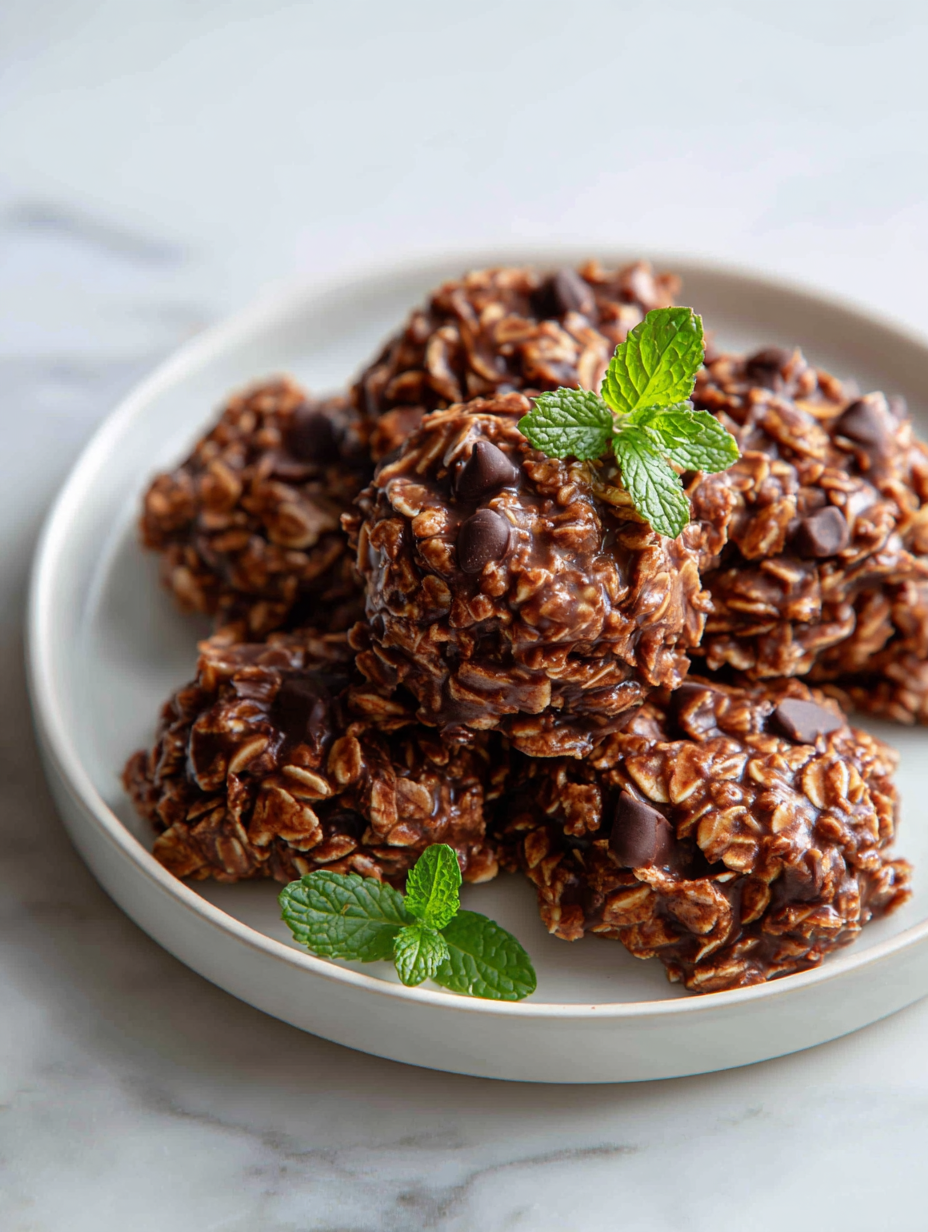
Sometimes, the best desserts are the simplest, especially when you’re short on time or just don’t want to turn on the oven. No Bake Oatmeal Cookies are a lifesaver—quick to whip up, with a chewy, chocolatey charm that hits just right. They’re the kind of treat you can toss together in minutes, then forget about until they’re firm and ready to enjoy.
What I love most is how forgiving this recipe is—no fancy ingredients, no fuss, just basic pantry staples and a little bit of patience. These cookies remind me of lazy afternoons, the smell of melting butter and cocoa filling the kitchen. It’s a small reminder that sometimes, the easiest recipes are the most satisfying, especially when you’re craving something sweet without heating up the house.
This recipe taps into the joy of spontaneous baking—no oven needed, just a quick mix and chill. It’s perfect for those moments when craving something sweet hits hard, but you want to avoid the fuss of baking or heating up the kitchen. I love how these cookies come together with just a handful of pantry staples, making it a go-to when you need a treat, fast.
Spontaneous Sweetness in a Snap
- These cookies are my emergency sweet fix—no oven, no fuss, just instant comfort.
- Baking up a batch feels like a small act of rebellion on lazy weekends, a quick burst of joy.
- I love how the smell of cocoa and oats fills the kitchen, grounding me in simple, honest baking.
- Sharing these cookies with friends brings out a nostalgic smile—reminds me of childhood afternoons.
The story behind this recipe
This recipe came together one chaotic afternoon when I needed a quick treat that wouldn’t heat up the kitchen. I was rummaging through my pantry, looking for something sweet and simple, and remembered how my grandma used to make similar no-bake snacks for us kids. It’s funny how these recipes stick around—comforting, practical, and a little bit rebellious against the oven. Every time I make them, I think of her, the smell of cocoa filling the air, and the way these cookies somehow make everything feel a little calmer, even in the busiest moments.
Historical Tidbits of No Bake Cookies
- These cookies gained popularity during the Great Depression, when pantry staples were all anyone had to work with.
- Invented as a quick fix for sweet cravings without turning on the oven during wartime rationing.
- Originally called ‘No Bake Cookies,’ they became a staple in homes where ovens were scarce or unreliable.
- Modern variations sometimes include peanut butter or coconut, but the classic recipe keeps it simple and nostalgic.
Ingredient breakdown: key components
- Old-fashioned rolled oats: I love their chewy texture and nutty flavor, but steel-cut oats can add a heartier bite if you prefer. Swap oats based on your texture preference.
- Unsweetened cocoa powder: Brightens the cookies with a deep, chocolatey aroma. If you want a milder taste, reduce the cocoa slightly or try Dutch-processed for a smoother finish.
- Butter: It gives richness and helps the mixture hold together. Margarine can be a quick substitute, but it’ll change the flavor slightly—less creamy, more neutral.
- Granulated sugar: Sweetens and helps with the setting process. Brown sugar adds a caramel note; if you skip it, expect a cleaner sweetness but less depth.
- Vanilla extract: I find it amplifies the chocolate flavor and rounds out the sweetness. Use a splash of almond extract for a different aroma twist, but keep it light.
- Milk: I prefer whole milk for richness, but almond or oat milk work fine if you’re dairy-free. Watch the mixture as it heats; plant milks can thicken differently.
- Optional add-ins: I sometimes toss in a handful of chopped nuts or coconut for texture—feel free to experiment based on what you love to snack on.
Spotlight on key ingredients
Cocoa Powder:
- Old-fashioned rolled oats: I love their chewy texture and nutty flavor, but steel-cut oats can add a heartier bite if you prefer. Swap oats based on your texture preference.
- Unsweetened cocoa powder: Brightens the cookies with a deep, chocolatey aroma. If you want a milder taste, reduce the cocoa slightly or try Dutch-processed for a smoother finish.
Butter & Sugar:
- Butter: It gives richness and helps the mixture hold together. Margarine can be a quick substitute, but it’ll change the flavor slightly—less creamy, more neutral.
- Granulated sugar: Sweetens and helps with the setting process. Brown sugar adds a caramel note; if you skip it, expect a cleaner sweetness but less depth.
Notes for ingredient swaps
- Dairy-Free: Swap butter for coconut oil or vegan margarine. Expect a slightly different richness and aroma, but they melt just as smoothly.
- Sweetener Options: Use honey or maple syrup instead of sugar. These add a subtle flavor twist and may affect the setting consistency.
- Oats: Steel-cut oats can be used for a heartier, crunchier bite, but they need a longer soak or grinding to match rolled oats’ chewiness.
- Chocolate: Dark chocolate chips can replace cocoa powder for chunks of melty chocolate, though they’ll add sweetness and texture variation.
- Milk Alternatives: Almond or oat milk work well if you prefer plant-based options. They may alter the mixture’s thickness slightly, so add gradually.
- Flavor Boost: A pinch of cinnamon or espresso powder can deepen the chocolate flavor or add warmth—use sparingly for balance.
- Add-ins: Chopped nuts, dried fruit, or shredded coconut can be mixed in for extra texture and flavor—adjust quantities based on your taste.
Equipment & Tools
- Medium saucepan: To melt ingredients and cook the mixture evenly.
- Wooden spoon or silicone spatula: For stirring and preventing sticking during heating.
- Parchment paper or wax paper-lined tray: To set and cool the cookies without sticking.
Step-by-step guide to no-bake cookies
- Gather your equipment: a medium saucepan, a spoon for stirring, and parchment paper or a baking sheet lined with wax paper for setting the cookies.
- Combine 1/2 cup (115g) unsalted butter, 2 cups (150g) granulated sugar, 1/2 cup (120ml) milk, and 1/4 cup (25g) unsweetened cocoa powder in the saucepan. Heat over medium heat (about 160°C / 320°F) until the butter melts and the mixture starts to boil.
- Once boiling, set a timer for 1 minute. Keep stirring gently to prevent sticking or burning. The mixture should be glossy and slightly thickened after boiling.
- Remove from heat and quickly stir in 1 teaspoon vanilla extract. Then, add 3 cups (240g) old-fashioned rolled oats and stir until well coated. The mixture will become thick and chewy.
- Using a spoon or small cookie scoop, drop spoonfuls onto prepared parchment paper. Flatten slightly if you prefer a more uniform shape. Work quickly before the mixture starts to set.
- Let the cookies sit at room temperature for about 30 minutes to an hour, or until firm. If you’re in a hurry, place them in the fridge for 15-20 minutes.
- Once firm, gently peel the cookies off the parchment paper. They should be chewy with a shiny chocolate coating and a nutty oat texture. Store in an airtight container at room temperature for up to a week or in the fridge for longer freshness.
Allow the cookies to cool and set at room temperature or in the fridge. Once firm, transfer to an airtight container. Serve with a glass of milk or as is for a chewy, chocolatey treat.
How to Know It’s Done
- The mixture reaches a gentle boil with a crackling sound and steam rises steadily.
- After boiling, the mixture is glossy and thickens slightly when stirred.
- Cookies are firm to touch and hold their shape when cooled.
No Bake Oatmeal Cookies
Ingredients
Equipment
Method
- Gather all your ingredients and set up your workspace with parchment paper ready on a tray.
- Combine the butter, sugar, cocoa powder, and milk in a medium saucepan. Turn the heat to medium and stir constantly as the mixture begins to melt and bubble, filling your kitchen with a rich chocolate aroma.
- Let the mixture boil gently for exactly one minute, maintaining a steady simmer while stirring. You'll notice it thickening slightly and becoming glossy, with a crackling sound as it bubbles.
- Remove the saucepan from heat and stir in the vanilla extract. Then, add the oats all at once, folding them into the warm chocolate mixture until they are evenly coated and the mixture becomes thick and sticky.
- Using a spoon or small scoop, drop spoonfuls of the mixture onto your prepared parchment paper. Flatten each cookie slightly with the back of your spoon for a more uniform shape.
- Allow the cookies to sit at room temperature for about 30 minutes to an hour until they firm up, or place them in the fridge for 15-20 minutes to speed up the process.
- Once set and firm, peel the cookies gently from the parchment paper. They will have a shiny, chocolate coating and a chewy, oat-filled interior. Enjoy immediately or store in an airtight container at room temperature for up to a week.
Tips and tricks for perfect cookies
- Bolded mini-head: Use a gentle simmer → Keeps the mixture from scorching and preserves the rich chocolate aroma.
- Bolded mini-head: Stir constantly after boiling → Prevents sticking and ensures even cooking of oats and cocoa.
- Bolded mini-head: Drop cookies quickly → Keeps them from setting too hard, maintaining chewy texture.
- Bolded mini-head: Flatten cookies lightly → Creates an even thickness for uniform setting and easier stacking.
- Bolded mini-head: Chill for set → Enhances firmness, makes cookies easier to handle and store.
- Bolded mini-head: Watch for glossiness → Mixture should be shiny before dropping; dullness means it’s cooled too much.
- Bolded mini-head: Use parchment paper → Prevents sticking and makes cleanup easier, ensuring perfect cookies every time.
Common mistakes and how to fix them
- FORGOT to stir: Scrape the bottom to prevent burning; fix with gentle heat and continuous stirring.
- DUMPED mixture: Add more oats or a splash of milk to loosen; avoid crumbly cookies.
- OVER-TORCHED: Remove from heat immediately; use lower heat next time to prevent a bitter taste.
- MISSED the setting point: Chill longer or add a touch of extra oats to help firm up.
Quick fixes and pantry swaps
- If mixture is too thick, splash in a little more milk and stir until smooth.
- When cookies spread too much, chill the mixture for 10 minutes before scooping.
- Splash a bit of vanilla or coffee extract if the flavor feels dull or flat.
- Patch a crumbly batch by adding a tiny bit of melted butter and mixing well.
- Shield from sticking by using a damp spoon or rinsing it between scoops.
Prep, store, and reheat tips
- You can prepare the cookie mixture a few hours in advance; keep it covered in the fridge to prevent drying out, and give it a quick stir before spooning out.
- Cookies can be stored in an airtight container at room temperature for up to a week, but for longer freshness, refrigerate for up to two weeks. Expect the texture to become slightly denser over time.
- The flavor intensifies as they sit, with a richer chocolate aroma after a day or two—perfect for making ahead for gatherings or busy weeks.
- Reheating isn’t necessary; just give the cookies a few seconds in the microwave if you want them a bit softer or more melty, watching for gooeyness and aroma.
Top questions about no bake cookies
1. Can I use quick oats instead of rolled oats?
Yes, using quick oats will make the cookies chewier and slightly more fragile, but they still hold together well. Just watch the texture.
2. Can I make these vegan?
Absolutely, you can swap coconut oil for butter for a dairy-free version. Expect a slightly different richness and scent, but they’ll still set nicely.
3. My mixture is too runny, what do I do?
If your mixture isn’t thickening properly, try boiling it a little longer or adding an extra splash of oats. Keep stirring for even texture.
4. How long do these cookies last?
Storing cookies in an airtight container at room temp keeps them fresh for about a week. For longer, pop them in the fridge for up to two weeks.
5. Can I reheat these cookies?
To soften cookies that have become too firm, microwave them for 5-10 seconds until they’re chewy again—watch for melting chocolate aroma.
6. Can I customize the add-ins?
Yes, you can add chopped nuts, dried fruit, or shredded coconut to give more texture and flavor. Just fold them in after mixing the oats.
7. Can I prepare the mixture in advance?
Make the mixture ahead of time, cover, and refrigerate. When ready, scoop onto parchment and set either at room temp or in the fridge.
8. What’s the difference between cocoa types?
Using Dutch-processed cocoa gives a smoother, milder chocolate flavor. Natural cocoa is more pungent and slightly more bitter, so choose based on your taste.
9. What if I accidentally burn the mixture?
Over-torched mixture will taste bitter. Remove from heat immediately if you smell a burnt aroma, and start over if necessary.
10. Why aren’t my cookies setting?
If your cookies aren’t firming up, chill them longer or add a few more oats. Patience helps them set properly without cracking.
These cookies are a little slice of childhood comfort, simple and honest in their chocolatey chew. They remind me that sometimes, the best treats need no oven, just a bit of patience and good ingredients.
In times when I need a quick fix or a nostalgic moment, they’re my go-to. No matter the season or the chaos, they offer a small, sweet pause—something to savor and share, just as they are.

Hello, I’m Oliver James, the person behind Melting Into Flavors. Cooking is my greatest passion, and it’s been the driving force in my life for as long as I can remember.
It’s not just about food for me; it’s about creating experiences, connecting with others, and sharing the love I have for what’s on the plate. Through this blog and my café, I’m able to share my journey with all of you and hopefully inspire some of your own culinary adventures along the way.


