I’ve always loved the idea of single-serving desserts, especially when they come in jars. There’s something about digging into your own little container of creamy cheesecake that makes the moment feel more personal, more special—even if it’s just a weeknight treat. No bake means less fuss, less waiting, and more time enjoying the cool, tangy richness that a good cheesecake offers.
This recipe is about stripping down the fuss and focusing on the pure joy of a simple, honest dessert. It’s perfect for when you want something sweet but don’t want to turn on the oven or spend ages cleaning up. Plus, these jars are portable—great for picnics, parties, or just sneaking a spoonful when no one’s looking.
It’s a little rebel move, really. No bake cheesecakes feel like a cozy secret, tucked away in your fridge, ready whenever you need a quick moment of comfort. I love how just a handful of ingredients can turn into something so luscious, so satisfyingly silky, with a bright lemon zest or a swirl of jam to make it feel extra special. It’s honest, straightforward, and undeniably delicious—a small, sweet rebellion against complicated desserts.
Focusing on individual servings, I see these jars as tiny moments of celebration in a busy week. They’re perfect for sharing—if you want—or for stealing a quiet moment alone with something sweet. This recipe is about turning a classic dessert into a portable, no-fuss treat that feels special but is quick to pull together, with no oven needed.
Mini Cheesecake Joys
- These jars remind me of childhood ice cream sundaes, but with a grown-up, tangy twist that makes me smile every time.
- Nothing beats the feeling of pulling these out of the fridge after a long day—cool, creamy, and just sweet enough to lift my mood.
- I love how this recipe lets me indulge without the guilt—no oven, no fuss, just pure cheesecake richness in a portable jar.
Inspiration from Simplicity
- This recipe came from a lazy weekend craving—something creamy, tangy, and portable. I wanted a cheesecake that didn’t demand turning on the oven or fussing with water baths. It’s funny how just a few simple ingredients can turn into something so satisfying, especially when served in tiny jars that feel both casual and a little fancy.
- I first made these for a brunch and was surprised how quickly they disappeared. Since then, they’ve become my go-to for weeknight treats or when I need a quick pick-me-up. They remind me that good things don’t always need to be complicated—that sometimes, simplicity is the real luxury.
- heading: ‘The story behind this recipe’
Historical & Cultural Tidbits
- No bake cheesecakes gained popularity in the 1960s, as convenience foods hit the market and kitchens looked for quick desserts.
- The jars themselves are inspired by traditional French dessert presentation, turning a simple treat into a portable, personal experience.
- Historically, cheesecakes originated in ancient Greece, but the modern no-bake version reflects 20th-century innovations in refrigeration and convenience.
Key Ingredients & Tips
- Cream cheese: I like it at room temp, soft and smooth, so it mixes easily—less lumps, more silkiness. Swap with Greek yogurt if you prefer a tangier, lighter feel.
- Graham cracker crumbs: I toast mine slightly for a richer, nuttier flavor and a crunchier base. Use digestive biscuits for a milder, buttery note.
- Granulated sugar: I prefer superfine for quicker dissolving and a finer crumb. Adjust sweetness if you’re using a sweeter cracker or fruit topping.
- Lemon juice: Brightens everything, makes the cheesecake pop with zing. Skip if you want a more neutral, mellow flavor, but it’s worth it.
- Heavy cream: Whipped to soft peaks, it’s the airy lift that keeps the texture light. Half-and-half can work, but it won’t be as rich and fluffy.
- Vanilla extract: Adds warmth and depth—don’t skip it. Almond extract can add a different aromatic twist if you like.
- Optional toppings: Jam, fresh berries, or a drizzle of chocolate—use what you love, just keep it simple and fresh.
Spotlight on Key Ingredients
Cream cheese:
- I prefer it at room temp, soft and silky, making mixing easier and lumps disappear. Swap with Greek yogurt for a tangier, lighter texture.
- Graham cracker crumbs: I toast mine lightly for a deeper, nutty aroma and crunch. Using digestive biscuits gives a milder, buttery note, perfect for a softer crust.
Heavy cream:
- Lemon juice: Brightens the entire cheesecake with a zing that makes each bite lively and refreshing. Skip if you want a more mellow, neutral flavor, but it’s worth the squeeze.
- Whipped to soft peaks, it gives the filling an airy, velvety texture. Using half-and-half works but won’t be as fluffy or rich, so keep that in mind.
Notes for ingredient swaps
- Dairy-Free: Swap cream cheese for coconut cream or cashew cheese. Expect a slightly sweeter, more tropical flavor, with a softer set.
- Gluten-Free: Use gluten-free graham cracker crumbs or crushed digestive biscuits. The texture will be a bit more crumbly but just as tasty.
- Sweetener Alternatives: Replace sugar with honey or maple syrup. Use less, as these are sweeter; the texture might be a tad stickier.
- Lemon Juice: Use bottled lemon juice or lime juice for a similar bright, zesty flavor, especially if fresh lemons aren’t available.
- Whipping Cream: Substitute with coconut whipped cream or stabilized whipped topping. Expect a different richness and possibly less airy lift.
- Cracker Base: Try crushed chocolate cookies or digestive biscuits for a different flavor profile—richer, with hints of cocoa or buttery notes.
- Toppings: Use fruit compotes, caramel, or nut butters instead of fresh berries or jam for varied texture and flavor accents.
Equipment & Tools
- small jars with lids: individual servings and easy storage
- mixing bowl: combining ingredients
- sturdy spoon: mixing and pressing ingredients
- small saucepan: melting butter
- measuring cups and spoons: accurate ingredient portioning
Step-by-step Guide to No Bake Cheesecake Jars
- Gather your equipment: small jars or containers with lids, a mixing bowl, a sturdy spoon, and a small saucepan. Purpose: prepping tools for assembly and mixing.
- Crush the graham crackers: place about 1 cup in a zip-top bag, crush with a rolling pin until fine. Purpose: forming the base layer.
- Melt butter: 30 seconds in the microwave until just melted. Purpose: binding the crumbs together.
- Combine crumbs and butter: pour melted butter over crackers, stir until evenly coated. Purpose: creating a crunchy, flavorful crust.
- Divide the crumb mixture: spoon about 2 tablespoons into each jar, press gently to form an even base. Purpose: forming the crust layer.
- Make the filling: in the mixing bowl, beat 8 oz softened cream cheese until smooth (~1 minute). Purpose: base for the creamy layer.
- Add sugar and vanilla: mix in 1/3 cup sugar, 1 teaspoon vanilla extract; beat until fluffy (~1 minute). Purpose: sweetening and flavoring.
- In a separate bowl, whip 1 cup heavy cream to soft peaks (~2 minutes). Purpose: adding airy lightness.
- Fold whipped cream into cream cheese mixture: gently combine until smooth. Purpose: creating a light, creamy filling.
- Add lemon juice: stir in 1-2 tablespoons for brightness. Purpose: balancing richness with zing.
- Spoon the filling: distribute evenly over the crust in each jar, about 2-3 tablespoons per jar. Purpose: building layers.
- Chill the jars: cover with lids, refrigerate at least 4 hours or overnight. Purpose: setting the cheesecake.
- Finish and serve: top with fresh berries or a drizzle of jam if desired. Purpose: adding a fresh or sweet finishing touch.
- Check for doneness: the filling should be firm but slightly jiggle in the center (~4 hours). Purpose: ensuring proper setting.
- Serve chilled: enjoy directly from the fridge, with a spoon or small dessert fork. Purpose: optimal texture and flavor.
Once chilled and set, remove jars from fridge. Top with fresh berries or a drizzle of jam. Serve immediately or keep refrigerated until ready to enjoy for best texture and freshness.
How to Know It’s Done
- The filling is firm and slightly jiggles in the center.
- The crust is golden and holds together when pressed lightly.
- The aroma is sweet and vanilla-rich, with hints of toasted graham cracker.
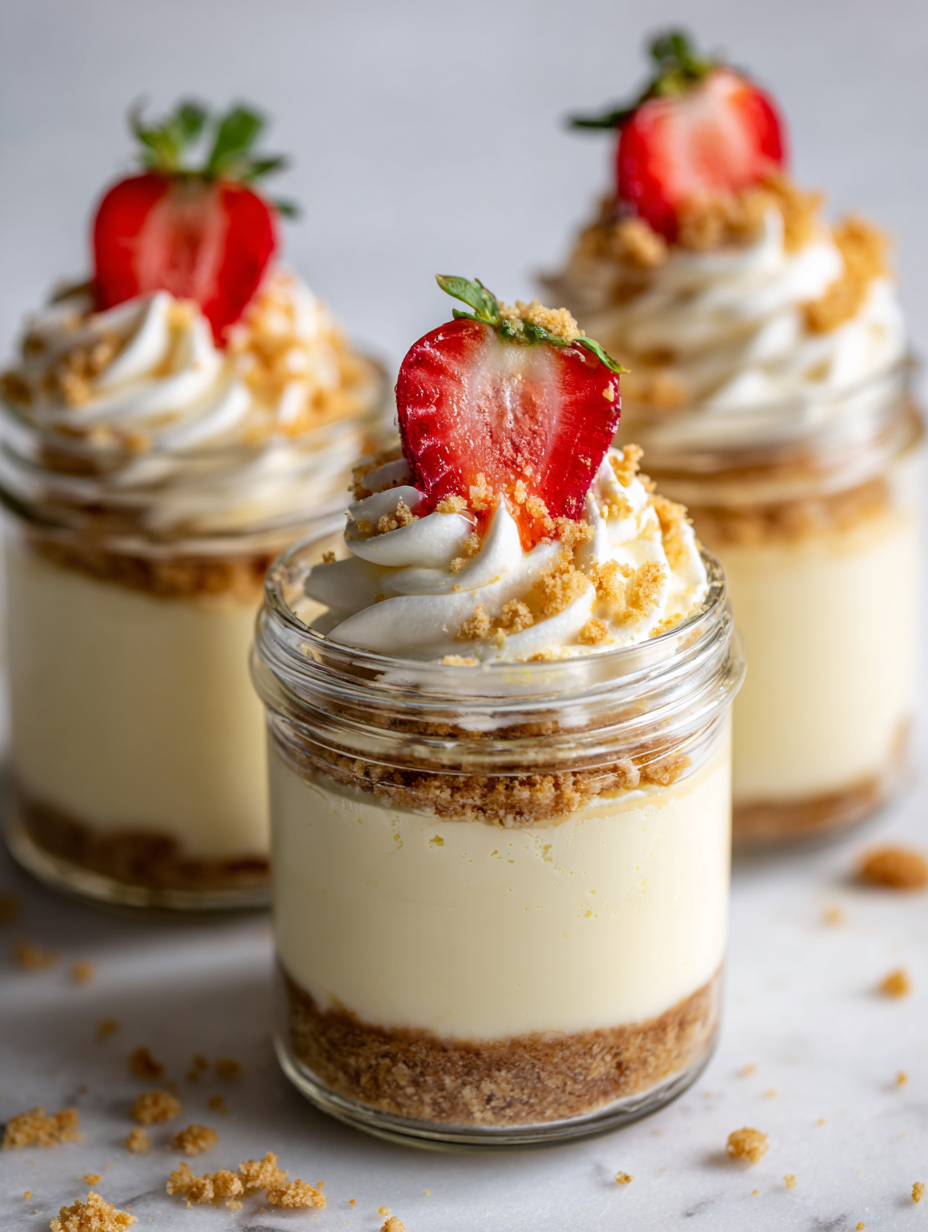
Mini No-Bake Cheesecake Jars
Ingredients
Equipment
Method
- Crush the graham crackers into fine crumbs using a sturdy spoon or a zip-top bag with a rolling pin. Toast the crumbs lightly in a small saucepan over medium heat until fragrant, about 2 minutes. This enhances their nutty flavor.
- Pour the melted butter over the toasted crumbs and stir until evenly coated. This creates a flavorful, crunchy crust base.
- Divide the crumb mixture evenly among your small jars, pressing down gently with the back of a spoon or a small glass to form a compact base layer.
- In a mixing bowl, beat the softened cream cheese with your hand mixer or whisk until smooth and creamy, about 1 minute. You want it silky and free of lumps.
- Stir in the granulated sugar and vanilla extract until well combined and fluffy, about 1 minute. The mixture should lighten slightly and smell sweet and warm.
- In a separate bowl, whip the heavy cream until soft peaks form, about 2 minutes. It should hold gentle peaks when lifted.
- Gently fold the whipped cream into the cream cheese mixture using a spatula or sturdy spoon, incorporating it carefully to keep the filling light and airy.
- Add lemon juice gradually, folding it in as you go, until the filling is bright and slightly tangy. Adjust to taste, typically 1-2 tablespoons.
- Spoon the creamy filling over the crust in each jar, filling about 2-3 tablespoons per jar, and smooth the tops with the back of a spoon.
- Cover the jars with lids and refrigerate for at least 4 hours or overnight, allowing the cheesecake to set and develop its silky texture.
- Before serving, top with fresh berries or a swirl of jam for color and extra flavor. Serve chilled and enjoy the creamy, tangy goodness.
Tips for Perfect Cheesecake Jars
- Bolded mini-head: Chill ingredients thoroughly before mixing. This keeps the filling silky and prevents curdling.
- Bolded mini-head: Use room temperature cream cheese for smooth, lump-free blending. Cold cheese resists mixing and creates lumps.
- Bolded mini-head: Gently fold whipped cream into the cream cheese mixture. Preserve airiness for a light, fluffy texture.
- Bolded mini-head: Toast graham cracker crumbs slightly for a richer flavor and crunch. Keep an eye to avoid burning.
- Bolded mini-head: Add lemon juice gradually, tasting for brightness without overwhelming the creamy balance.
- Bolded mini-head: When pressing the crust, use the bottom of a small jar or glass to get an even, compact layer.
- Bolded mini-head: Chill the assembled jars for at least 4 hours, or overnight, for optimal set and flavor melding.
Common mistakes and how to fix them
- FORGOT to chill jars? Ensure filling is cold before serving for the best texture.
- DUMPED the crust mixture unevenly? Press firmly to create a solid base.
- OVER-TORCHED the crackers? Toast lightly until fragrant, not browned.
- FAILED to measure ingredients accurately? Use a scale for precision, especially with cream cheese.
Quick Fixes & Pantry Swaps
- When the filling cracks, splash a bit of warm milk to smooth it out.
- If the crust is soggy, patch it with an extra sprinkle of crumbs and a quick press.
- Dumped extra lemon juice? Chill the mixture longer to firm it up before serving.
- Over-torched your crackers? Shield them with a paper towel and lower the heat next time.
- If the jars shimmer with condensation, wipe and let sit at room temperature before serving.
Prep, store, and reheat tips
- Prepare the crust and filling mixture a day ahead for extra flavor development. Keep refrigerated overnight for best taste and texture.
- Assemble the jars with crust and filling up to 24 hours in advance. Cover tightly and store in the fridge to prevent absorption of other fridge odors.
- Cheesecake jars are best enjoyed within 3 days. The creamy texture may start to soften after that, but they remain safe to eat.
- Refrigerate the jars until ready to serve. To reheat slightly, place in a warm water bath for a few seconds—just enough to take the chill off, not melt.
Top questions about no bake cheesecakes
1. Can I use light cream cheese?
Yes, using full-fat cream cheese gives the best creamy texture and flavor. Light or reduced-fat options can make the filling less rich.
2. Can I substitute the cracker crust?
Absolutely, you can swap graham crackers for digestive biscuits or Oreo crumbs for a different vibe. Expect slight changes in flavor and crunch.
3. How far in advance can I make these?
Yes, you can make these jars a day ahead. Keep them covered in the fridge for up to 2-3 days for best texture and flavor.
4. My cheesecake is soft or runny, what do I do?
If the filling is too runny, ensure it’s chilled long enough—at least 4 hours or overnight. If it’s cracked, a quick re-chill helps firm it up.
5. Can I add toppings?
Yes, you can add fruit toppings, chocolate shavings, or caramel drizzle. Just keep the toppings simple and fresh to avoid sogginess.
6. Can I omit the lemon juice?
If you don’t have lemon juice, a splash of lime juice or a bit of lemon zest can brighten the flavor just as well.
7. What’s the best way to mix the filling?
Use a handheld mixer or a sturdy whisk for the cream cheese and whipped cream. This prevents lumps and ensures a smooth, airy filling.
8. Why is my filling lumpy?
Ensure the cream cheese is softened and at room temperature before mixing. Cold cheese resists blending and causes lumps.
9. Can I make this dairy-free?
Yes, you can swap heavy cream for coconut cream or almond milk whipped with stabilizer. Expect a slightly different texture and flavor.
10. My jars are sweaty, what do I do?
When the jars shimmer with condensation, wipe them gently and allow them to come to room temperature before serving to prevent sogginess.
These jars are a tiny rebellion against the usual fuss of dessert. They remind me that simple ingredients, combined thoughtfully, can create something unexpectedly satisfying. Whenever I make them, I feel a little proud of turning everyday pantry staples into a moment of indulgence.
And honestly, there’s something about eating a personal-sized cheesecake that makes the moment feel a bit more special. No matter the occasion, these jars add a touch of homemade comfort that’s quick, honest, and just a little bit charming.

Hello, I’m Oliver James, the person behind Melting Into Flavors. Cooking is my greatest passion, and it’s been the driving force in my life for as long as I can remember.
It’s not just about food for me; it’s about creating experiences, connecting with others, and sharing the love I have for what’s on the plate. Through this blog and my café, I’m able to share my journey with all of you and hopefully inspire some of your own culinary adventures along the way.


