This no-bake Oreo cheesecake is my go-to when I need a quick fix of childhood comfort. The smell of crushed cookies and cream cheese makes the kitchen feel warm and familiar, even on hectic days. It’s like a little hug in dessert form, simple enough to whip up without turning on the oven, but still rich and satisfying.
I love how this recipe transforms those familiar, crunchy Oreos into a silky, creamy filling that feels fancy but is honestly so easy. It’s perfect for last-minute gatherings or when I just want something sweet without the fuss of baking. Plus, the no-bake aspect means I get to skip the heat and keep my kitchen cool, which is a bonus during the warmer months.
This recipe is inspired by the idea of turning a classic childhood treat into an elegant, no-bake dessert that’s surprisingly sophisticated and easy to whip up in moments of nostalgia or last-minute cravings.
Nostalgia Meets No-Bake Magic
- Biting into this cheesecake takes me straight back to childhood Sunday afternoons, the crunch of Oreos mixing with creamy sweetness.
- I love how effortlessly this dessert comes together — no oven, no fuss, just pure, indulgent comfort in every bite.
- Sharing this with friends always sparks memories and laughter, especially when they realize how simple yet decadent it is.
- There’s a quiet pride in turning store-bought cookies into something that feels special and homemade, even if it’s just a quick fix.
- This recipe’s been my secret weapon for last-minute dinners — everyone’s surprised how professional it looks and tastes.
Nostalgia Meets No-Bake Magic
- This recipe came about during a chaotic weekend when I needed something sweet, fast, and foolproof. I was craving that nostalgic Oreo crunch but wanted it to feel a bit more indulgent, without the fuss of baking. The idea of combining crunchy cookies with creamy cheese was an obvious fix, but I wanted to keep it simple and approachable for anyone. It’s become my go-to for last-minute gatherings or whenever I need a little comfort in dessert form.
- One lazy afternoon, I realized I had a stash of Oreos and a block of cream cheese lurking in the fridge. Instead of my usual fussier cheesecake, I threw everything together in a moment of craving—no oven, no waiting. The first bite was unexpectedly silky, with that perfect Oreo crunch on top. That’s when I knew I’d stumbled on something special, a dessert that’s easy, satisfying, and a little bit nostalgic.
- heading: ‘Nostalgia Meets No-Bake Magic’
Historical Tidbits of the No-Bake Oreo Cheesecake
- This recipe’s roots trace back to a 1960s American snack craze, where Oreos first burst onto the scene as a versatile cookie.
- The idea of no-bake desserts gained popularity in the 1970s when busy households sought quick, satisfying treats without oven time.
- Oreo cheesecake itself became a hit in the early 2000s, combining nostalgia with modern convenience, but this specific no-bake twist is a recent adaptation.
Key Ingredients Breakdown
- Oreo cookies: I love crushing these until they’re fine but still have some texture; you can pulse a bit longer if you prefer a smoother base. Their rich, chocolatey scent is unmistakable and adds depth to the crust.
- Cream cheese: I opt for full-fat, softened cream cheese for that silky, melt-in-your-mouth texture. If it feels a bit stiff, a quick zap in the microwave makes mixing easier, giving a smooth, velvety bite.
- Heavy cream: Whipping it until soft peaks is key; it turns airy and light, contrasting the dense cookies. If it’s not whipping up well, check your cream’s chill factor or add a touch of vanilla for flavor.
- Sugar: Just a touch to enhance sweetness without overpowering. I prefer superfine sugar for quick dissolving — if it’s grainy, just give it a few extra seconds in the mixer.
- Lemon juice (optional): A splash brightens the richness and cuts through the sweetness. Use fresh lemon for that zesty aroma, or skip if you want a more traditional flavor.
- Butter: Melted butter binds the crust, giving it a crumbly yet firm texture. If you find it too greasy, add a little more crushed Oreos to balance out the moisture.
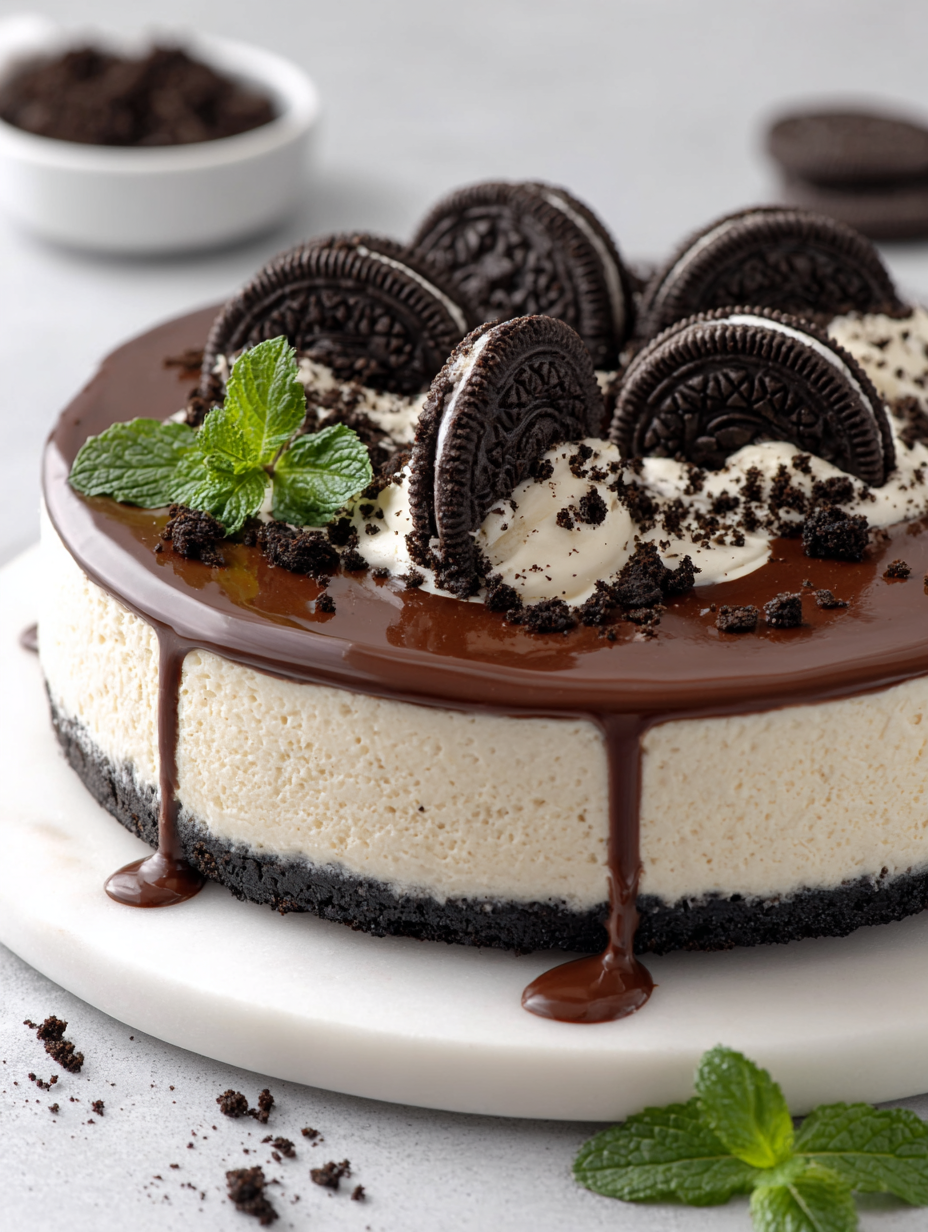
- Optional toppings: I like a drizzle of chocolate or a handful of crushed Oreos on top. It adds a crunchy, sweet, and slightly smoky finish that makes the whole dessert feel more decadent.
Spotlight on key ingredients
Oreo cookies:
- I love crushing these until they’re fine but still have some texture; you can pulse a bit longer if you prefer a smoother base. Their rich, chocolatey scent is unmistakable and adds depth to the crust.
- Cream cheese: I opt for full-fat, softened cream cheese for that silky, melt-in-your-mouth texture. If it feels a bit stiff, a quick zap in the microwave makes mixing easier, giving a smooth, velvety bite.
Heavy cream:
- Whipping it until soft peaks is key; it turns airy and light, contrasting the dense cookies. If it’s not whipping up well, check your cream’s chill factor or add a touch of vanilla for flavor.
- Sugar: Just a touch to enhance sweetness without overpowering. I prefer superfine sugar for quick dissolving — if it’s grainy, just give it a few extra seconds in the mixer.
Notes for ingredient swaps
- Dairy-Free: Coconut cream can replace heavy cream for a rich, tropical flavor, but it may be slightly less fluffy.
- Gluten-Free: Use gluten-free chocolate cookies instead of Oreos for a dessert that everyone can enjoy without wheat.
- Sweetener Swap: Maple syrup or honey can substitute sugar, adding a different sweetness and slight aroma—adjust quantity for taste.
- Vegan Version: Vegan cream cheese and plant-based whipped cream make this dessert friendly for vegans, with a slightly different tang and texture.
- Crust Alternative: Graham cracker crumbs or digestive biscuits can replace Oreos, giving a different flavor profile but still crunchy and satisfying.
- Add a Zest: Lemon or orange zest in the filling brightens flavors and adds a fresh, citrusy aroma—skip if you prefer a classic taste.
- Cookie Variations: Swap Oreos for double-stuffed or flavored cookies like peanut butter or mint for a fun twist on the classic.
Equipment & Tools
- Springform pan: To hold the crust and filling, easy to remove for clean slices.
- Food processor or zip-top bag + rolling pin: To crush Oreos evenly and efficiently.
- Spatula: To smooth the filling and spread crumbs.
- Mixing bowls: To beat and fold ingredients separately.
- Electric mixer (optional): To whip cream quickly and efficiently.
Step-by-step Guide to No Bake Oreo Cheesecake
- Gather your equipment: a 23cm (9-inch) springform pan, a mixing bowl, a spatula, and a food processor or zip-top bag and rolling pin for crushing cookies.
- Crush the Oreos: place about 20-25 cookies in your food processor or bag, then pulse or bash until fine crumbs form. Reserve a handful for topping.
- Make the crust: melt 4 tbsp (60g) butter in the microwave or on the stove. Mix the cookie crumbs with melted butter until evenly coated. Press the mixture into the bottom of your springform pan, using the back of a spoon or your fingers to create an even, firm base. Chill in the fridge for 15 minutes to set.
- Prepare the filling: in a large bowl, beat 400g (14 oz) softened cream cheese until smooth and creamy, about 2 minutes. Add 1/2 cup (60g) powdered sugar and mix until combined. Mix in 1 tsp vanilla extract if using.
- In a separate bowl, whip 1 cup (240ml) heavy cream until soft peaks form, about 3-4 minutes. Gently fold the whipped cream into the cream cheese mixture in stages, maintaining as much air as possible for fluffiness.
- Add crushed Oreos: fold in the remaining cookies gently, so the filling keeps its airy texture. Pour the filling over the chilled crust, smoothing the top with a spatula.
- Chill the cheesecake: cover loosely with plastic wrap and refrigerate for at least 4 hours, preferably overnight, to fully set and develop flavor.
- Finish and serve: before serving, sprinkle the reserved cookie crumbs and optional toppings like chocolate shavings or extra Oreos on top. Carefully remove the sides of the springform pan, then slice and enjoy.
Once chilled, carefully remove the sides of the springform pan. Slice with a warm knife for clean edges. Serve directly or with extra toppings for presentation.
How to Know It’s Done
- Crust is firm and holds shape when pressed.
- Filling is smooth, fluffy, and slightly jiggles without being runny.
- Edges are set and no liquid pools on top after chilling.
No-Bake Oreo Cheesecake
Ingredients
Equipment
Method
- Place about 20-25 Oreos in your food processor or in a zip-top bag and bash with a rolling pin until fine crumbs form, leaving some small pieces for texture. Transfer crumbs to a bowl and melt the butter. Mix the cookie crumbs with the melted butter until evenly coated.
- Press the cookie mixture firmly into the bottom of a springform pan, spreading it evenly with the back of a spoon or your fingers. Chill in the refrigerator for 15 minutes to set the crust.
- While the crust chills, beat the softened cream cheese in a large bowl until smooth and creamy, about 2 minutes. Add the powdered sugar and vanilla extract, then mix until fully combined and silky.
- In a separate bowl, whip the chilled heavy cream with an electric mixer until soft peaks form, about 3-4 minutes. Gently fold the whipped cream into the cream cheese mixture in stages, maintaining its airy texture.
- Gently fold in about half of the crushed Oreos to the filling for added texture. Pour the filling over the chilled crust, smoothing the top with a spatula. Sprinkle some reserved cookie crumbs on top for decoration.
- Cover the cheesecake loosely with plastic wrap and refrigerate for at least 4 hours, preferably overnight, until fully set and firm.
- Once chilled, carefully remove the sides of the springform pan. Slice the cheesecake with a warm knife for clean edges. Garnish with extra cookie crumbs or toppings if desired, then serve and enjoy!
Notes
Tips & Tricks for Perfect Results
- Bolded mini-head: Use room temperature ingredients for smoother mixing and fluffier filling.
- Bolded mini-head: Chill the heavy cream thoroughly before whipping to achieve soft peaks faster.
- Bolded mini-head: Crush Oreos until fine but retain some texture for a more dynamic crust.
- Bolded mini-head: Press the crust firmly into the pan with the back of a spoon for even base stability.
- Bolded mini-head: Fold whipped cream gently into the cream cheese mixture to keep it airy and light.
- Bolded mini-head: Chill the assembled cheesecake at least 4 hours, or overnight, for best set and flavor.
- Bolded mini-head: For cleaner slices, warm your knife in hot water and wipe between cuts.
Common mistakes and how to fix them
- FORGOT to chill the crust? Repress it firmly and chill longer for better stability.
- DUMPED too much butter? Add more cookie crumbs to balance moisture and prevent sogginess.
- OVER-TORCHED the crust? Lower oven temperature or reduce baking time, then watch for golden edges.
- FAILED to fully set? Extend chilling time or check filling consistency—should be firm but slightly wobbly.
Quick fixes and pantry swaps
- If the crust is too soft, splash with a little extra crushed Oreos and press again.
- When filling is runny, dump in more whipped cream and fold gently for fluffiness.
- Over-torched crust? Patch with a sprinkle of crushed cookies and reduce oven time next go.
- Forgot to chill? Shield with plastic wrap and refrigerate for at least 30 minutes before serving.
- When the topping shimmers and crackles, it’s ready—rescue with a quick sprinkle of crushed Oreos.
Prep, store, and reheat tips
- Prepare the crust and press into the pan a day ahead; keep refrigerated for a firm base.
- Assemble the filling and store in an airtight container; it can be made up to 24 hours in advance, maintaining freshness and creaminess.
- The cheesecake can be kept covered in the fridge for up to 2 days; the texture remains best if consumed within this window.
- Refrigerate the cheesecake until ready to serve; if slightly softens, give it a few minutes to firm up before slicing, ensuring clean cuts.
- To reheat slices, warm briefly in the microwave (10-15 seconds) until just softening, and enjoy the creamy texture with minimal melting.
Top Questions About No Bake Oreo Cheesecake
1. Can I make this gluten-free?
Yes, you can use gluten-free Oreos or similar cookies, but the texture might change slightly.
2. Is this vegan-friendly?
Absolutely, substitute full-fat cream cheese with a vegan alternative like cashew-based cheese, though the flavor will vary.
3. How do I get clean slices?
Using a warm knife helps slices come out clean. Run it under hot water and wipe before each cut.
4. How long should I chill it?
Chill the cheesecake at least 4 hours, but overnight is best. It firms up and improves flavor.
5. My cheesecake is too soft, what now?
If the filling is too soft, fold in more whipped cream or refrigerate longer until it firms up.
6. Can I customize toppings?
Yes, you can add extra toppings like chocolate ganache, fresh berries, or caramel for extra flavor.
7. How do I prevent the filling from becoming dense?
Overmixing can make the filling dense; fold ingredients gently to keep it airy and light.
8. Should ingredients be cold or room temperature?
Use room temperature ingredients for smoother mixing and fluffier texture in the filling.
9. My crust is crumbly, what do I do?
If your crust crumbles, press it more firmly and chill longer before adding filling.
10. How should I store leftovers?
Store leftovers covered in the fridge for up to 2 days. For best texture, serve within that window.
This no-bake Oreo cheesecake is a reminder that some of the best desserts are the simplest—rich, creamy, and packed with nostalgic crunch. It’s perfect for when time is tight but you still want to serve something that feels indulgent and thoughtful.
In a world of complex desserts, sometimes a straightforward, honest treat like this is just what you need—no oven, no fuss, just pure comfort in every bite. It’s a little project that always turns into a sweet moment to savor.

Hello, I’m Oliver James, the person behind Melting Into Flavors. Cooking is my greatest passion, and it’s been the driving force in my life for as long as I can remember.
It’s not just about food for me; it’s about creating experiences, connecting with others, and sharing the love I have for what’s on the plate. Through this blog and my café, I’m able to share my journey with all of you and hopefully inspire some of your own culinary adventures along the way.


