This no bake peanut butter cheesecake is a lifeline when the heat is relentless and the oven feels like a sauna. It’s about reclaiming the joy of a rich, creamy dessert without turning on the stove, perfect for those sweltering days or when your kitchen’s already bursting at the seams. Honestly, it’s shockingly simple, but the flavor punch is real—you get that sweet, salty peanut hit with every bite.
What I love most is how fast this comes together. No fuss, no fussing with crusts that crack or cheesecakes that crackle in the oven. It’s just a handful of ingredients, a bit of patience in the fridge, and a dessert that feels indulgent without the guilt. It’s a reminder that sometimes, the best things in life are the easiest, especially when they taste this good.
This recipe is about reclaiming the simple joy of a rich, creamy dessert without firing up the oven, perfect for hot days or when the kitchen’s already crowded. It’s about the honest pleasure of a no-fuss treat that tastes like it took hours but only needs a few minutes of your time. Plus, it’s a reminder that sometimes, the best desserts are the easiest.
The hidden joy of no-bake desserts
- This recipe feels like a secret handshake—simple, unexpected, and always a hit with friends.
- There’s a nostalgic rush when I see that creamy peanut butter swirl, reminding me of childhood snacks.
- I love the relief of no oven, especially during those scorching summer days when the kitchen is a no-go zone.
- Nothing beats the pride of pulling together something so rich and satisfying with just a handful of ingredients.
- Sometimes, I crave the pure comfort of this cheesecake after a hectic day—it’s my little reward.
The story behind this recipe
- This recipe came about during a lazy summer weekend when I was craving something sweet but didn’t want to turn on the oven or fuss with complicated steps. It’s a bit of an accident—one of those moments where I tossed together ingredients I had on hand, expecting a quick snack, but ended up with a dessert that’s become a staple. The beauty is in its simplicity, but the flavor? Pure peanut butter richness, balanced by a tangy hint of cream cheese.
- I remember the first time I served it at a small gathering. No one could believe it was no-bake, and everyone kept asking for the recipe. It’s become my go-to for last-minute dinners, potlucks, or whenever I crave a creamy, indulgent treat without the fuss. It’s funny how the simplest ideas often turn out to be the most memorable—this one’s a keeper.
- heading: ‘The spark that started it all’
Historical Tidbits of No-Bake Cheesecake
- This recipe’s roots trace back to resourceful home cooks who wanted a rich dessert without oven time, especially in warm climates.
- Peanut butter cheesecakes gained popularity in the 1970s with the rise of convenience foods and no-bake recipes.
- The combination of creamy cheese and peanut butter reflects a trend of blending classic flavors into quick, fuss-free desserts.
Key ingredients and tips
- Cream cheese: I prefer it softened well to avoid lumps—makes for a smoother, richer texture. You can try mascarpone for a milder, silkier finish.
- Peanut butter: I use chunky for texture, but creamy works just as well—just make sure it’s good quality, or it’ll dull the flavor’s vibrancy.
- Graham cracker crust: I crush my crackers finely so the base is firm and even—skip if you want a gluten-free option, but expect a slightly crumbly crust.
- Sweetener: I usually keep it simple with a bit of honey or maple syrup for depth, but powdered sugar works just as well if you want a sweeter note.
- Heavy cream: I whip it until soft peaks for that airy lift, but you can fold in Greek yogurt for a tangy twist and a lighter feel.
- Lemon juice: I add just a splash for brightness, giving the cheesecake a fresh zing—omit if you prefer a richer, denser flavor.
- Optional toppings: I love crunchy peanut pieces or a drizzle of chocolate—think about what texture or flavor you crave to customize.
Spotlight on key ingredients
Cream Cheese:
- Peanut Butter: I prefer chunky for that unexpected crunch, but creamy works just as well—just make sure it’s good quality, or it’ll dull the flavor’s vibrancy.
- I like it softened well to avoid lumps—makes for a smoother, richer texture. You can try mascarpone for a milder, silkier finish.
Graham Crackers:
- I crush my crackers finely so the base is firm and even—skip if you want a gluten-free option, but expect a slightly crumbly crust.
- Sweetener: I usually keep it simple with a bit of honey or maple syrup for depth, but powdered sugar works just as well if you want a sweeter note.
Notes for ingredient swaps
- Dairy-Free: Swap cream cheese for coconut cream or a dairy-free cream cheese alternative—expect a slightly lighter, less tangy texture.
- Peanut Butter: Use almond or cashew butter for a different nutty flavor; chunky adds texture, creamy keeps it smooth.
- Crust Base: Replace graham crackers with digestive biscuits or gluten-free cookies—note the flavor and texture will shift slightly.
- Sweetener: Substitute honey or maple syrup for sugar; this adds a richer, more complex sweetness, especially if you love a hint of caramel.
- Heavy Cream: Use whipped coconut cream or Greek yogurt for a lighter or tangier finish—adjust sweetness accordingly.
- Lemon Juice: Omit or replace with lime juice for a different citrus brightness—expect a slightly different zing.
- Toppings: Consider chopped roasted peanuts, chopped chocolate, or fruit compote—feel free to experiment with textures and flavors.
Equipment & Tools
- Springform pan: To assemble and easily remove the cheesecake
- Mixing bowl: To blend the filling ingredients
- Spatula: To smooth and spread the filling
- Food processor or zip-top bag and rolling pin: To crush the graham crackers into fine crumbs
Step-by-step guide to no bake cheesecake
- Gather your equipment: a 20cm (8-inch) springform pan, a mixing bowl, a spatula, and a food processor or zip-top bag and rolling pin for crust. Line the pan with parchment if you like for easy removal.
- Start with the crust: crush 200g (7 oz) of graham crackers finely—use a food processor or zip-top bag and rolling pin. Mix with 50g (1/4 cup) melted butter and a pinch of salt until crumbly. Press evenly into the bottom of the pan. Chill in the fridge for 10 minutes while you prepare the filling.
- Make the filling: in a mixing bowl, beat 300g (10 oz) softened cream cheese until smooth, about 2 minutes. Add 150g (1/2 cup) peanut butter and mix until well combined. Fold in 200ml (¾ cup) heavy cream, whipped to soft peaks, gently but thoroughly. Add 1-2 tbsp lemon juice to brighten. Mix until creamy and uniform.
- Pour the filling over the chilled crust: use a spatula to spread evenly. Tap the pan lightly on the counter to settle the filling and release any air bubbles.
- Smooth the top: ensure an even surface. Cover loosely with plastic wrap or foil. Refrigerate for at least 4 hours, preferably overnight, to set properly.
- Check for doneness: the edges should be firm and slightly crackled, the center should jiggle just a little when gently shaken, and it should smell rich and peanutty. The surface should be matte, not shiny or wet.
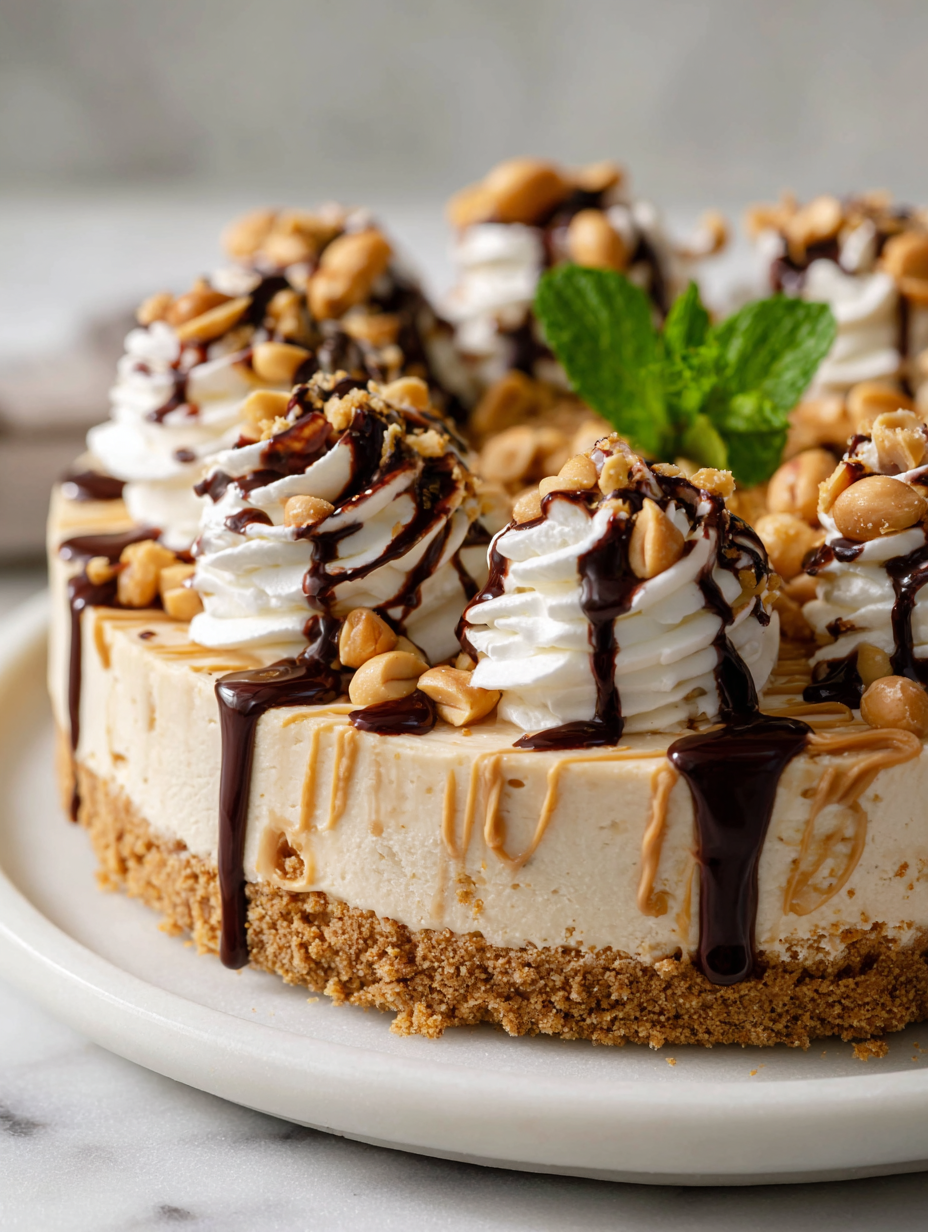
- Finish and serve: carefully remove the sides of the springform pan. Slice with a hot, damp knife for clean edges. Top with chopped peanuts, drizzle of chocolate, or extra dollop of whipped cream if desired.
Refrigerate the cheesecake for at least 4 hours or overnight. Serve chilled, sliced cleanly with a hot knife. Garnish with toppings if desired, then enjoy the creamy, peanutty goodness.
How to Know It’s Done
- Edges are firm and set, not wobbly or liquid.
- The surface is matte and crackled, indicating proper setting.
- A gentle shake shows a slight jiggle in the center, not a liquid core.
No-Bake Peanut Butter Cheesecake
Ingredients
Equipment
Method
- Place the graham crackers in a food processor or inside a zip-top bag and crush them finely with a rolling pin until you have uniform crumbs.
- Combine the crushed graham crackers with melted butter and a pinch of salt, mixing until the crumbs are evenly coated and hold together when pressed.
- Press the crumb mixture firmly into the bottom of a springform pan, smoothing it out with the back of a spatula or your fingers for an even crust. Chill in the fridge for 10 minutes to set.
- In a mixing bowl, beat the softened cream cheese until smooth, about 2 minutes, until no lumps remain and the mixture is creamy.
- Add the peanut butter to the cream cheese and mix until fully incorporated, creating a rich, peanutty base.
- In a separate bowl, whip the heavy cream until soft peaks form, then gently fold it into the peanut cream cheese mixture, keeping it light and airy.
- Add a splash of lemon juice to brighten the flavor and mix gently to combine evenly.
- Pour the creamy filling over the chilled crust, spreading it out smoothly with a spatula and tapping the pan lightly on the counter to remove air bubbles.
- Cover the pan loosely with plastic wrap or foil and refrigerate for at least 4 hours, preferably overnight, until set and firm.
- Once set, remove the cheesecake from the fridge, carefully release the sides of the springform pan, and transfer to a serving plate.
- Top with chopped peanuts, a drizzle of chocolate, or any toppings of your choice for extra texture and flavor.
- Slice with a hot, damp knife for clean cuts, then serve chilled and enjoy this rich, creamy peanut butter treat!
Top tips for perfect cheesecake
- Bolded tip: Chill the crust thoroughly—this prevents cracking when you pour in the filling.
- Bolded tip: Gently fold whipped cream into the filling—this keeps it light and airy, avoiding deflation.
- Bolded tip: Use a hot, damp knife to slice—this ensures clean cuts without crushing the cheesecake.
- Bolded tip: Press the crust evenly—use the bottom of a glass to achieve a compact, uniform base.
- Bolded tip: Add lemon juice last—this brightens the flavor without making the filling too runny.
- Bolded tip: Refrigerate overnight—this allows flavors to meld and the texture to set perfectly.
- Bolded tip: Use quality peanut butter—better flavor and texture, which makes all the difference in taste.
Common mistakes and how to fix them
- FORGOT to chill crust longer? Chill for at least 10 minutes to prevent cracking.
- DUMPED the whipped cream too early? Fold in gently just before pouring to keep it airy.
- OVER-TORCHED the crust? Bake at 175°C (350°F) for 8-10 minutes, then cool completely.
- MISSED the setting time? Refrigerate at least 4 hours, or overnight for best texture.
Quick fixes and pantry swaps
- When the cheesecake cracks, splash a little warm water over the cracks to blend them seamlessly.
- If the filling is too runny, whip in a bit more cream cheese and chill for 30 minutes.
- Dumped the crust before it set? Patch with extra crumbs pressed firmly and refrigerate again.
- Over-softened cream cheese? Use a chilled bowl and beat longer to regain firmness.
- When the dessert smells too peanutty or off, shield with whipped cream or fruit toppings for a fresher taste.
Prep, store, and reheat tips
- You can prepare the crust and press it into the pan a day in advance. Keep it covered in the fridge for a fresh, crisp base.
- The cheesecake filling can be made a day ahead; store it tightly covered in the fridge to prevent it from absorbing other odors. It stays fresh for up to 24 hours, with flavors mellowing slightly overnight.
- For best texture, let the cheesecake come to room temperature for 10-15 minutes before serving. The creamy filling softens and becomes more luscious at warmer temps.
- Refrigerate leftovers covered tightly for up to 3 days. The texture stays good, but the flavor might mellow slightly—top with fresh toppings just before serving to refresh the look.
Top questions about peanut butter cheesecake
1. Can I use natural peanut butter?
Yes, using natural peanut butter might make the filling slightly softer, but it still works fine. Just ensure it’s stirred well before mixing.
2. Can I substitute cream cheese?
Absolutely. You can swap cream cheese with mascarpone for a silkier texture or Greek yogurt for tanginess, but expect some change in richness.
3. How long to chill the crust?
The crust should be chilled at least 10 minutes before pouring the filling. If it’s not firm enough, the cheesecake might crack or slide.
4. What if it doesn’t set?
If your cheesecake isn’t setting properly after 4 hours, give it more time—preferably overnight. The texture improves and firms up with longer chilling.
5. Can I freeze leftovers?
You can freeze the cheesecake for up to 2 months. Wrap it tightly and thaw in the fridge before serving, but note it may be a little softer.
6. Should I add lemon juice?
Adding a splash of lemon juice brightens the flavor and helps the filling set better. Omit if you prefer a richer, denser taste.
7. Can I make it dairy-free?
Yes, you can omit the heavy cream and fold in whipped coconut cream or Greek yogurt for a lighter, tangy flavor.
8. Chunky or creamy peanut butter?
Using chunky peanut butter adds texture and crunch, while creamy makes it smoother. Choose based on your texture preference.
9. How do I get clean slices?
Make sure to use a hot, damp knife when slicing. This prevents the cheesecake from tearing and gives you clean slices.
10. What if the filling is too soft?
When the filling is too runny, fold in a bit more softened cream cheese and chill for 30 minutes to thicken.
This cheesecake isn’t just a dessert; it’s a reminder that simplicity often carries the most comfort. The peanut butter richness paired with that faint tang of cream cheese makes each bite feel like a small, indulgent secret.
Whenever I make this, I’m struck by how a handful of ingredients can come together so effortlessly into something that feels special. It’s quick, honest, and just the right thing for those moments when dessert needs to be both easy and satisfying.

Hello, I’m Oliver James, the person behind Melting Into Flavors. Cooking is my greatest passion, and it’s been the driving force in my life for as long as I can remember.
It’s not just about food for me; it’s about creating experiences, connecting with others, and sharing the love I have for what’s on the plate. Through this blog and my café, I’m able to share my journey with all of you and hopefully inspire some of your own culinary adventures along the way.


